|
|

Rank: Advanced Member
Groups: Member
Joined: 12/8/2005
Posts: 708
Location: Germany
|
This was the hardest custom I ever did.Or better say scratch build because almost everything you see is done by hand and there were only a very few parts I could take from other models. After two months of hard work it´s almost done now.The only thing that is still missing is the decals which should arrive within the next 10-14 days. I´ll post more pics and a complete making of as soon as I get the decals and the model will be completed.  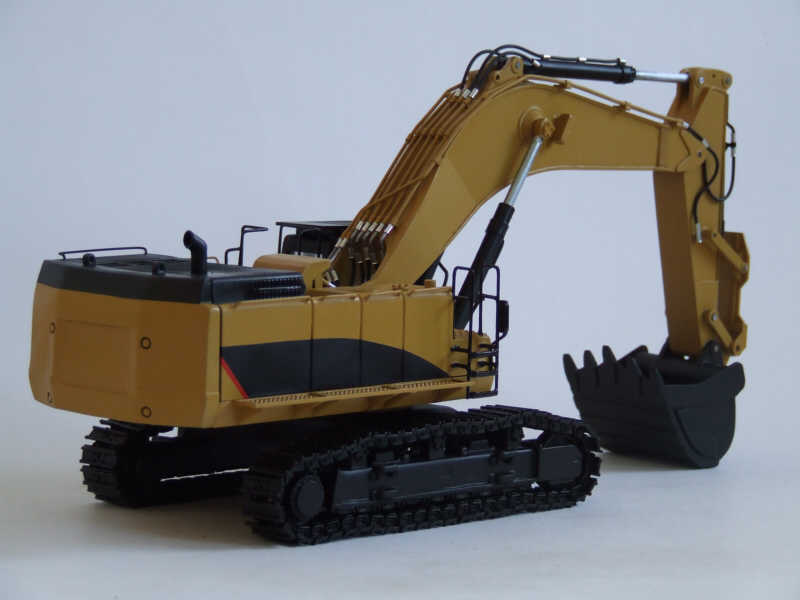 So please stay patient.There´s tons of photos to come when it will be finally finished.It´s got some nice features and lots of nice details.I promise. Jan edit: replaced the poor photo by a better one
|
|

Rank: Advanced Member
Groups: Member
Joined: 9/16/2007
Posts: 2,707
Location: Staten Island, New York
|
AWESOME job!! cant wait for the decals to be done.
-Vinny http://www.heavytruckphotos.com/
|
|

Rank: Advanced Member
Groups: Member
Joined: 4/17/2009
Posts: 159
|
Wow Jan! Look superb. Great work with this one. Will look incredible with decals. For personal collection or sale? 
|
|

Rank: Advanced Member
Groups: Member
Joined: 4/15/2007
Posts: 543
Location: Arizona
|
Very impressive!! Hope you can post pics of this machine next to a 365 or 375 for size comparison.I really like the ram protection guard,Great going. 
|
|

Rank: Advanced Member
Groups: Member
Joined: 1/22/2008
Posts: 2,027
Location: Maryland
|
Awesome job! I have been told it is very hard to convert any existing diecast into a 385. Yours turned out great.
Mark
Mark L.
It's what you learn after you know it all that counts
|
|

Rank: Advanced Member
Groups: Member
Joined: 7/25/2006
Posts: 1,100
Location: New Mexico
|
That looks awesome , Its defintly the best looking 385 I have seen!! I cant wait to see it all finished up
"DO IT IN THE DIRT"
|
|

Rank: Advanced Member
Groups: Member
Joined: 6/30/2003
Posts: 4,920
Location: Melbourne, Australia
|
Wow, absolutely outstanding Janh! there have been a couple of decent 385's in the recent past (the one from the french forum and Greg's one) but I must say, this one is outstanding! The ME configuration with the rock guard really add to the machines overall appearance. If by any chance you have pictures of the build process (like you had with your 345) I'd sure love to see them! I can't wait to see more pics with it fully decalled! I would pay big bucks for one of these! Here's hoping that CAT and Norscot (or anyone else for that matter) come to their senses and build one in 1:50th. Well done! Rowan.
1:25th scale CAT 375L excavator
|
|

Rank: Advanced Member
Groups: Member
Joined: 9/8/2008
Posts: 1,857
Location: Wheeling, WV
|
WOW! That awsome!! You do amazing work!!
Real men drive diesels!
|
|
Rank: Advanced Member
Groups: Member
Joined: 12/8/2005
Posts: 708
Location: Germany
|
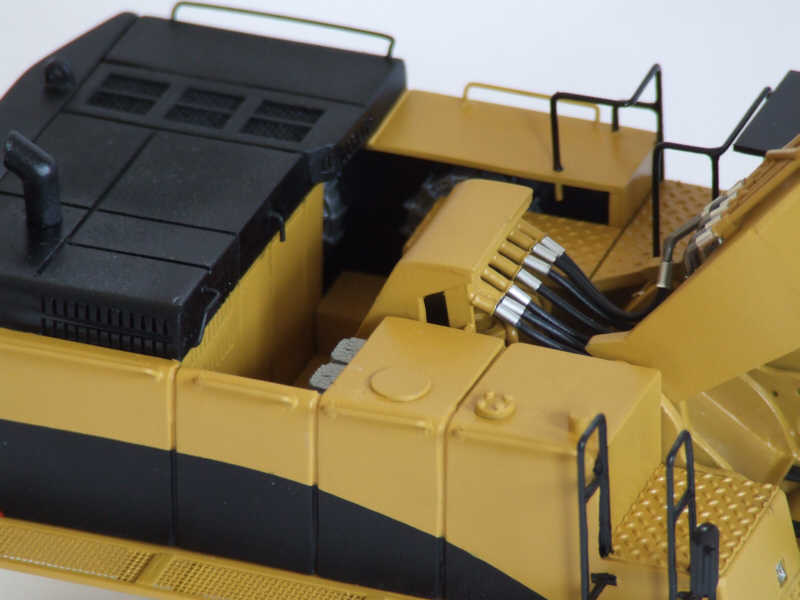 Can you see the airfans hiding in there? About 3 hours of work for each of them. The ladder down in the right corner is made from brass and styrene.It took a whole afternoon just to make the handrails and this ladder. The walkways on the side are made from brass,steel mash and styrene stripes: Another full afternoon of work. Somewhen I just stopped counting the hours....... 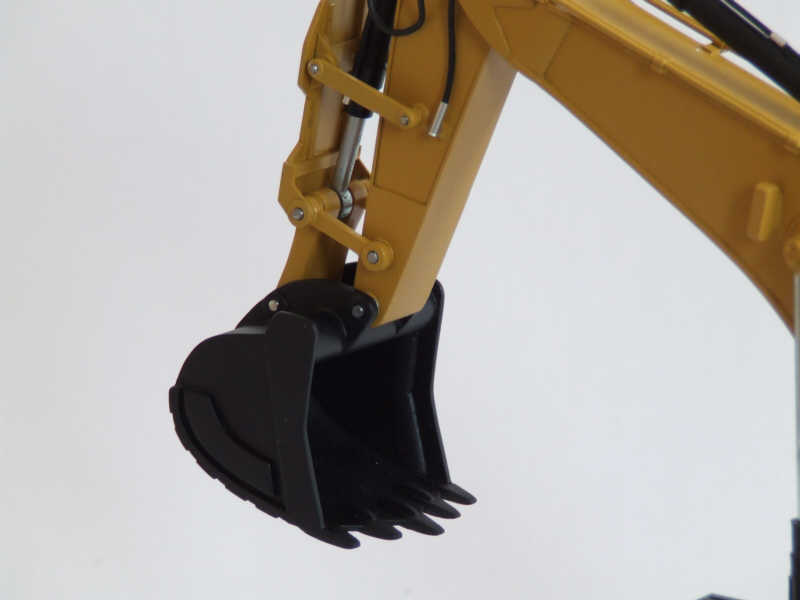 The bucket is made from styrene.I´m really,really happy with this one.It turned out exactly how I wanted it to be. The bucket: One full day of work The protection shield in front of the bucket cylinder: Another full day However this is a nice feature that was not on my list when I started building the model. Jan
|
|

Rank: Advanced Member
Groups: Member
Joined: 12/30/2008
Posts: 3,439
Location: Good ol' Indiana
|
Wow you have done some fabulous work!
-Ethan Collection 8/2/2016For more of the Diorama and my collection: On Facebook or On YouTube
|
|
Rank: Advanced Member
Groups: Member
Joined: 12/8/2005
Posts: 708
Location: Germany
|
 Here we have a comparison shot with what rested from the 365 and the same part from the 385. You can see that there are huge differences in the shape between the two parts.And also the 385 is 12mm longer than the 365.The part on my model is completely scratch build from styrene and resine. Today in the evening I will start sorting my photos and post the first pics from the very beginning of this project. Jan
|
|

Rank: Advanced Member
Groups: Member
Joined: 11/26/2008
Posts: 2,559
Location: Edmonton, AB
|
This is an outstanding work Jan, thanks a lot for sharing it with us. I love the way you did it!
|
|

Rank: Advanced Member
Groups: Member
Joined: 10/29/2006
Posts: 458
Location: Toronto
|
Wow Janh, you have done another excellent work.
|
|

Rank: Advanced Member
Groups: Member
Joined: 6/4/2006
Posts: 7,752
Location: arlington, Tx
|
Amazing work. Is this mostly metal or plastic? what did you use for the tracks? Jason
NIkl Scale Models
|
|

Rank: Advanced Member
Groups: Member
Joined: 8/8/2002
Posts: 365
Location: MD
|
Jan, that is outstanding work. Truly a master piece. I didn't think your 345 could be topped but this one blows it away. Shane
Shane S  www.sjscustomdesigns.comshane@sjscustomdesigns.com www.sjscustomdesigns.comshane@sjscustomdesigns.com
|
|

Rank: Advanced Member
Groups: Member
Joined: 2/5/2008
Posts: 693
Location: Pittsburgh,PA
|
|
|
Rank: Member
Groups: Member
Joined: 8/3/2006
Posts: 89
Location: Cleveland
|
Simply Amazing!! Great Job 
|
|

Rank: Advanced Member
Groups: Member
Joined: 5/11/2009
Posts: 140
Location: reading PA
|
Jahn that is by far the most bad ass scratch built model I have seen so far. That is simply awesome..i think thats desktop background worthy my friend.
Penn College Heavy Equipment Grad.
|
|

Rank: Advanced Member
Groups: Member
Joined: 7/24/2007
Posts: 630
Location: Germany
|
Oh...My... Lord 'speechless'
Leo
|
|
Rank: Advanced Member
Groups: Member
Joined: 12/8/2005
Posts: 708
Location: Germany
|
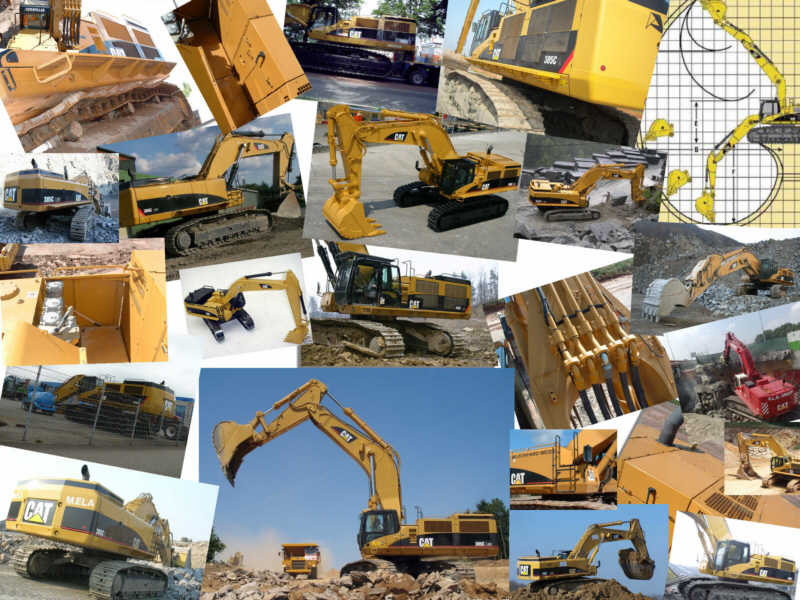 Every project starts with a research.So I searched the web to get as many views of the machine as possible. 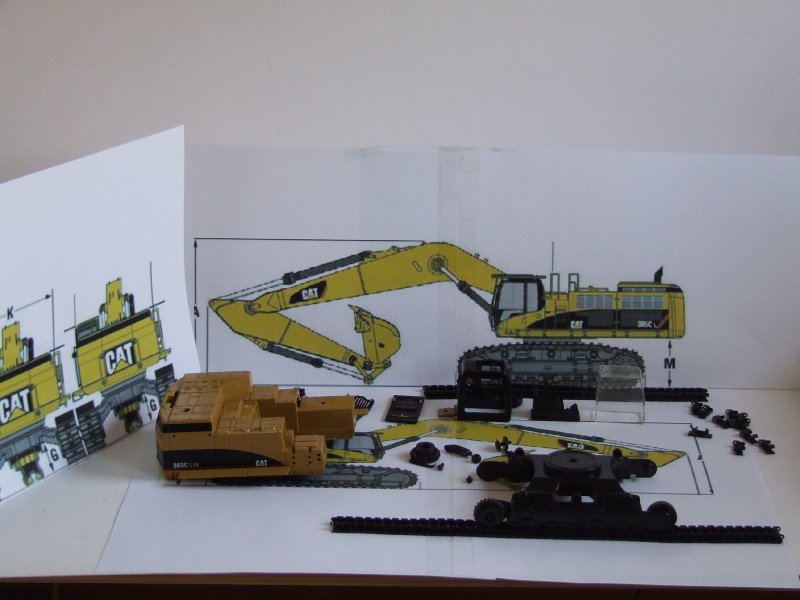 For the meassurements I downloaded the spec sheet from CAT and resized the drawings to 1/50 scale. I bought a Norscot CAT 365c FS model and compared it with the drawings. 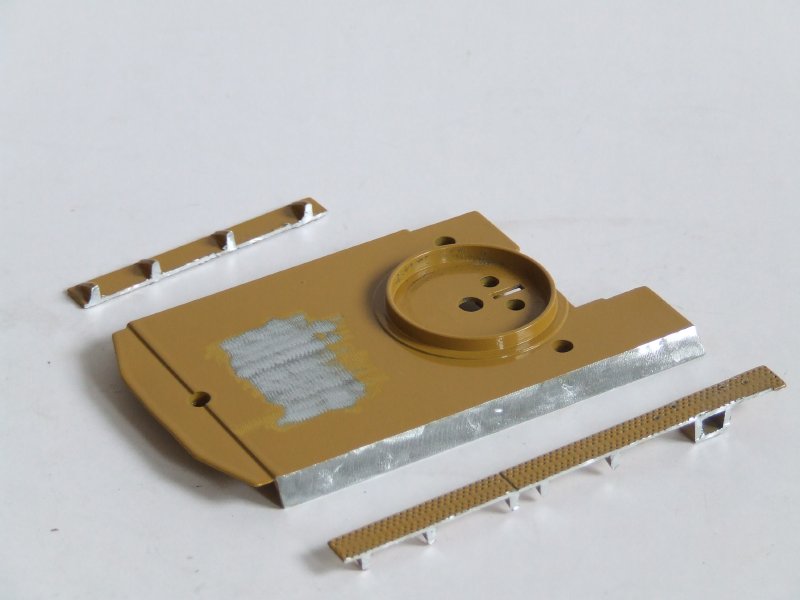 I then started with the base plate.Cut off the walkways. 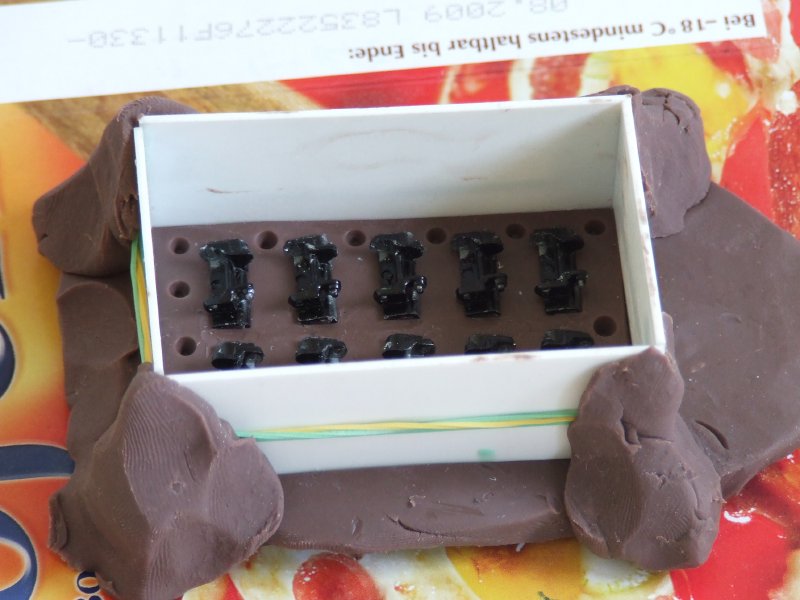 One of the major problems was to lengthen the tracks.I didn´t want to buy a second model just to get a few track pads.So I had to find a way to reproduce them. Besides when I tried to dissconect the track almost every second track pad got broken.So I lost 5 or 6 of the metal track pads. Making of the silicone mould for the track pads: 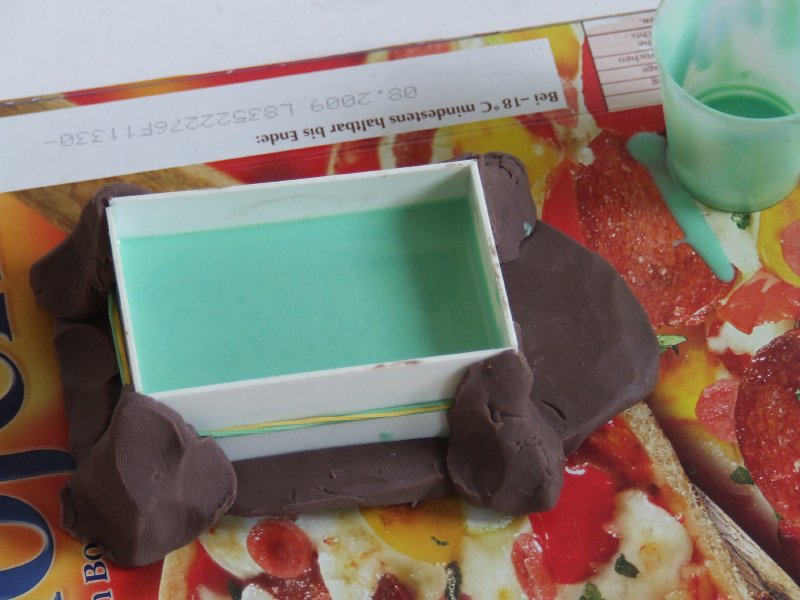 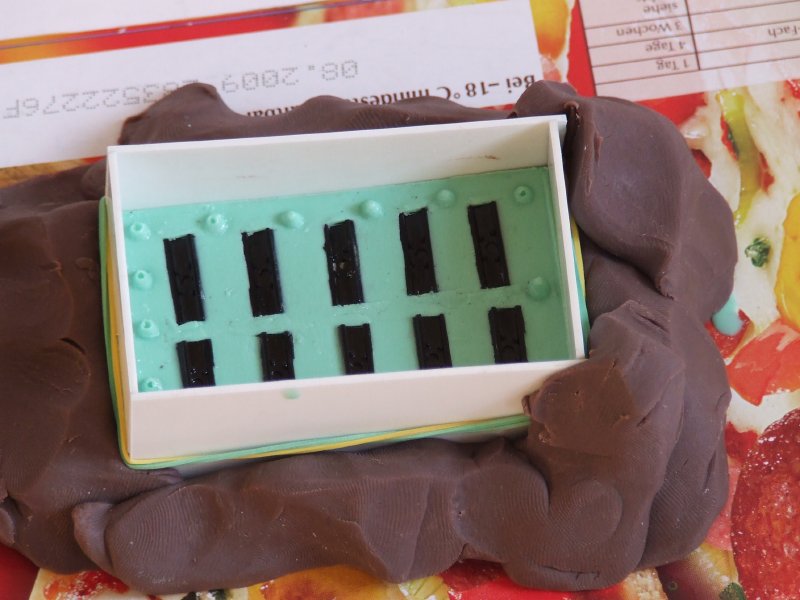 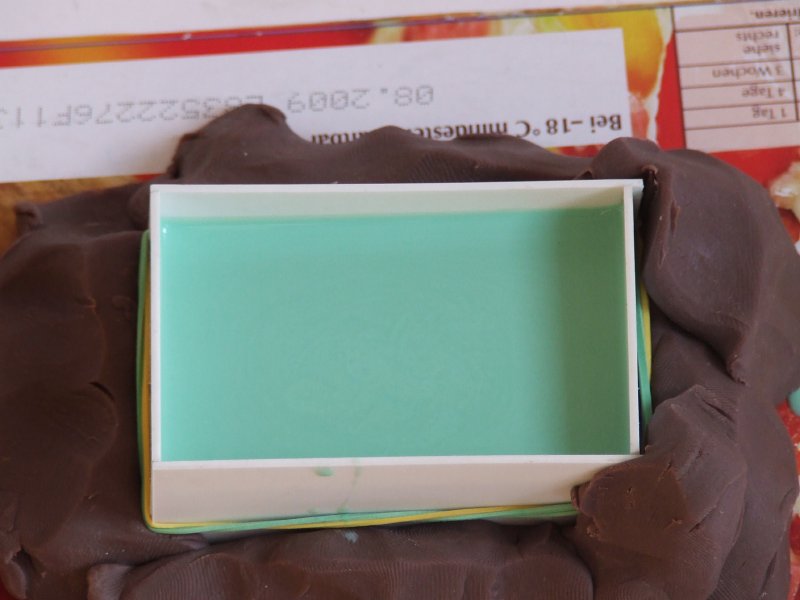 It turned out that it is really difficult to reproduce the track pads.I had to make many,many of them just to get a few that matched the existing tracks.More than 98% went into the trash box. 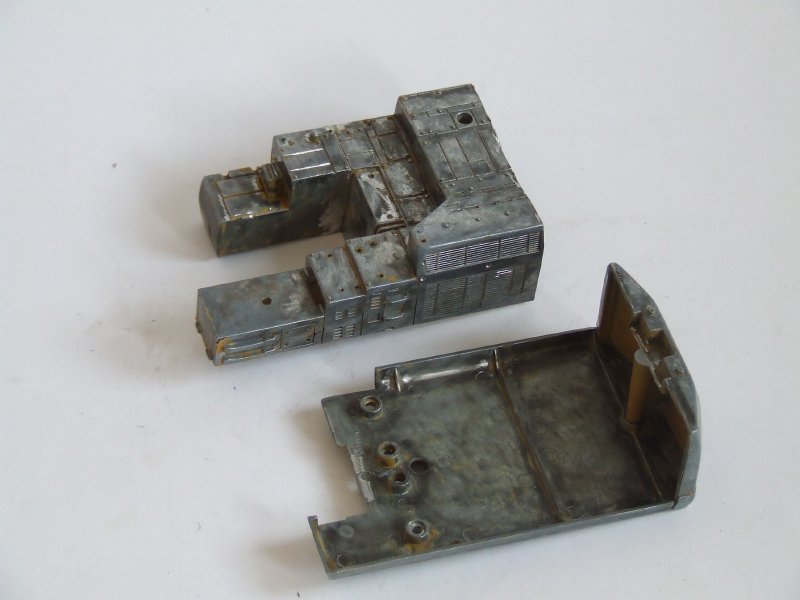 Next step: Cut off the counterweight from the body. 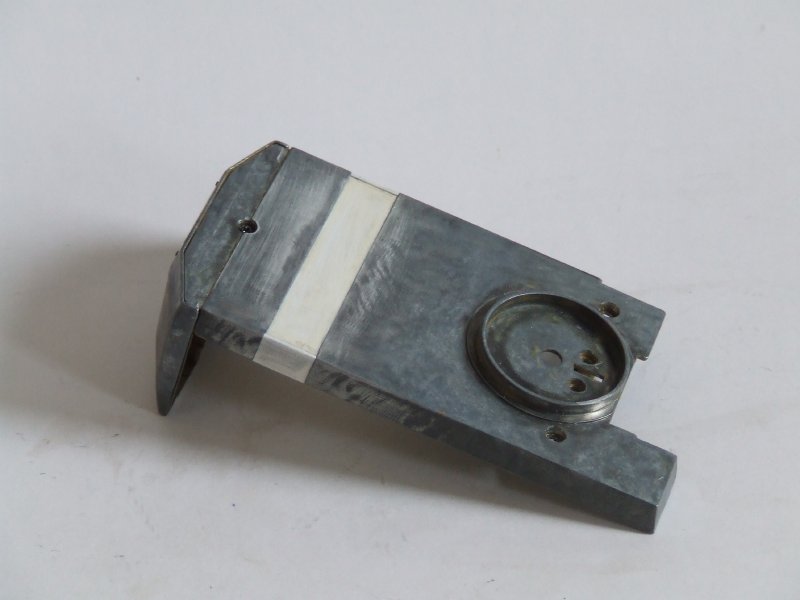 Then I lengthened the base plate.
|
|
|
Guest |
