|
|

Rank: Advanced Member
Groups: Member
Joined: 6/4/2006
Posts: 7,744
Location: arlington, Tx
|
OK I always get asked to post pics of my building progress. I usually forget while I am building, once I get into a grove of building I forget all about it until I am finished. Well I have taken some progress pics of a large column I am building right now. First I get an idea looking at A LOT of pictures, then I get a list of what I will need and call my people at Plastructs and spend about $120+ in parts. This customer left it up to me on outcome of this tank, so I kind of over done it alittle on the building of this one. I have started with a 5 inch tube, glue the cap on and have started the landings. 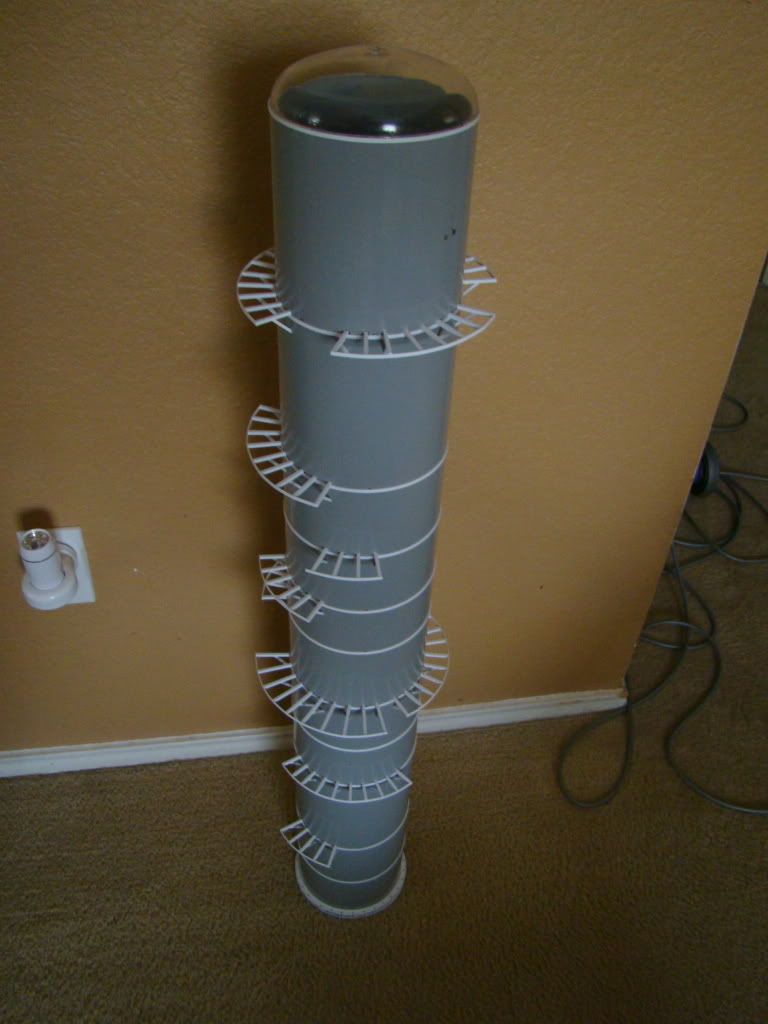 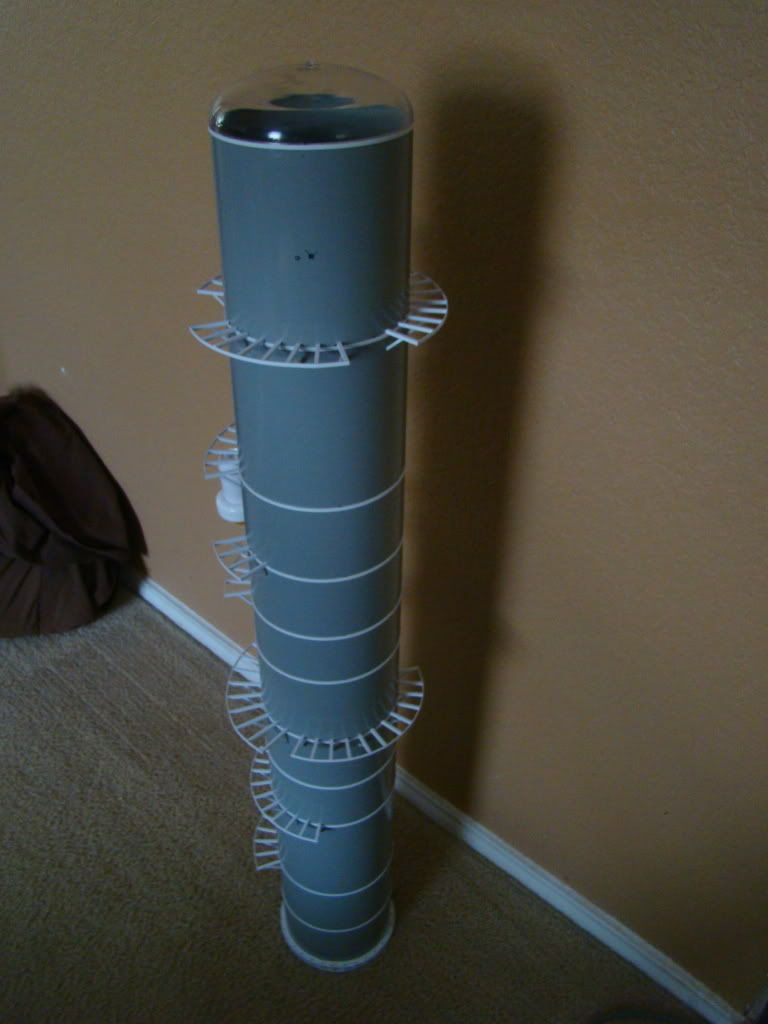 After I get these million pieces on I let then dry, and I started on the bottom flange. This is a very time consuming part with a lot of individual pieces that need to be put onto place.  next it is time for the flooring on the landings. This is the second time I am using the screen for a floor, I have always used solid sheet and cut to the shape. To get the perfect shape for the screen I have a old piece of 5 inch tube, I put the tube on the screen and cut the shape with my knife. from there I glue it to the frame and trim the edges. 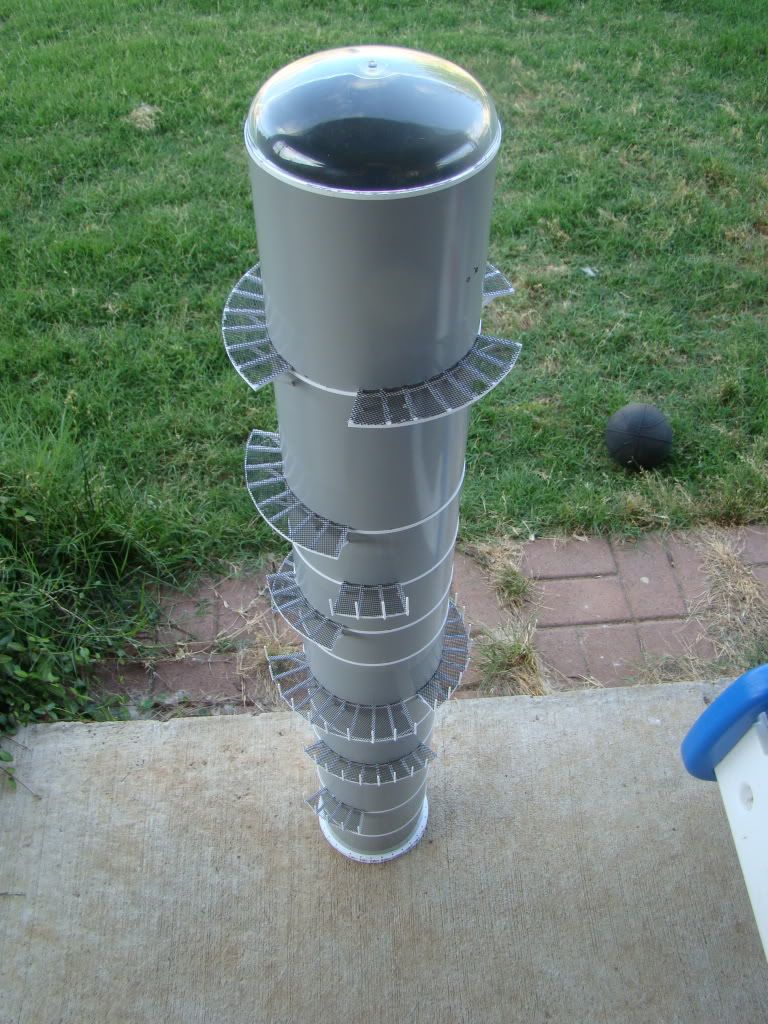 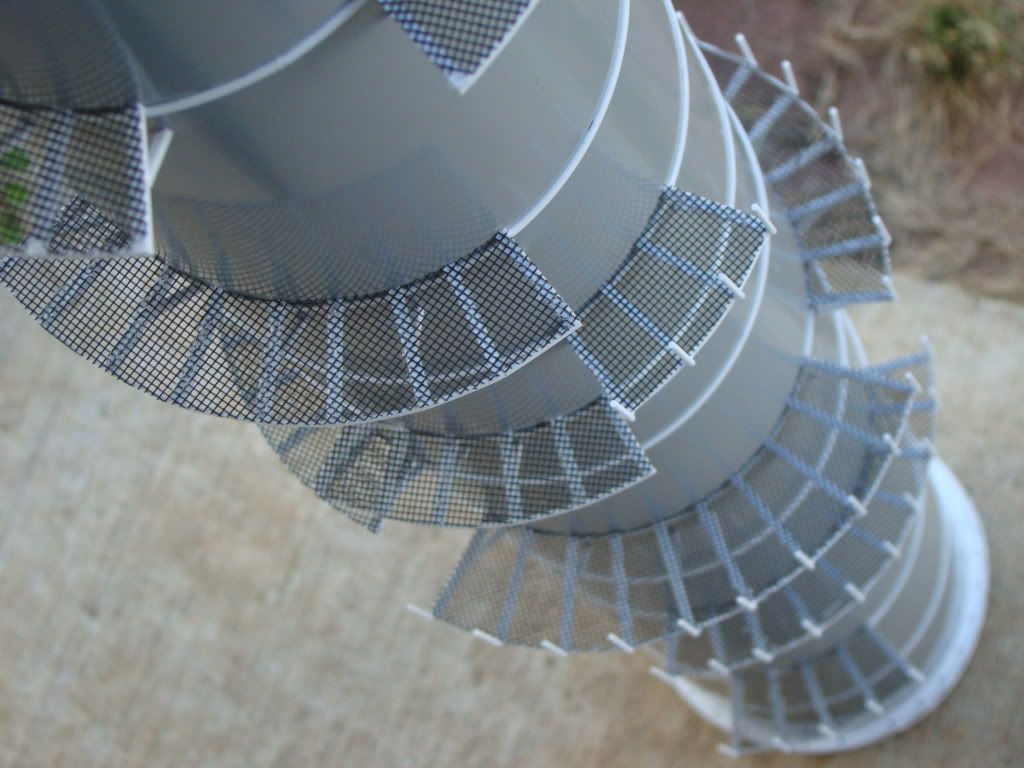 The next day I will start the railing of the landings. I usually just use the hand rail from plastructs but I wanted to try a new method this time. I am going to make my own railings. So I counted out another million individual pieces out of 1.5mm rod. Each one is glued into place with plastic weld and then I apply a small amount of super glue after the plastic weld has cured. 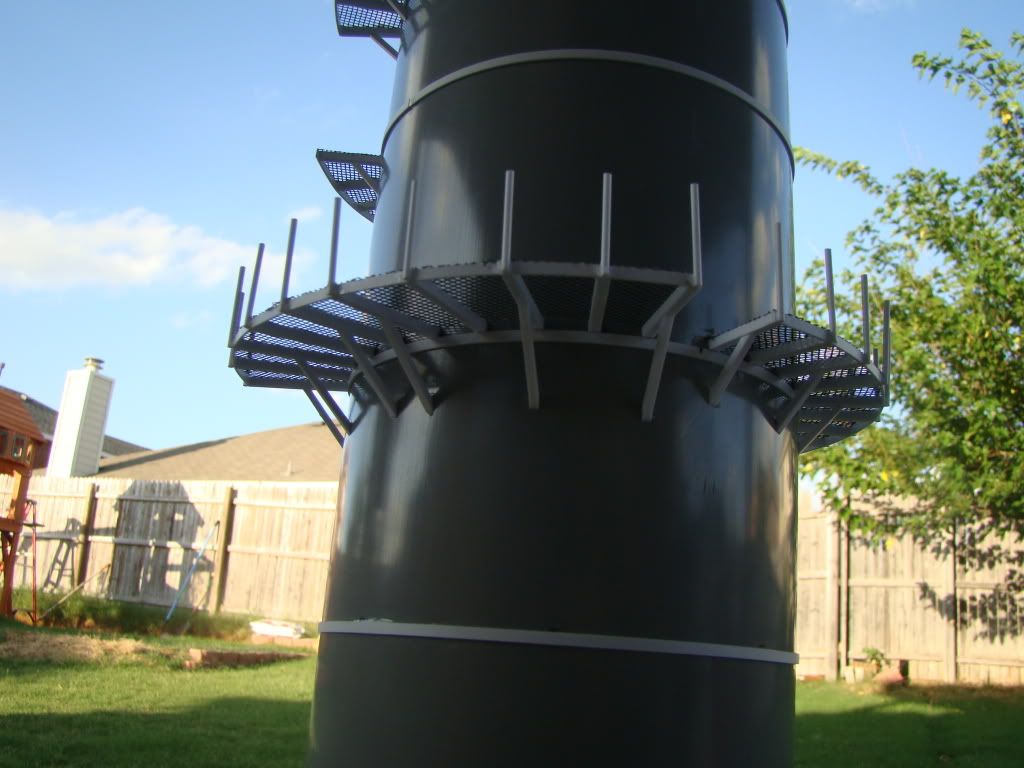 What you have seen here is probably about 30 hours of work so far. There is a lot of time planning and cutting the pieces you want. No rushing anything on these jobs, all custom no plans Will continue after lunch I am hungry Jason
Nikl Scale Models nikl scale models shapeways store
|
|
Rank: Advanced Member
Groups: Member
Joined: 6/4/2006
Posts: 7,744
Location: arlington, Tx
|
Ok after I have all the uprights on the landings I measure up where I want the railing to go. Then I start glueing which I forgot to take pics of. But I will say this part was a pain to due because I put the hand rail on the inside of the upright. You will be able to see them in a leter picture Once I get these this big it is hard to work with it due to the size. So I start building the saddles. This way I can lye it down and work on it. 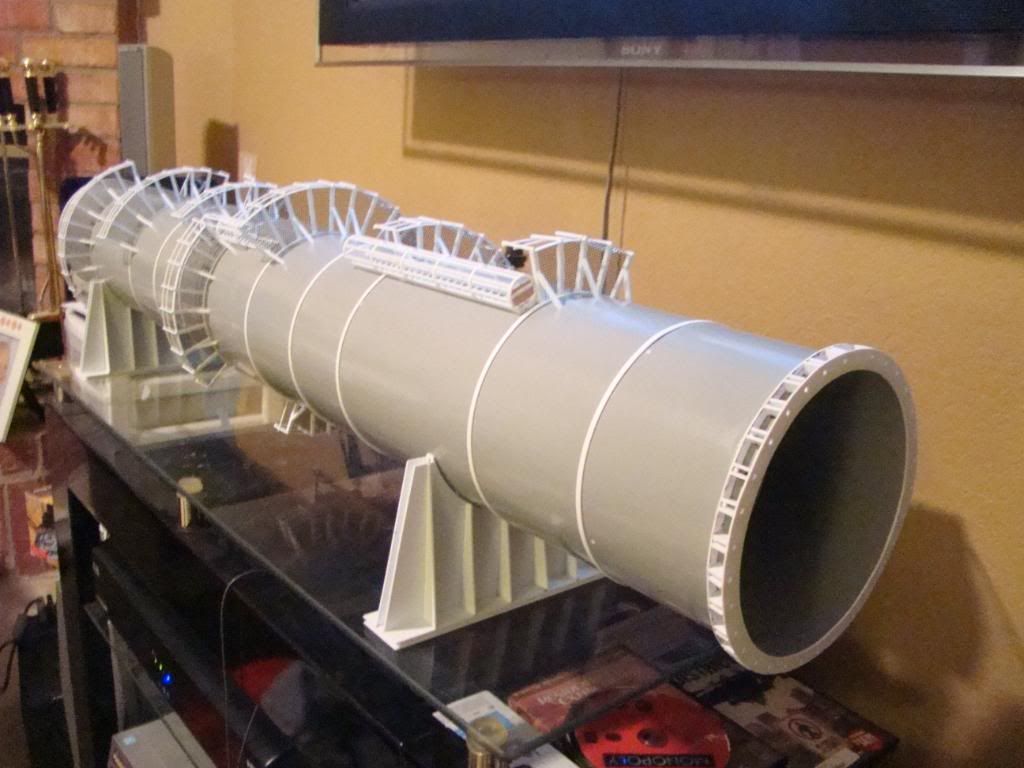 You can see I have added ladders so you can get from landing to landing. these are just the Plastruct ladders w/cage. I have placed my CAT D6 next to the column so you can get a feeling of the size 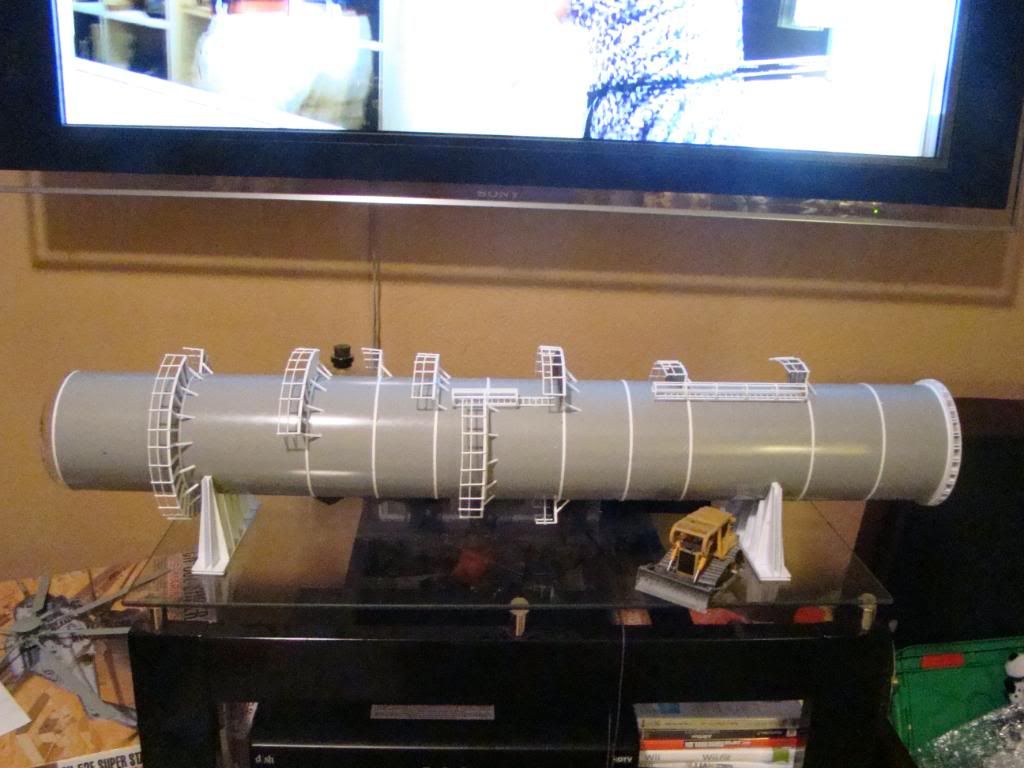 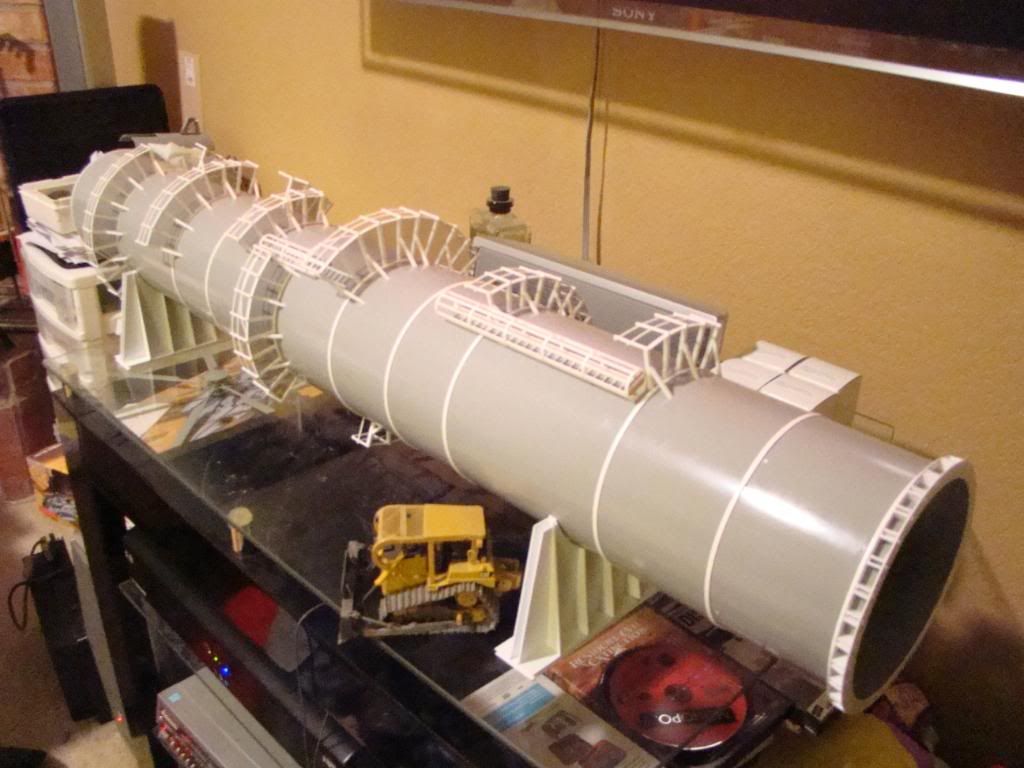 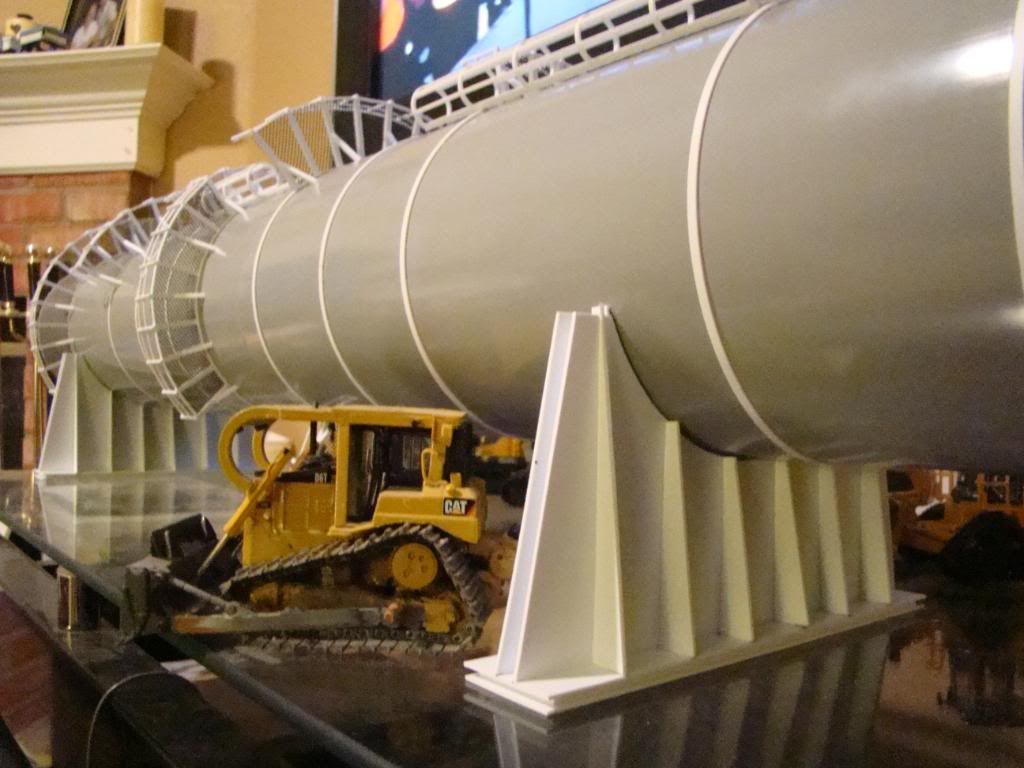
Nikl Scale Models nikl scale models shapeways store
|
|

Rank: Advanced Member
Groups: Member
Joined: 6/1/2006
Posts: 4,065
Location: Dublin Ireland
|
wow! thats pretty damn sweet!! super work there man, 
Why is "phonetically" spelt with a "ph"? ... It's better to be silent and thought a fool, then to speak up and remove all doubt The complex of Newgrange was originally built between c. 3100 and 2900 BC,[2] meaning that it's aproximately 5,000 years old. According to Carbon-14 dates,[3] it is more than 500 years older than the Great Pyramid of Giza in Egypt, and predates Stonehenge by about 1,000 years.
|
|
Rank: Advanced Member
Groups: Member
Joined: 6/4/2006
Posts: 7,744
Location: arlington, Tx
|
Ok here is a few pics of finishing the saddles I have painted the saddle red primer, but have masked off the top of the saddle, I wanted to keep this paint free because I am super glueing some small wood spacers to it. I do not want the paint letting go and the piece 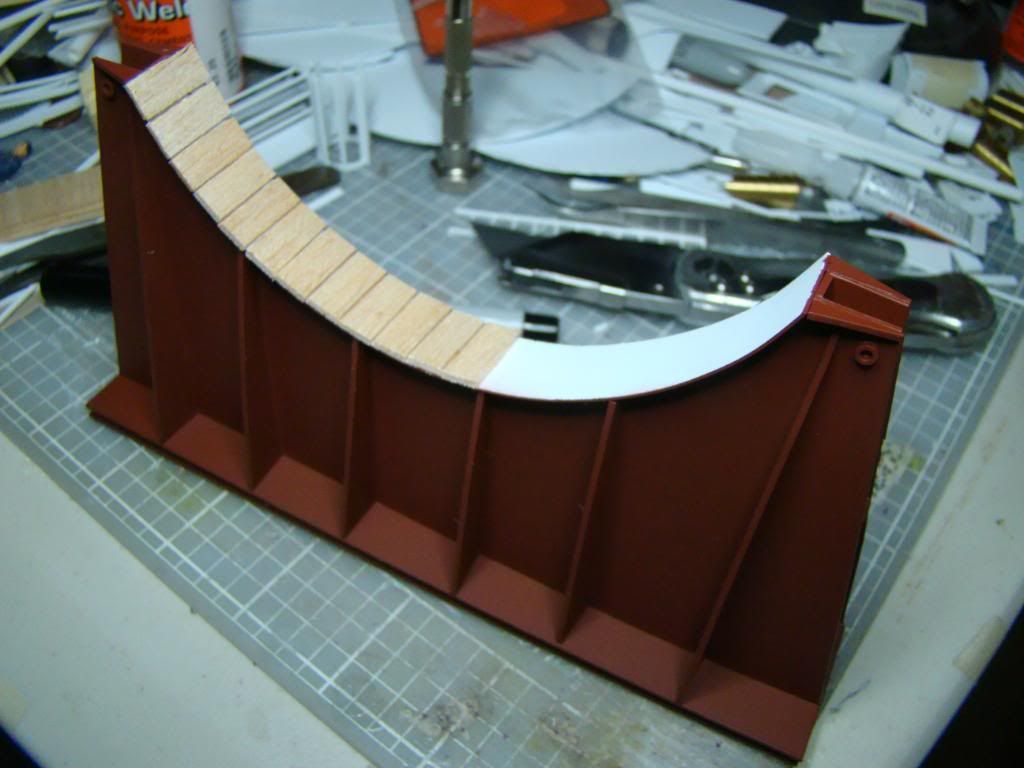 Ok got them all glued on and now I am going to add some color to the wood 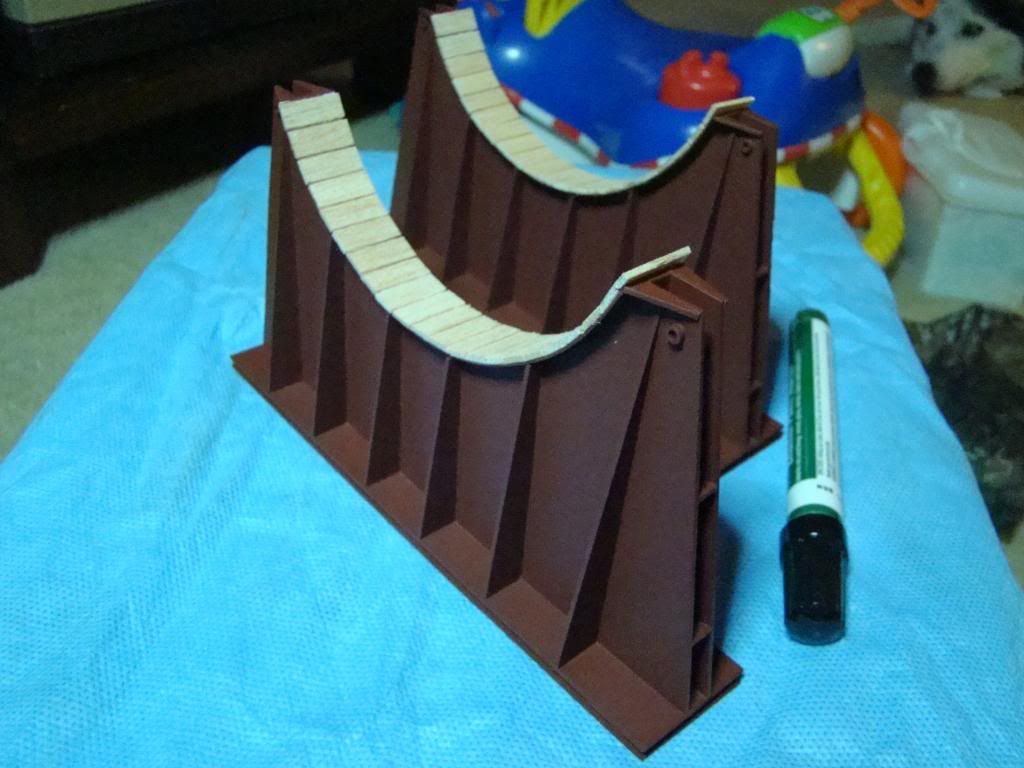 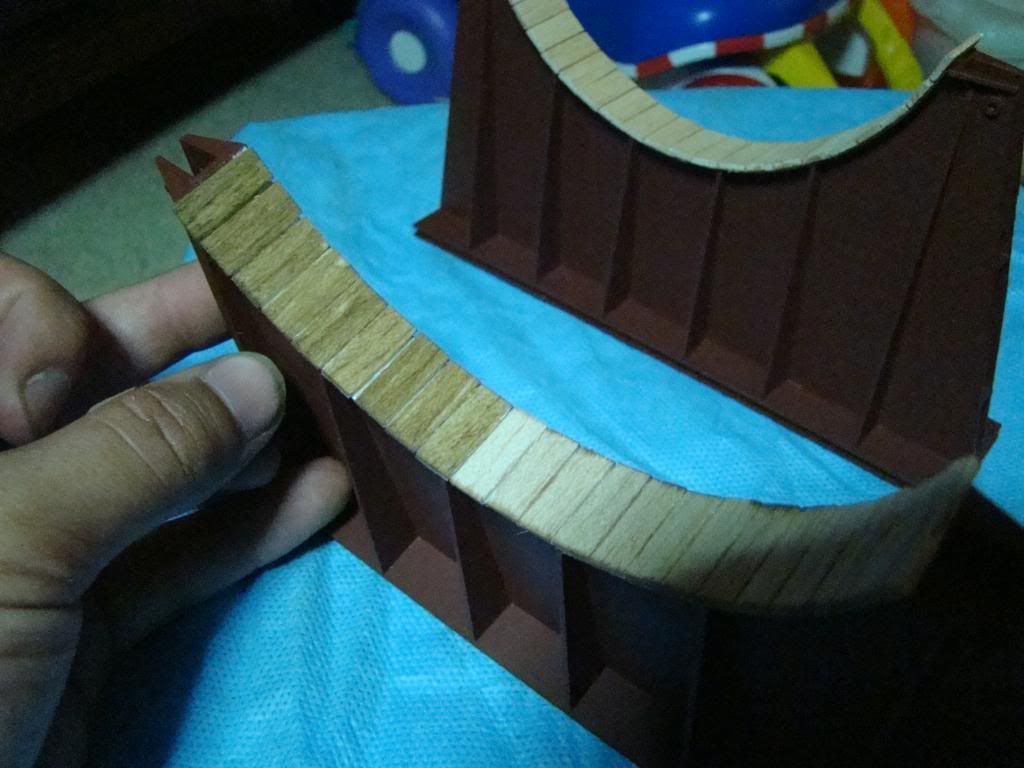 and here they are all done, the wood gives the saddle and nice realistic look to them 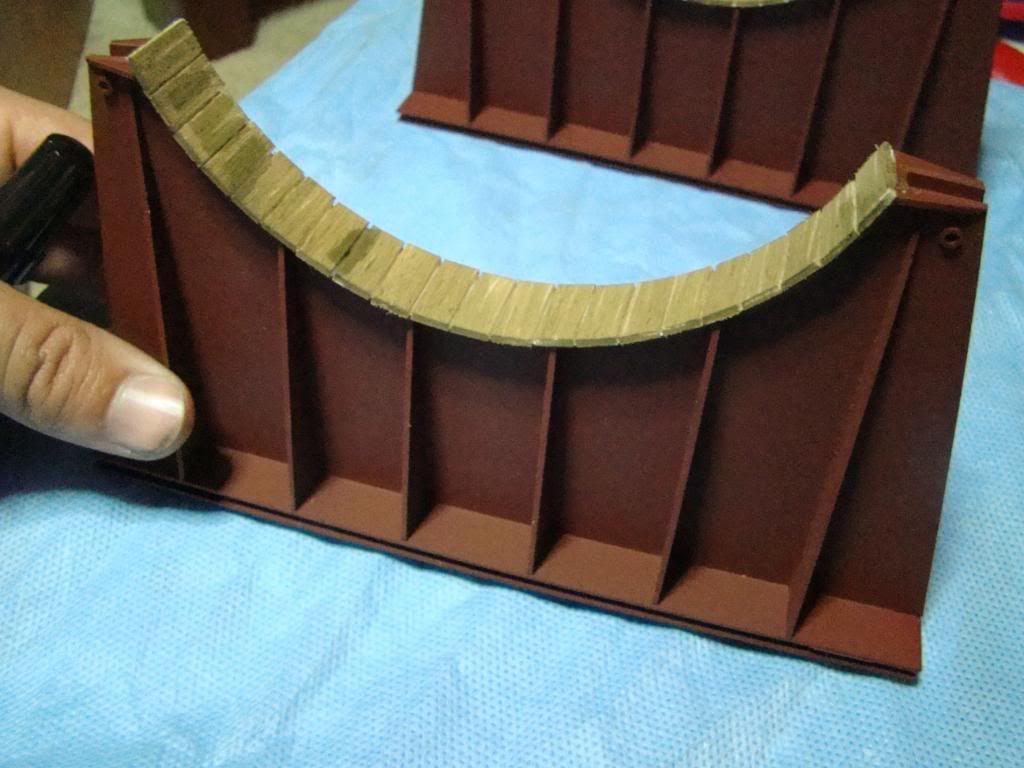
Nikl Scale Models nikl scale models shapeways store
|
|

Rank: Advanced Member
Groups: Member
Joined: 9/22/2007
Posts: 5,860
Location: Louisville
|
amazing work as always jason
Brandon my youtube channelMy Facebook Page
|
|
Rank: Advanced Member
Groups: Member
Joined: 2/5/2009
Posts: 1,990
Location: waterford ireland
|
once again dude i am super impressed by your talent you are going to make some body very very very happy.
|
|
Rank: Advanced Member
Groups: Member
Joined: 2/5/2009
Posts: 1,990
Location: waterford ireland
|
once again dude i am super impressed by your talent you are going to make some body very very very happy.
|
|

Rank: Advanced Member
Groups: Member
Joined: 8/12/2007
Posts: 1,122
Location: North West England
|
Looks great. I just wish Plastruct wasn't so expensive over here.
Tim
Heavy Equipment Model Show
Turf Moor, Burnley Football Club, Burnley, Lancs, UK.
Sunday October 16th 2016
|
|
Rank: Advanced Member
Groups: Member
Joined: 6/4/2006
Posts: 7,744
Location: arlington, Tx
|
Ok now I am going to add the lifting points can not remember the technical name for them  I know some people just drill 2 holes and run a tube throught the tube but I have to be more technical, so here is how I do them. Form the lifing ponts 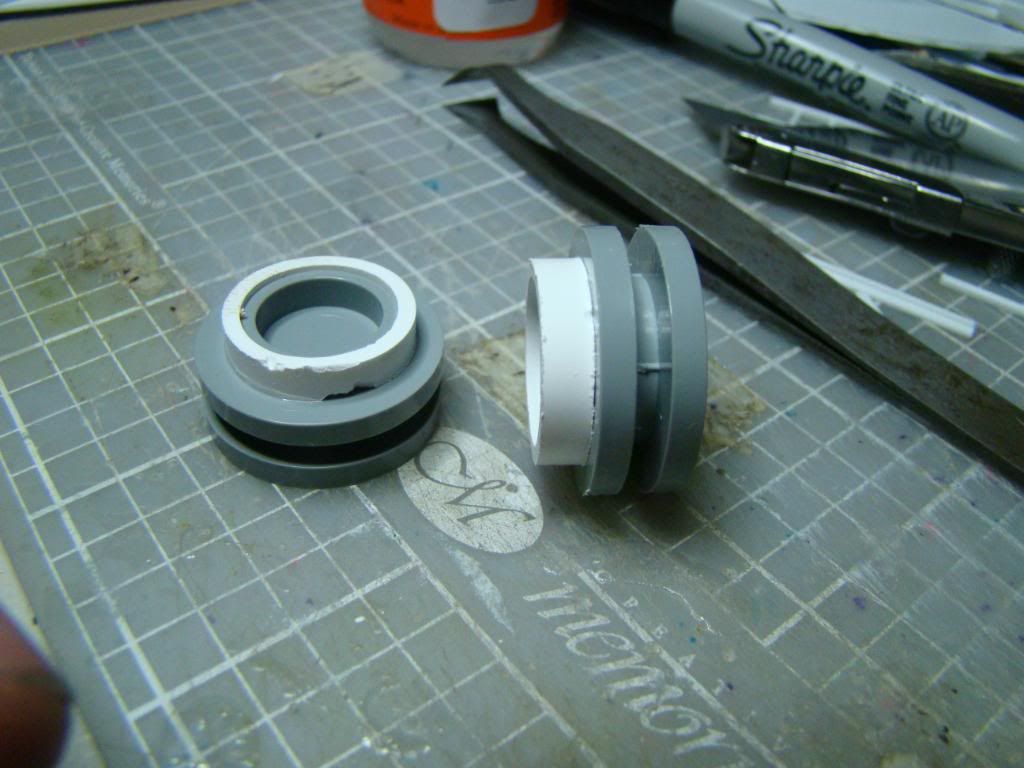 then I plastic weld them to the column. 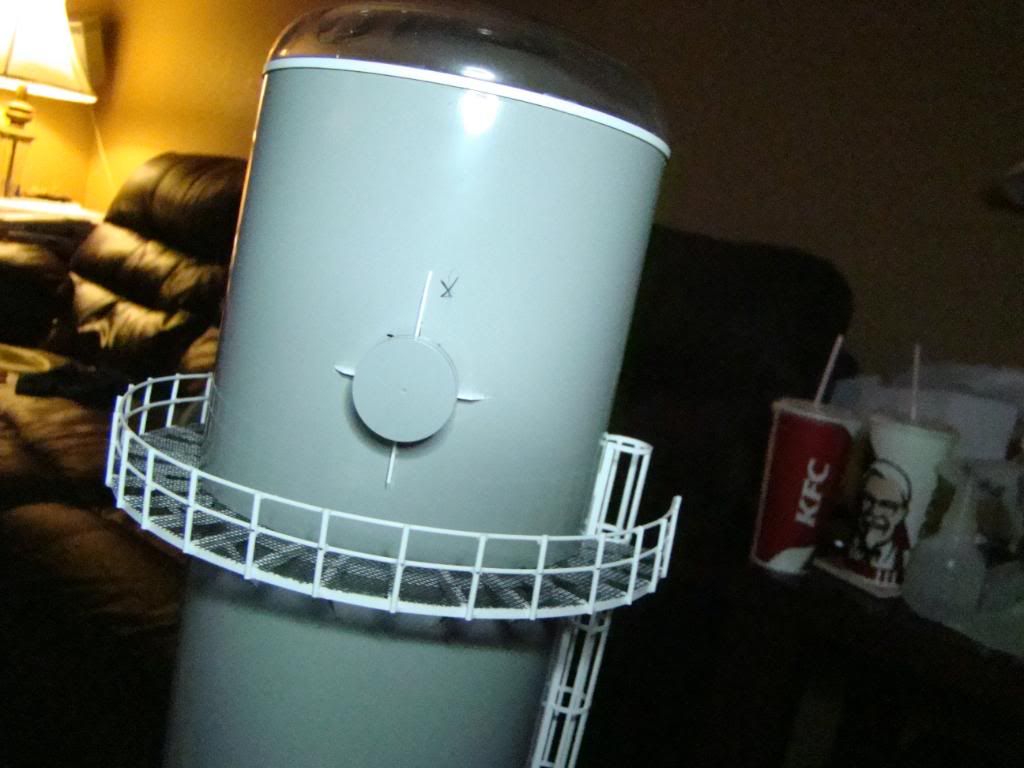 you can see I have added some stiffner around the lifting point this gives strength and some detail 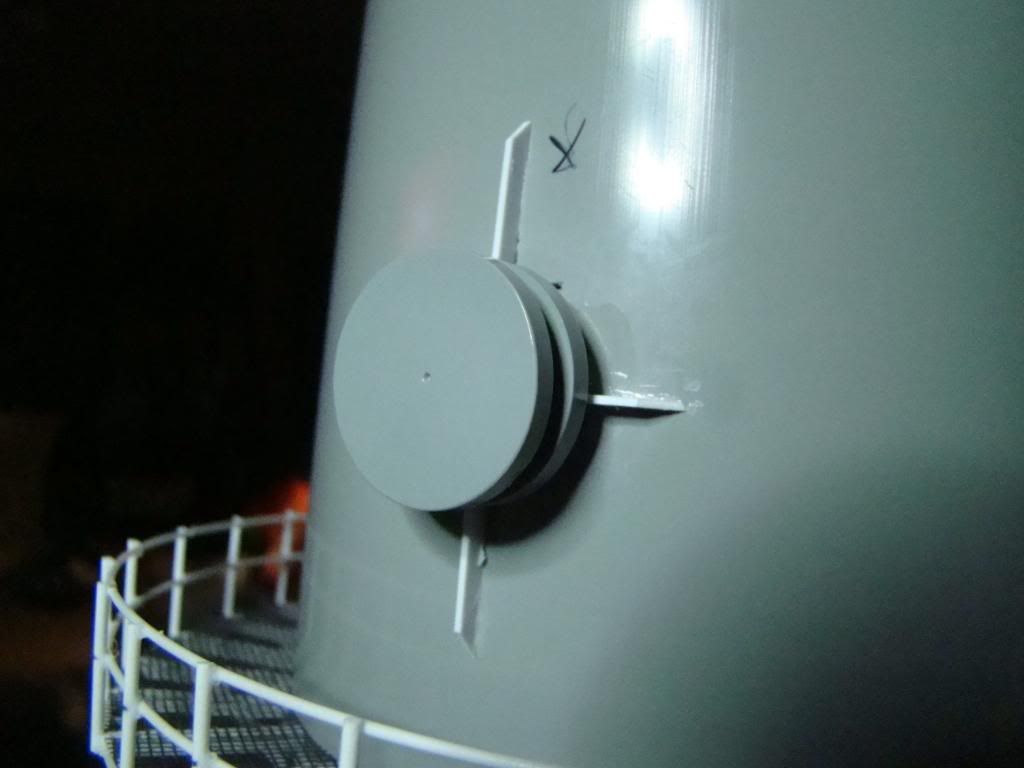  Here is where I left it last night, 4 nights in a row working til 1 am what a week more to come Jason
Nikl Scale Models nikl scale models shapeways store
|
|

Rank: Member
Groups: Member
Joined: 6/15/2010
Posts: 88
Location: atlanta georgia
|
|
|

Rank: Advanced Member
Groups: Member
Joined: 11/16/2006
Posts: 5,408
Location: Houten, The Netherlands
|
That's amazing Jason!! In Holland we have a word for this, "Monniken werk", roughly translated as Monks' work. Refferring to the copying of books by hand one after another before the book printing was invented.
Remko Ocean Traders Scale Models Facebook Group
|
|

Rank: Advanced Member
Groups: Member
Joined: 8/31/2008
Posts: 445
Location: Lewisville, Tx.
|
Is that the best you can do?   Just kidding man!  Thats looks awesome! You've really outdone yourself this time. Flippin' Plastruct magician!
|
|
Rank: Advanced Member
Groups: Member
Joined: 4/3/2009
Posts: 108
Location: South Yorkshire, England
|
Just incredible !!!
|
|

Rank: Advanced Member
Groups: Member
Joined: 3/21/2006
Posts: 5,046
Location: B-town
|
Jason
Top shelf work there Jason.
Chris
|
|

Rank: Advanced Member
Groups: Member
Joined: 2/8/2008
Posts: 4,167
Location: Anchorage, AK
|
Superb details. One of the reasons I bailed out of my tower construction (from 2 years ago!) was an inability to create realistic platforms. I was using plexiglass discs, but in fact almost all real towers use a screen mesh flooring similar to what Jason shows. Even the Plastruct railing seemed a bit "out of scale" with reality. The piping, flooring, rails, etc. appear almost "dainty" on the actual towers because of their enormous size. Our gang of idiots will tackle another one some day...  
|
|

Rank: Advanced Member
Groups: Member
Joined: 6/30/2003
Posts: 4,918
Location: Melbourne, Australia
|
These are the threads I love most on this forum... the watch as I build ones. Can I ask what you added to the wood pieces, was it a varnish? Congrats so far Jason, she is a gem!!! Thanks for sharing!!! Rowan.
1:25th scale CAT 375L excavator
|
|
Rank: Advanced Member
Groups: Member
Joined: 6/14/2007
Posts: 975
Location: Eureka
|
Really nice post and job on the column. Very informative and educational.
And a lot of plastruct pieces going together there.
Robert
|
|
Rank: Advanced Member
Groups: Member
Joined: 6/4/2006
Posts: 7,744
Location: arlington, Tx
|
RowanH wrote:These are the threads I love most on this forum... the watch as I build ones. Can I ask what you added to the wood pieces, was it a varnish? Congrats so far Jason, she is a gem!!! Thanks for sharing!!!
Rowan. Thanks for all the kind words from everyone, I really appriciate it. The product I put on the wood is paint pen I got from Hobby Lobby. It came in a 3 pack with 3 different colors. Rail brown, Rust and another rail color can not remember. It works great for a small job like this. Quote:Our gang of idiots will tackle another one some day Come on Ulf get them guys in gear, now my building secrets are out your guys can jump on them Quote: Flippin' Plastruct magician! Great one I guess I have a new name Jason
Nikl Scale Models nikl scale models shapeways store
|
|
Rank: Advanced Member
Groups: Member
Joined: 6/4/2006
Posts: 7,744
Location: arlington, Tx
|
Ok time for doing the bottom detail. For the bottom piping I wanted it to come out from the bottom and exit the side of the tank. I start with a small drill bit and set up to a 3/4" . 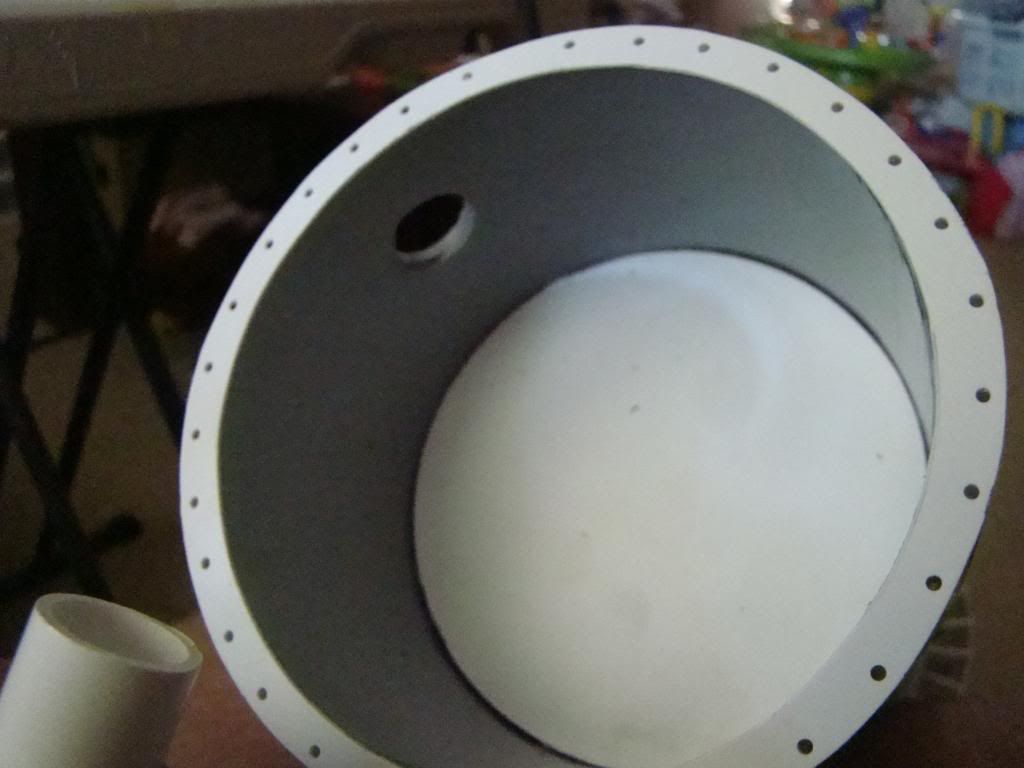 I let this set up for about a hour or to so the abs plastic has time to fully cure hard. Then I will get a clamp out and clamp the other side over night. This I let set over night because ring is pretty hard and does not bend very easy. I could place this ring in a glass of boiling water to bend but just to bend this using this method would not be worth the time, so I just clamp it down over night 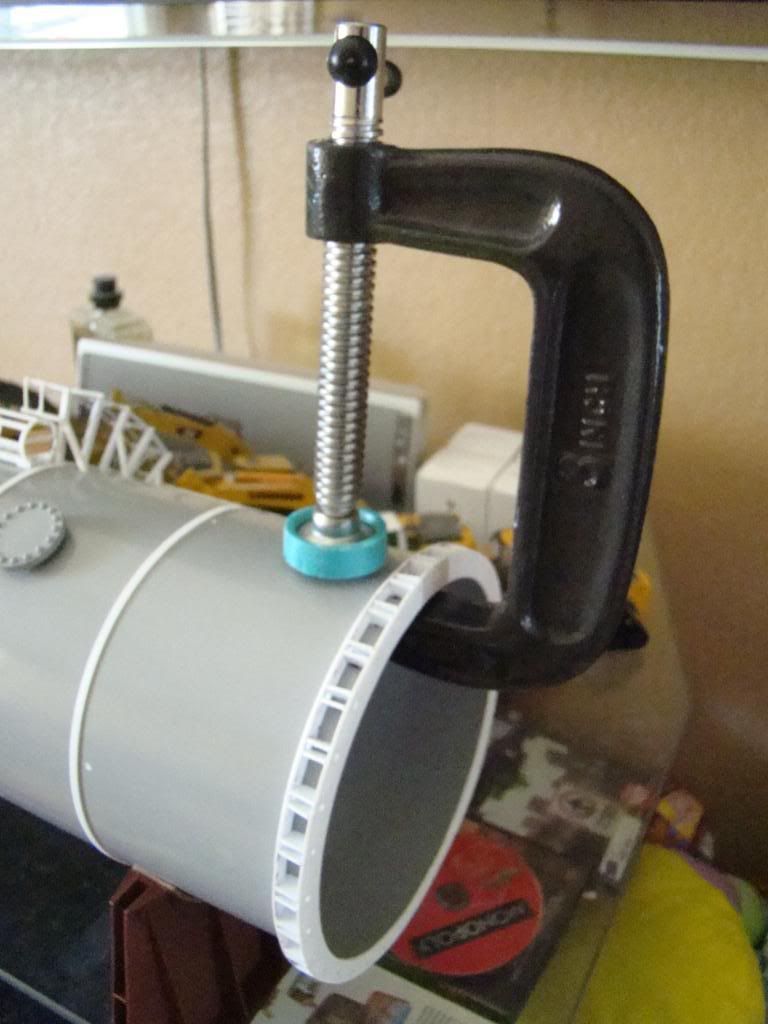 the next morning we have a nice ring that is bonded to the tube. 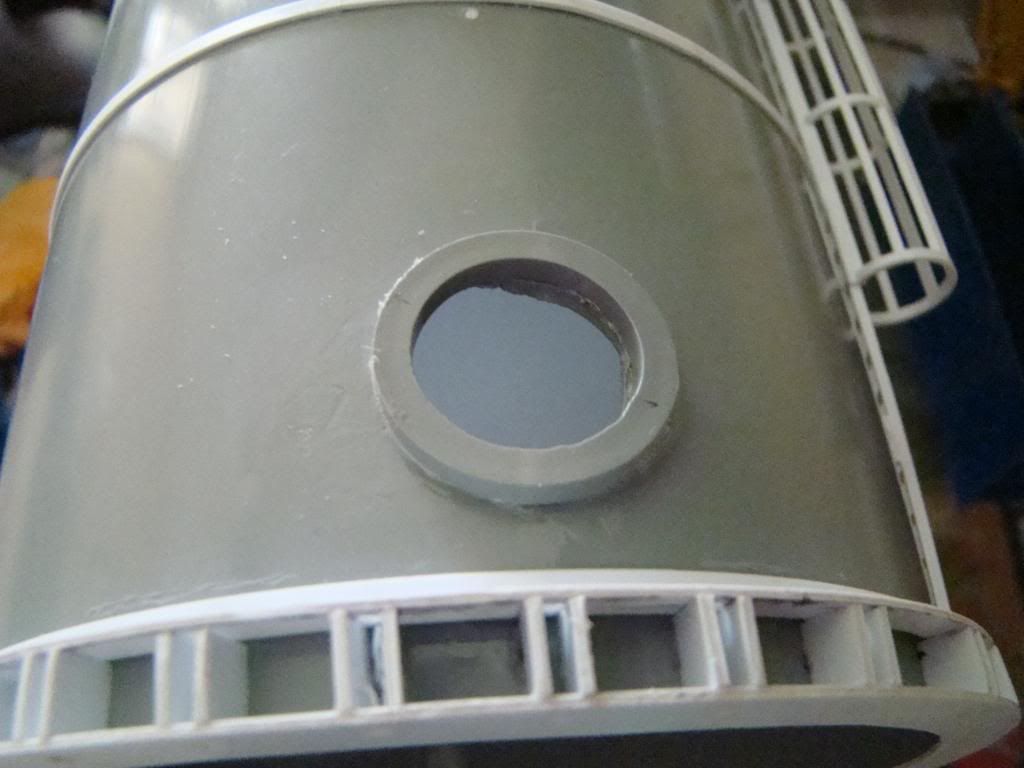
Nikl Scale Models nikl scale models shapeways store
|
|

Rank: Advanced Member
Groups: Member
Joined: 10/2/2007
Posts: 5,966
|
man one of these days i really need to get a column like this from you for a load.... would be a cool tandem lift between 2 LTM 11200
|
|
|
Guest |
