|
|

Rank: Advanced Member
Groups: Member
Joined: 12/30/2008
Posts: 3,439
Location: Good ol' Indiana
|
After I put this project on hold for about 2 years I am back at it. I have bought a 5080 and a 365B L to cut up. I have lots of pictures of 350's with all of their body work. I want to build my machine with a counterweight removal device and I was wondering if anyone has any videos of a counterweight removal device in action. I have pictures of the device for the 350 L and I am pretty sure how it works but an explanation of how counterweight removal devices work would also be helpful. Here are my photos  
-Ethan Collection 8/2/2016For more of the Diorama and my collection: On Facebook or On YouTube
|
|

Rank: Advanced Member
Groups: Member
Joined: 10/29/2010
Posts: 1,916
Location: Maine U.S.A
|
Can't wait to see it done!
-Mike
|
|
Rank: Advanced Member
Groups: Member
Joined: 3/14/2006
Posts: 279
Location: Sterling Hgts, Mi.
|
I am sorry, as I do not have a video to show you, but as you look at your first photo, you see the links at the bottom of the two chains that hook into the inside of the C/W. The C/W is sitting vertical on the ground at this time and has vertical slots to clear the cylinders. After raising the C/W higher than the upper house, the two vertical rectangular bars down near the bottom, on either side of the hydraulic cylinders are turned 90 degrees, so they are horizontal. There are slots for these too, which have a larger opening at the bottom. The C/W is lowered onto these, which holds the weight of the C/W, thus relieving the weight off the cylinders/chains. Above these blocks, you can see (4) threaded holes each side, which you run long bolts into, holdingthe C/W in place.
I am not sure if this helps you, but this method is used throughout all of Caterpillars excavators. I have made removable C/W for many of my models, as is needed to look correct for desplaying on various lowboys, depending on your States regulations. All the best, Dan
|
|

Rank: Advanced Member
Groups: Member
Joined: 4/3/2003
Posts: 2,115
Location: Rockford,IL.
|
Good luck, waiting to see your progress! Ken Ken
|
|

Rank: Advanced Member
Groups: Member
Joined: 12/30/2008
Posts: 3,439
Location: Good ol' Indiana
|
Thanks for the input. Progress will be slow on this build (busy class schedule), but I will be sure to keep everyone posted.
-Ethan Collection 8/2/2016For more of the Diorama and my collection: On Facebook or On YouTube
|
|

Rank: Advanced Member
Groups: Member
Joined: 10/29/2010
Posts: 1,916
Location: Maine U.S.A
|
I hope these pics will help you out a bit more, I took these a while back. Although the 365 has a slight different lifting design using one cylinder instead, but same concept.   
-Mike
|
|

Rank: Advanced Member
Groups: Member
Joined: 12/25/2006
Posts: 4,275
Location: Woodland, WA
|
I'm looking forward to seeing how this project turns out too, I cut my teeth in demo on a 350L just about every day for 18 months straight. I'll always have a soft spot for the old girls, no matter how much the dirt guys bash them, they make one great shear machine. A lot of guys I've seen make a 350 out of a 5080 seem to think that just because the bodies are the same shape, that they are the same size... the truth is that the 350's body is over a foot narrower, and obviously shorter in length because among other things, it lacks the catwalk in the middle. 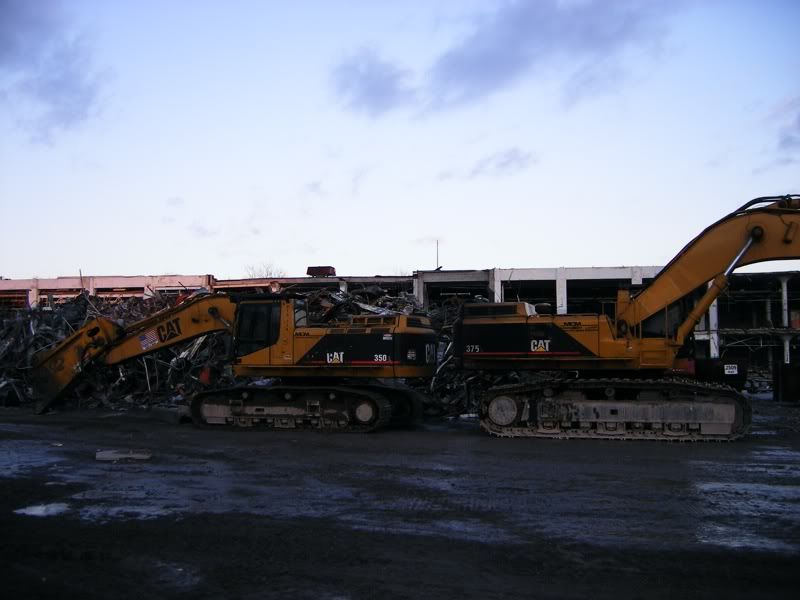 Not sure if these will be of any assistance in your build, but here is a link to my photobucket album of the 350 I ran: http://s193.photobucket.com/albums/z269/demoguy324/MCM%20Job%20517/350L%20MSD4500/?start=allAnd some reference pictures I took to assist in my own build (still to come, if I ever get the time) http://s193.photobucket.com/albums/z269/demoguy324/MCM%20Job%20517/350L%20MSD4500/reference%20pictures/If you're modeling the counterweight removal device and want to display it authentic to real life, leave one of the cylinders half way up when assembled. they always had a tendancy to drift up, I'm not sure why, but at least once a week, I'd have to go back and lower them back down. (Levers for this feature are in the rear right compartment) Also another very common display position  : 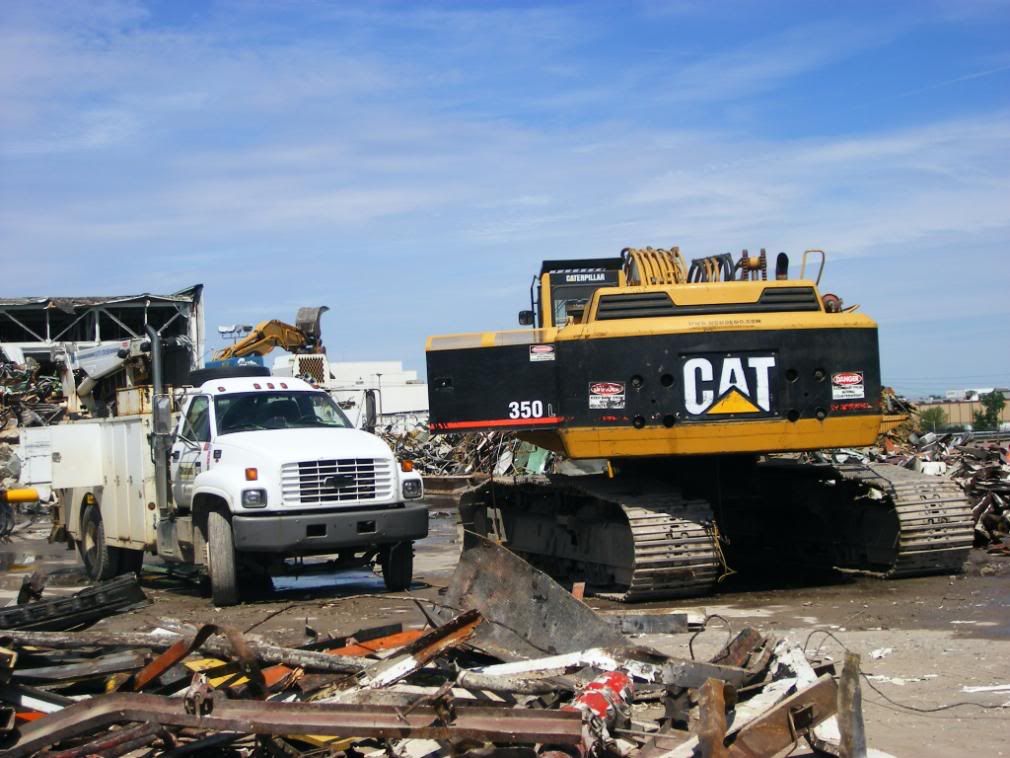
Eric W. Pioszak, Operating Engineers Local 701, Portland, OregonMETAL TRACKS AVAILABLE AGAIN! Cab guards Available again! Grapples Available again! Industrialscalemodels[at symbol]Gmail.com
|
|

Rank: Advanced Member
Groups: Member
Joined: 12/30/2008
Posts: 3,439
Location: Good ol' Indiana
|
Eric Pioszak wrote:Also another very common display position  : Ahh probably why the number of 350's still around is dropping radically. Thanks for the suggestions. I appreciate the input before anything hits the dremmel.
-Ethan Collection 8/2/2016For more of the Diorama and my collection: On Facebook or On YouTube
|
|

Rank: Advanced Member
Groups: Member
Joined: 12/30/2008
Posts: 3,439
Location: Good ol' Indiana
|
The dremmel didn't really start smoking but the table I accidentally cut did start to smoke. This project is moving along well I am about 1/5 of the way done. The 5080 has been reduced to a pile of parts. Some will be used other will be filed away.  A lot of work has been done to the 365 boom including: -filled the hideous screw holes -cut the boom to make it about 1/4" shorter -sanded the hydraulic pipe work off of the stick -made the bucket less aggressive -relocated the arm cylinder Here is what it looked like in progress:  
-Ethan Collection 8/2/2016For more of the Diorama and my collection: On Facebook or On YouTube
|
|

Rank: Advanced Member
Groups: Member
Joined: 12/25/2006
Posts: 4,275
Location: Woodland, WA
|
Here are a few pictures of a 350L My friend Daniel sent me, Mostly scratch built with exception of a few parts significantly modified from a Norscot 365B 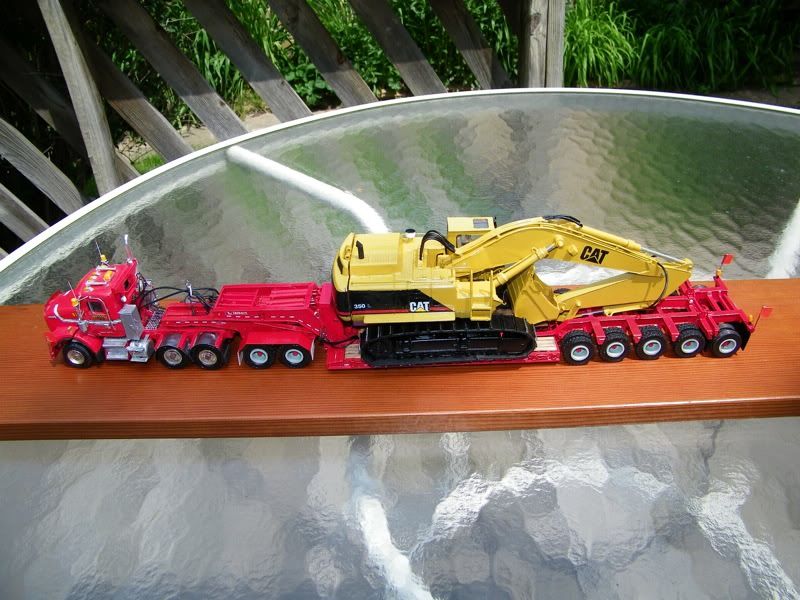 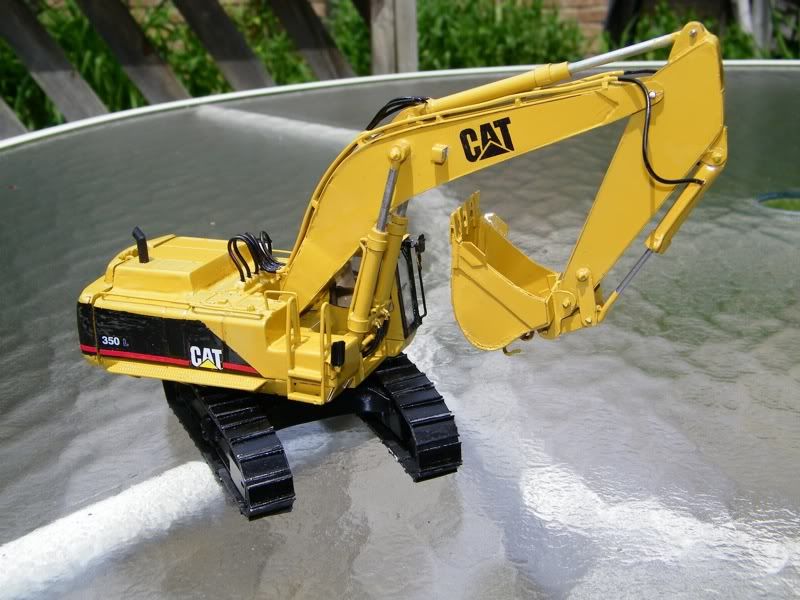 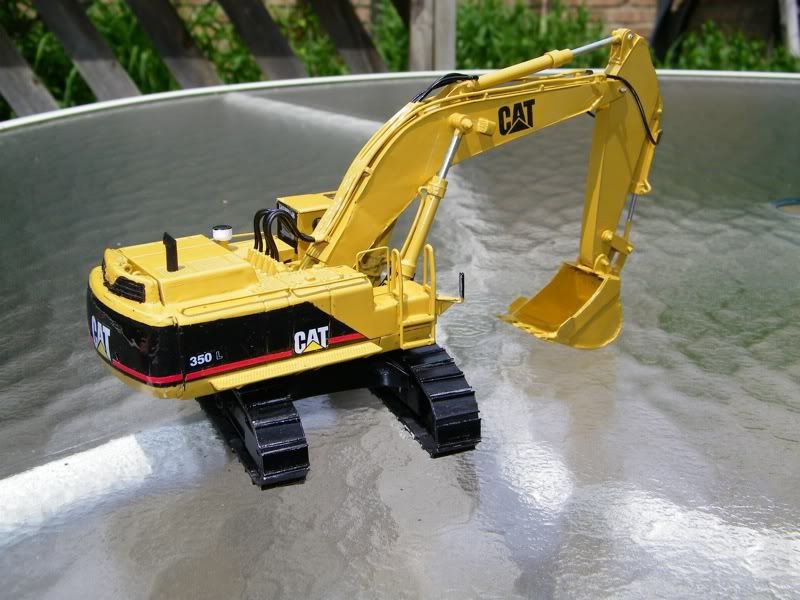 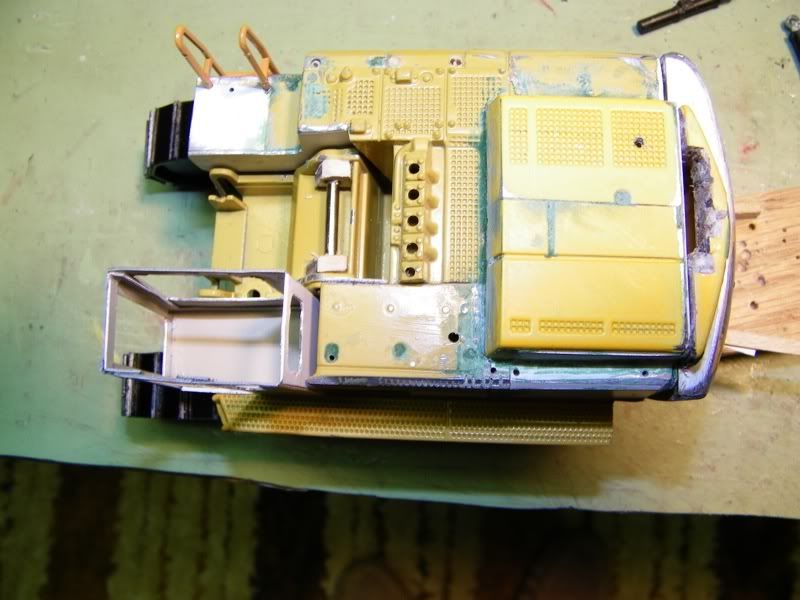 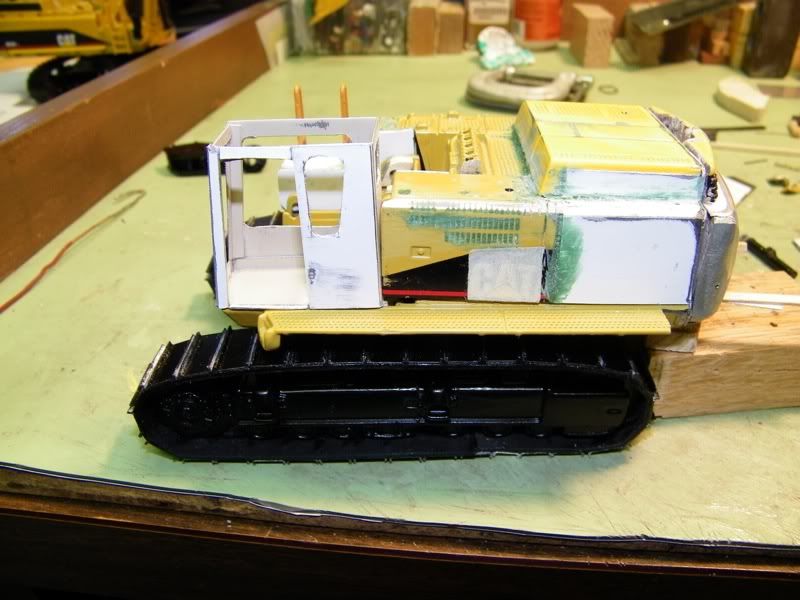
Eric W. Pioszak, Operating Engineers Local 701, Portland, OregonMETAL TRACKS AVAILABLE AGAIN! Cab guards Available again! Grapples Available again! Industrialscalemodels[at symbol]Gmail.com
|
|

Rank: Advanced Member
Groups: Member
Joined: 6/30/2003
Posts: 4,920
Location: Melbourne, Australia
|
I'm really looking forward to seeing how this comes out, I wish I got my hands on one of the Tony James 350L's from years back. I've always loved the 350, cheers for posting updates. Another very fine piece Dan! Rowan.
1:25th scale CAT 375L excavator
|
|

Rank: Advanced Member
Groups: Member
Joined: 12/30/2008
Posts: 3,439
Location: Good ol' Indiana
|
Got it all painted in Caterpillar Yellow yesterday and today I will post photos of that it looks like tonight.
-Ethan Collection 8/2/2016For more of the Diorama and my collection: On Facebook or On YouTube
|
|

Rank: Advanced Member
Groups: Member
Joined: 12/30/2008
Posts: 3,439
Location: Good ol' Indiana
|
Here are the promised pictures. It is a little later than promised but I really got into a game of Axis and Allies with a friend of mine. This is before painting partially through sanding and what not.   Here she is primed, painted, and ready for detail paint and decals. I do have to fix one small paint blemish, where for some reason the paint did not stick.   
-Ethan Collection 8/2/2016For more of the Diorama and my collection: On Facebook or On YouTube
|
|

Rank: Advanced Member
Groups: Member
Joined: 7/26/2010
Posts: 807
Location: Lansing, Michigan
|
SWEEET!!!!!!   -Zack
Zack "You can take the kid out of the sand box , But you can't take the sand box out of the Kid."
|
|

Rank: Advanced Member
Groups: Member
Joined: 4/3/2003
Posts: 2,115
Location: Rockford,IL.
|
Looks good, keep up the good work! Ken Ken
|
|

Rank: Advanced Member
Groups: Member
Joined: 12/30/2008
Posts: 3,439
Location: Good ol' Indiana
|
Here is what got done on Saturday. The last of the decals are drying and will be put on early next week 
-Ethan Collection 8/2/2016For more of the Diorama and my collection: On Facebook or On YouTube
|
|

Rank: Advanced Member
Groups: Member
Joined: 6/27/2007
Posts: 2,647
Location: Fort McMurray, Alberta
|
Looks great so far, thanks for sharing.
|
|
|
Guest |
