|
|
Rank: Advanced Member
Groups: Member
Joined: 5/11/2009
Posts: 570
|
Almost a week since my last update but I've been working hard and this last part has been extremely time-consuming and frustrating! I made the right side of the superstructure, which although quite simple is very detailed. I made the angular/sloped front part first (fuel or hydraulic oil tank?) and you can see it in the last photos. This piece was very annoying to assemble but it worked out good and I'm pleased with it. The most difficult parts to assemble were the grills for the radiators. Each grill has a large main aperture with ten angled slats, and there are smaller apertures above and below the main ones. I used 1mm styrene for the main slats and 0.5mm styrene for the smaller ones. The internal uprights are 0.5mm styrene with notches cut at 1.5mm intervals with a scalpel. 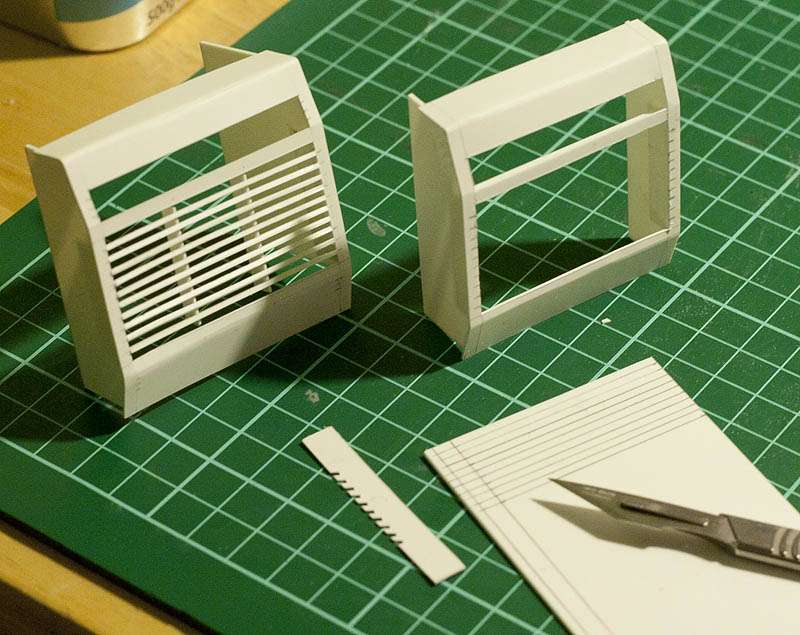 Here are all the parts assembled - I will level it all with sanding before I paint it. Two of the slats are at slightly too steep and angle so I will go back and adjust them later. 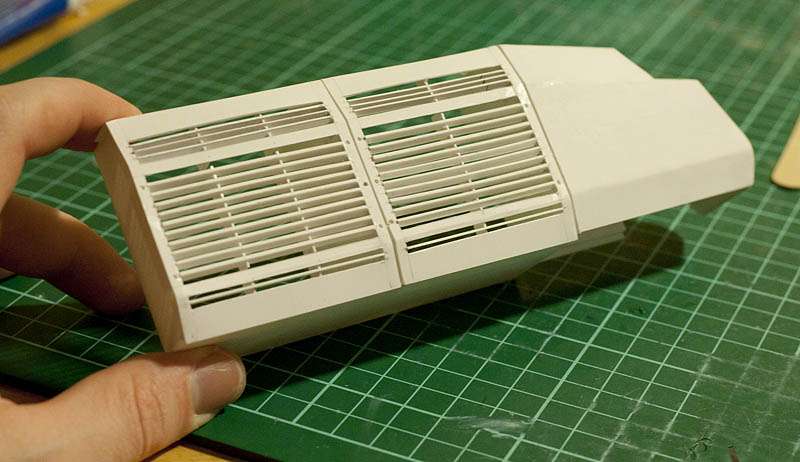 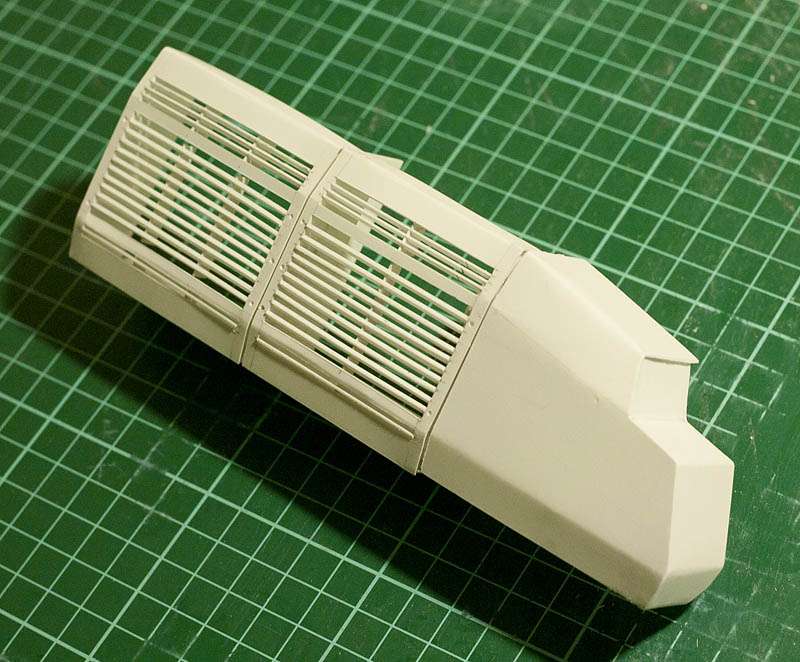 And some of my drawings, showing the next challenge: the cab! 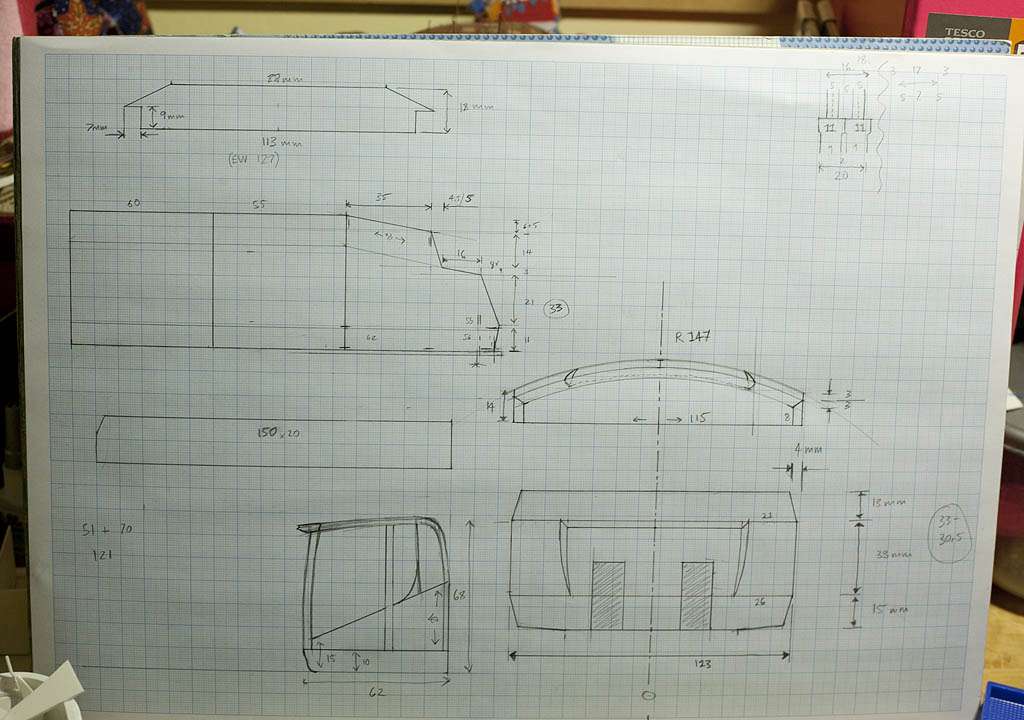
|
|

Rank: Advanced Member
Groups: Member
Joined: 6/27/2007
Posts: 2,647
Location: Fort McMurray, Alberta
|
Absolutely beautiful work! Thanks for sharing, and keep it up.
|
|

Rank: Advanced Member
Groups: Member
Joined: 6/4/2006
Posts: 7,744
Location: arlington, Tx
|
Nice job , doing grills is a pain in the butt Jason
Nikl Scale Models nikl scale models shapeways store
|
|

Rank: Advanced Member
Groups: Member
Joined: 8/8/2002
Posts: 5,515
Location: New Jersey
|
Nice attention to details, time invested really shows !
Chet
I live in my own little world it's ok they know me here
|
|
Rank: Advanced Member
Groups: Member
Joined: 5/11/2009
Posts: 570
|
Thanks guys. I've provisionally built the frame of the cab, and I'll probably prime, paint and finish it like the bucket because it's a separate component which will not be permanently attached to the model. I made a scale 6-foot guy to show the size of the machine.  Everything here is just sitting loosely in place, which is why there are few gaps and wonky edges... I can't fix the two sides of the superstructure until I have built the engine and hydraulic system detail, but I will probably be building the engine & exhaust cover next and continue with what I am able to do accurately. I may also redo the hinges on the doors with brass/aluminium as I'm not entirely pleased with the plastic ones. I really need to sweet-talk Liebherr into giving me some better photos - they've already been in touch with me and have said that this machine is still a prototype which is why it's not on the website. I really hope no major changes are made if/when the machine goes into production! 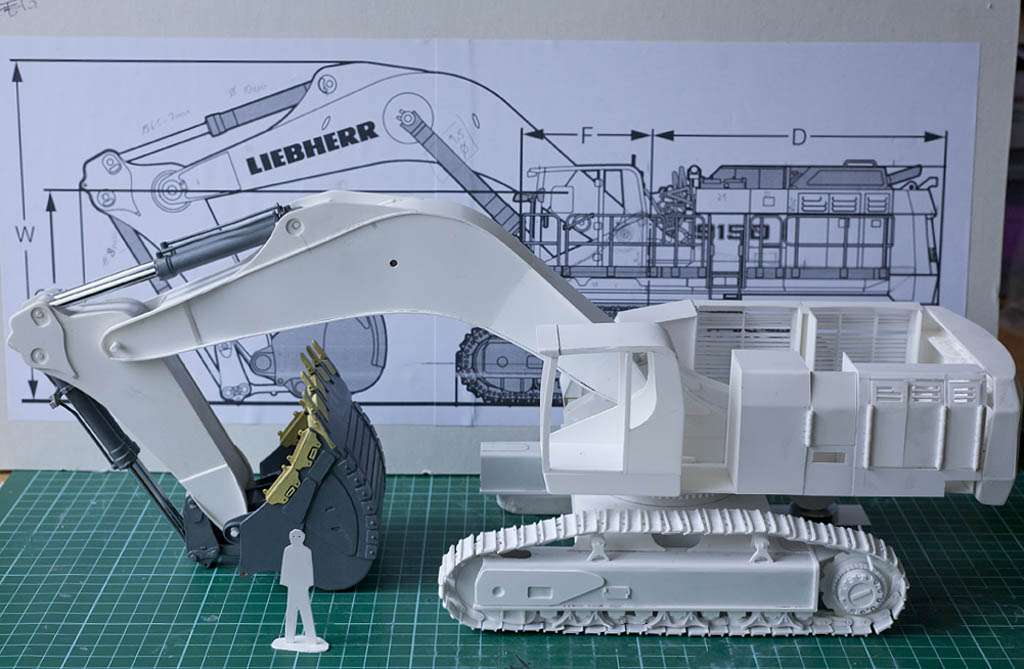 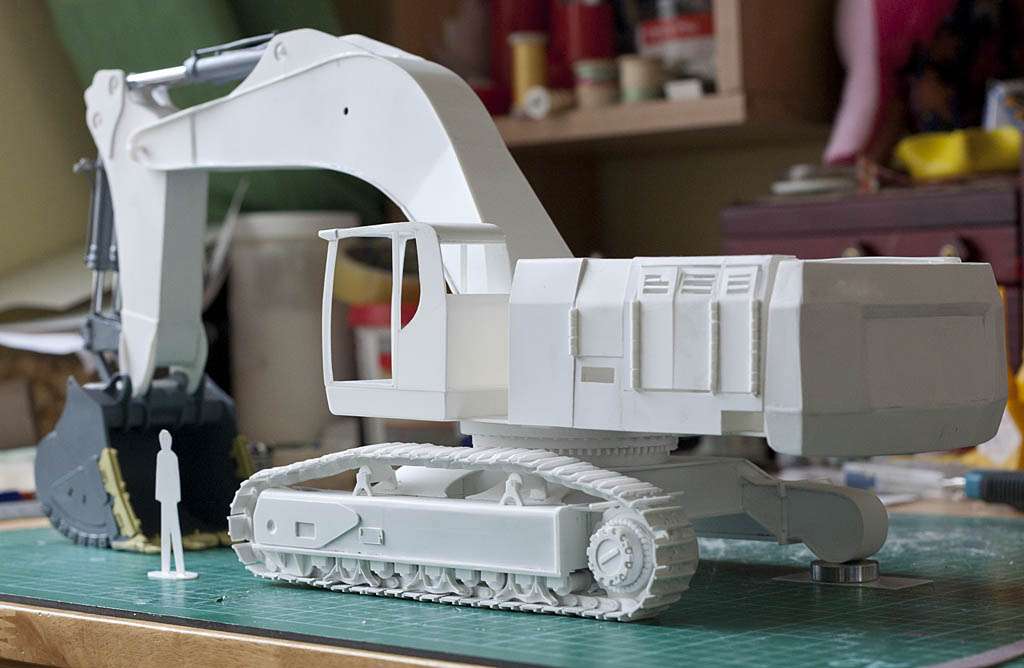 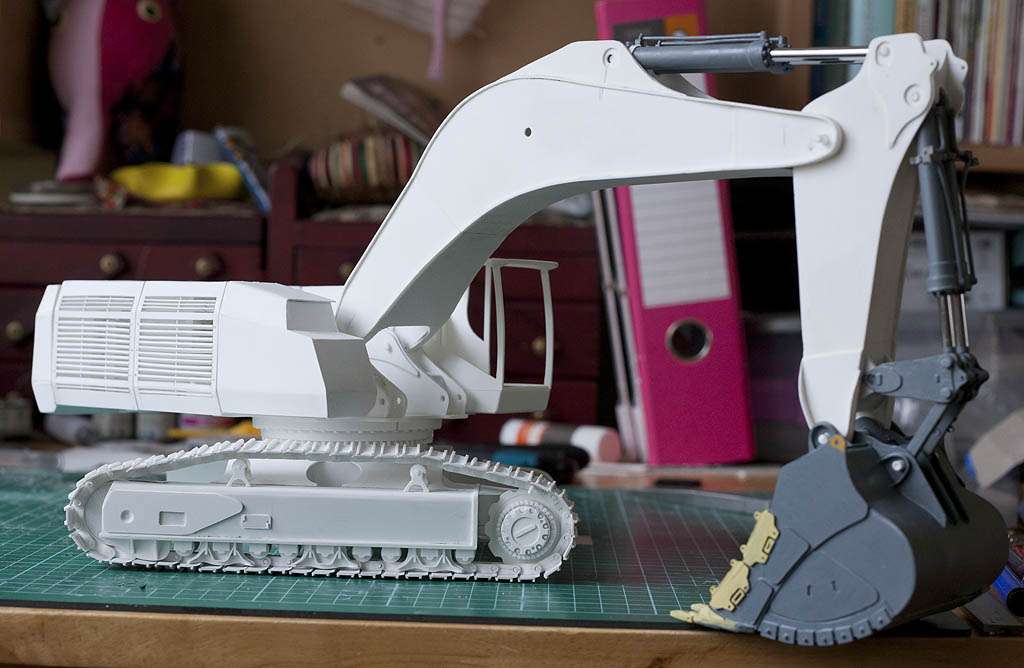
|
|

Rank: Advanced Member
Groups: Member
Joined: 10/7/2005
Posts: 2,495
Location: Shetland
|
Now this is what I've been waiting for  You seem to be making great progress and once again I can't wait to see the finished model. Perhaps you'll be a little reluctant to sell it when it's finished but what if Liebherr themselves are interested in buying it!.
Scania V8. The best sounding truck in the world.
|
|
Rank: Advanced Member
Groups: Member
Joined: 5/11/2009
Posts: 570
|
Thanks Paul - I'd be delighted if there was a buyer for this model as it would give me the inspiration to do the other side of the tracks, LOL.  By way of progress, I'm actually almost done with the "outside" of the model, so to speak - I have done the top engine cover (provisionally, without detail) and have finished the walkways. Video coming soon!! After one very frustrating first attempt, I ended up making a jig for the walkways with 1.5mm mounting board (very thick paper, basically). It worked a treat. 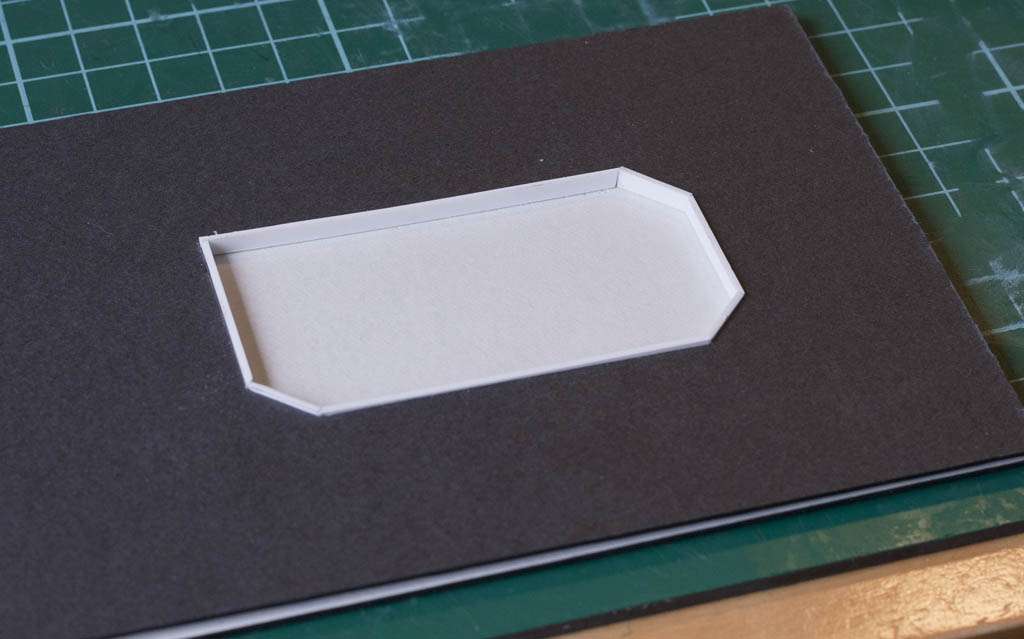 I used CA to fix the fabric gauze to the support framework. 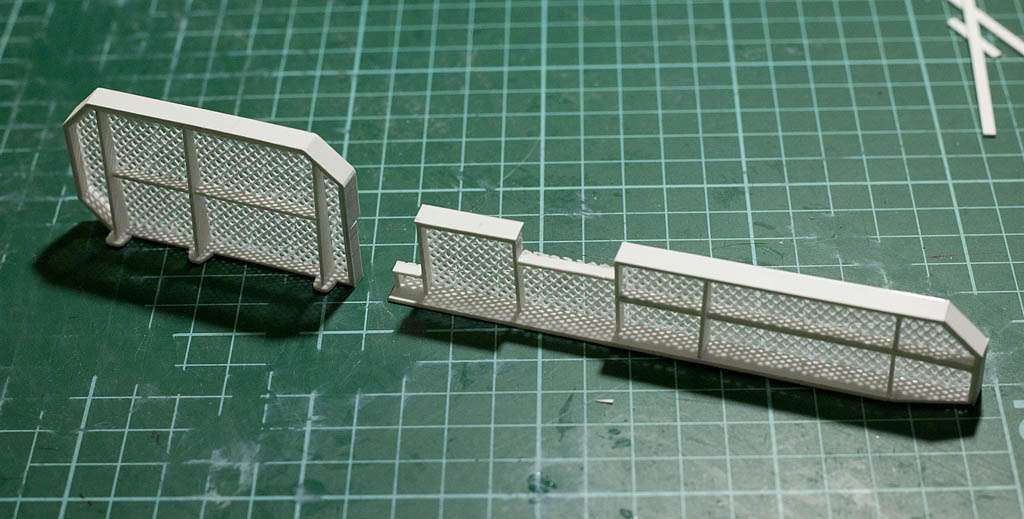 Temp. fixing to the model, and a sneak preview of the engine cover... 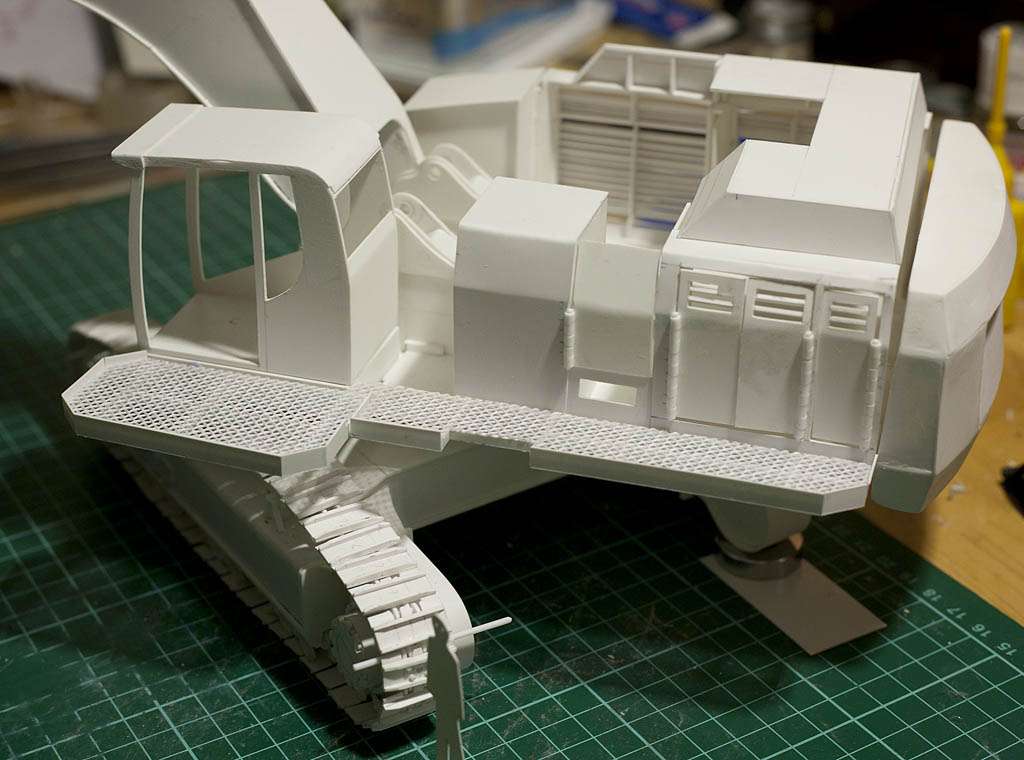 And after many more frustrating hours of labour, this: 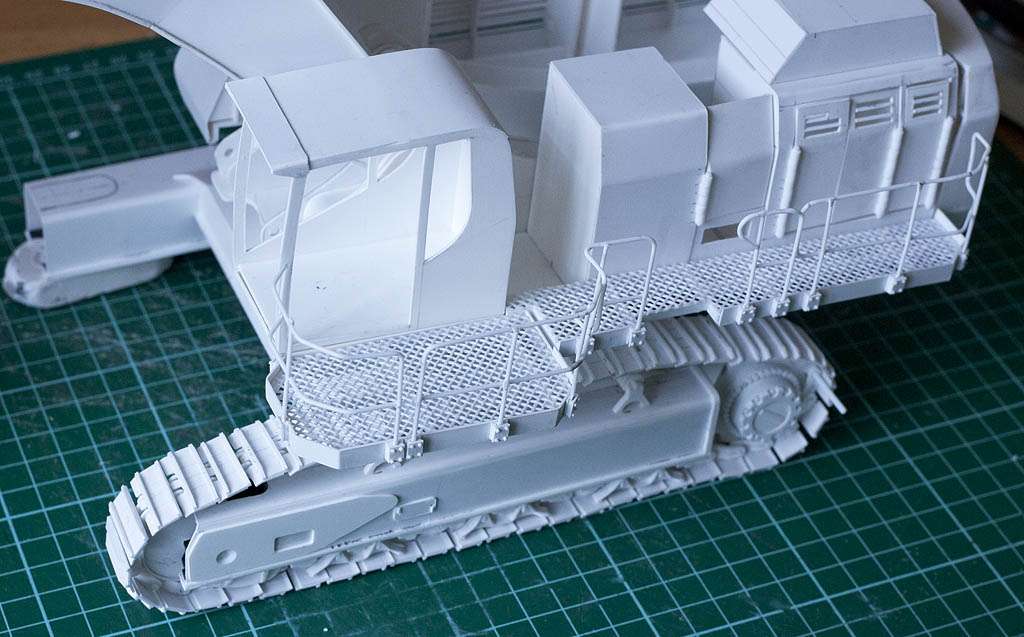 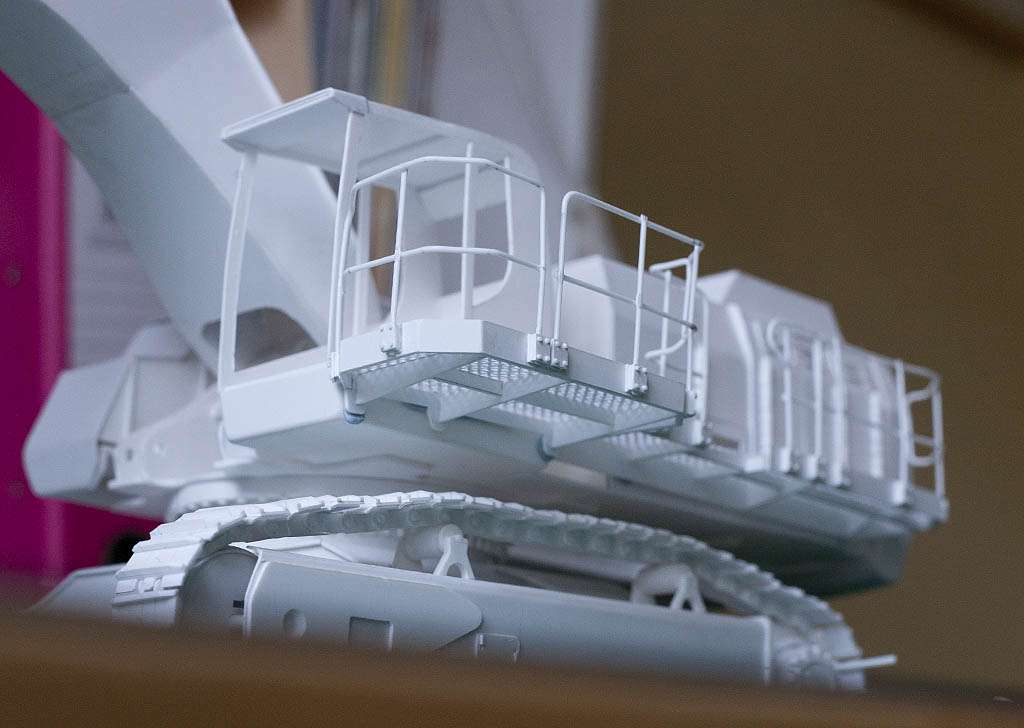
|
|

Rank: Advanced Member
Groups: Member
Joined: 1/11/2007
Posts: 9,004
Location: Lincolnshire
|
Looking very nice indeed!
Paul R
|
|
Rank: Advanced Member
Groups: Member
Joined: 6/27/2007
Posts: 2,647
Location: Fort McMurray, Alberta
|
I'm so impressed by this build, that it's hard to put it into words. Keep up the great work, and keep the updates coming. I can't wait to see this finished.
|
|
Rank: Advanced Member
Groups: Member
Joined: 5/11/2009
Posts: 570
|
Thanks guys - it's nice when the details go on the model because they make all the boring and tedious bits worthwhile! Here's a video of the model... perhaps I'll do more when 1) I have a better camera, and 2) I'm not looking after my son! Click to redirect: 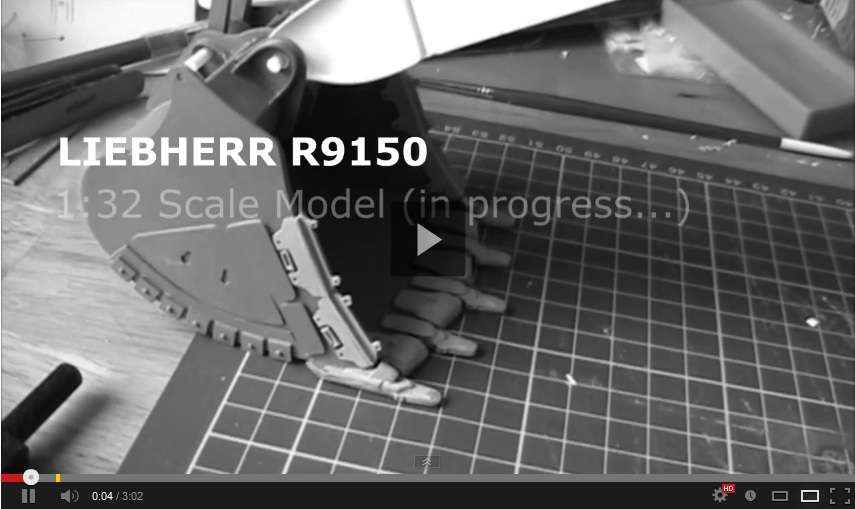
|
|
Rank: Advanced Member
Groups: Member
Joined: 8/8/2002
Posts: 5,515
Location: New Jersey
|
Nice video even have the railing retaining blocks complete with 4 bolt heads nice touch of realism there ! Chet
I live in my own little world it's ok they know me here
|
|
Rank: Advanced Member
Groups: Member
Joined: 5/11/2009
Posts: 570
|
Here's an update of a different kind - disaster strikes! I left the living room for a couple of minutes and returned to find that my son had managed to reach my cutting mat (big one, A2 size) and pull it off the table... and the model with it. So the model came crashing to the floor from a height of 75cm. 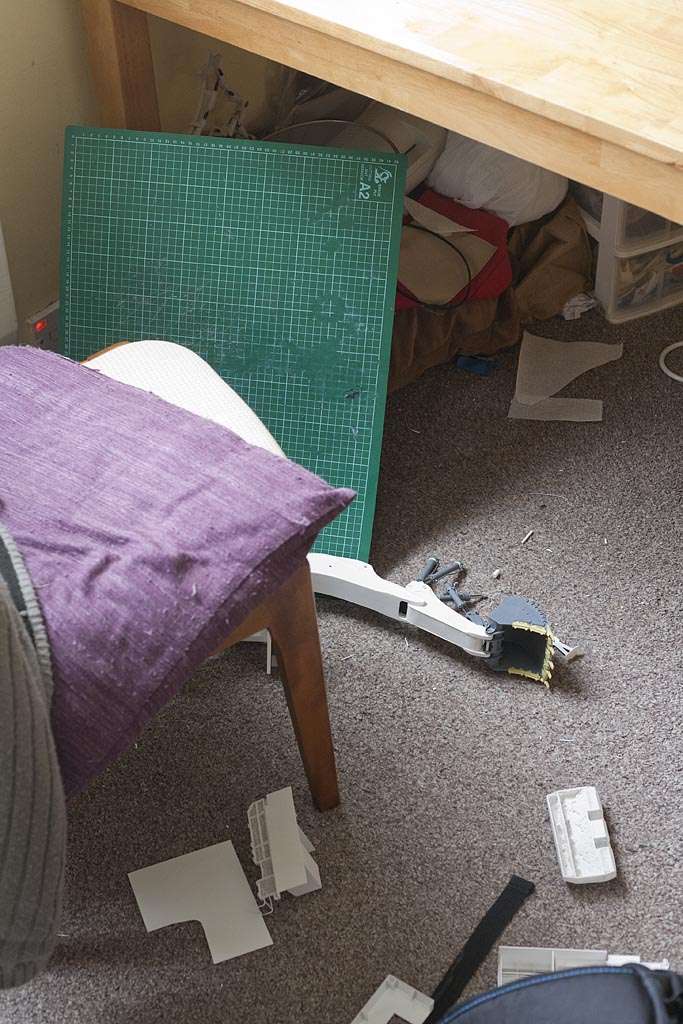 But, amazingly, no damage to the model whatsoever - that styrene is made of tough stuff, and thankfully because I had tacked parts of the model together they came apart quite easily, and the rest (including the tracks) escaped unscathed. You can see the engine grill section at the bottom right of the picture... it fell far! I've taken a short break and will get back into it on Monday... still having an absolute NIGHTMARE trying to find tinted plastic for the cab windows.
|
|
Rank: Advanced Member
Groups: Member
Joined: 6/4/2006
Posts: 7,744
Location: arlington, Tx
|
Well that sucks, that styrene can take a fall. Hopfully you can get it all back together quick. I like the video shows off more than just pics Jason
Nikl Scale Models nikl scale models shapeways store
|
|
Rank: Advanced Member
Groups: Member
Joined: 6/4/2006
Posts: 7,744
Location: arlington, Tx
|
Well that sucks, that styrene can take a fall. Hopfully you can get it all back together quick. I like the video shows off more than just pics Jason
Nikl Scale Models nikl scale models shapeways store
|
|
Rank: Advanced Member
Groups: Member
Joined: 1/11/2007
Posts: 9,004
Location: Lincolnshire
|
I looked at the photo and my heart sank! Then I read the post and thought "you lucky man!".
I hope your son now knows not to mess with Daddies stuff!
Paul R
|
|
Rank: Advanced Member
Groups: Member
Joined: 8/8/2002
Posts: 5,515
Location: New Jersey
|
That sucks... lucky it took a licking and kept on ticking ! Quote:Still having an absolute NIGHTMARE trying to find tinted plastic for the cab windows. That is an easy fix... go get automotive window tint from an autoparts store comes in different shades light to dark.. Buy regular clear thin plastic and cut for windows follow tinting directions and use a credit card to squeegee on the tint you will be more than happy with the results !Usually comes with a small rubber squeegee. Regards Chet
I live in my own little world it's ok they know me here
|
|

Rank: Advanced Member
Groups: Member
Joined: 9/12/2012
Posts: 484
Location: San Diego, California
|
Davie82 wrote:still having an absolute NIGHTMARE trying to find tinted plastic for the cab windows. Off the top of my head I can only think of one option that will look clean: Tinted adhesive film for automotive lights. AKA headlight/taillight tint film. It's pretty thin, and a million times more uniform than any hobby shop spray-on tint. The adhesive is forgiving enough that if you mess up, you can peel it off the clear window plastic without headache. It'll allow you to change it with ease if you're unsatisfied with the result. They sell two or three different darknesses. Ebay is a good source for it. I got a 12x28" roll for less than $5 shipped. This is the "light gray" one.  Hope this helps! LatticeCraneMan wrote:
That is an easy fix... go get automotive window tint from an autoparts store comes in different shades light to dark..
Buy regular clear thin plastic and cut for windows follow tinting directions and use a credit card to squeegee on the tint you will be more than happy with the results !Usually comes with a small rubber squeegee.
Regards
Chet
That's also a good idea Chet. However, the type of tint that you usually find at your local auto store is going to be 15-20 dollars more than the headlight lint, the adhesive is super aggressive, and the less expensive ones will blue/purple over time. Just speaking from my experience with the two products. One clear advantage of the window tint is it's thinner, but it makes it tear and come apart if you try to remove it once the adhesive cures and sets it.
|
|

Rank: Advanced Member
Groups: Member
Joined: 9/14/2011
Posts: 989
Location: Buffalo, NY
|
Awesome work! I have some "Clear Gray PVC" from Midwest Products, product number 704-04, size .005"x7.6"x11". Midwest Products WebsiteIt's too flimsy by itself, but maybe they make a thicker version? I think micro-mark makes a clear window adhesive, which might work for adhering it to a plain, clear piece of plastic without any discoloring. There are also spray tint products, but it may be too dark. "Night Shades" is the common name if I recall correctly. Rockblocker style fog light tint/protection might be another avenue too, though I can't find their website.
Daily Diesel Dose.com| All Ready Mix.com | Plowsite DOT Thread | If your only contribution is complaining, please don't contribute!
|
|
Rank: Advanced Member
Groups: Member
Joined: 5/11/2009
Posts: 570
|
Thanks for all the helpful suggestions guys. I actually bought a small sample of automotive tint film but it didn't work well because it had an annoying "frosty" texture and was difficult to see through. Here in the UK the choice of tint films is pretty poor... either it's almost black, or it's got some colour in it, or it's totally mirrored on the outside and you can't see a darn thing through it. MEH!
However, I have one more idea, kind of along the same lines: filter gels for studio lights/camera flash guns. Despite being called "gels" they are basically exactly the same as automotive tint films but much higher quality because of their intended use. I have ordered a 24cm x 24cm sheet which I can double over if it's not dark enough, and it cost me the princely sum of £2, about $3. :d/
|
|
|
Guest |
