|
|
Rank: Advanced Member
Groups: Member
Joined: 5/11/2009
Posts: 570
|
Hi folks, So I've had my 11200 for a few days now and I've been itching to try out an idea I had even before I got the crane, so I got to work on Saturday and have put in a considerable amount of time on these boom cylinders. These are very much a prototype and given what I've experienced with testing I don't think they'll be taken to a final state. They work perfectly and IMO look good, but there are problems with the size of the jackets (still smaller than on the real machine!) and they rub against the boom in transport mode. Anyways, I've never liked how the model companies use very thick plastic cylinder jackets, not to mention that WSI, Conrad and even YCC do it with the top quality locking metal cylinders too. On the real cranes the jackets are very thin compared to the body of the cylinder, and it's possible (and not difficult) to do this to scale. It really adds to the look of power that these machines have. I used 11.1mm diameter styrene tube for the jacket, and inside are two telescoping steel tubes mounted upside down with the narrower tube to the bottom. The jacket takes none of the strain and the steel is so strong that only one of the cylinders needs to be pinned in place to support the entire boom. The steel tubes come from a telescopic back scratcher that I got for £1 in Tesco (not a joke - really!). On one side I drilled an additional two holes to experiment with boom placement; IMO it kills the realism but the functionality is very nice for displaying the model, and I much prefer the look of the cylinders to any others that are currently available. The pictures show the three height options I have chosen:  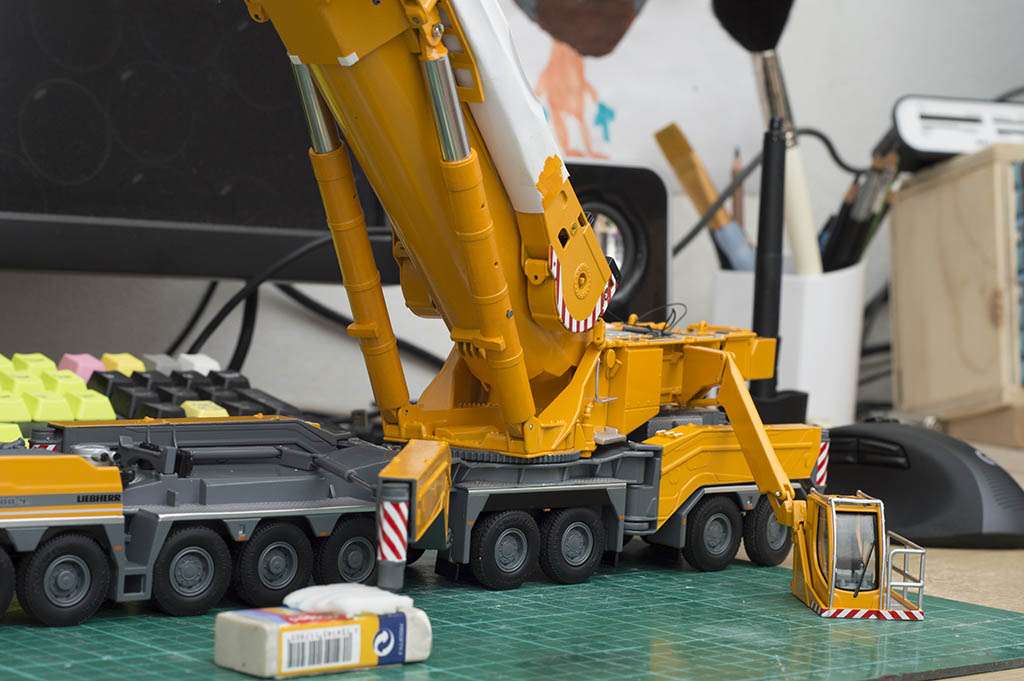 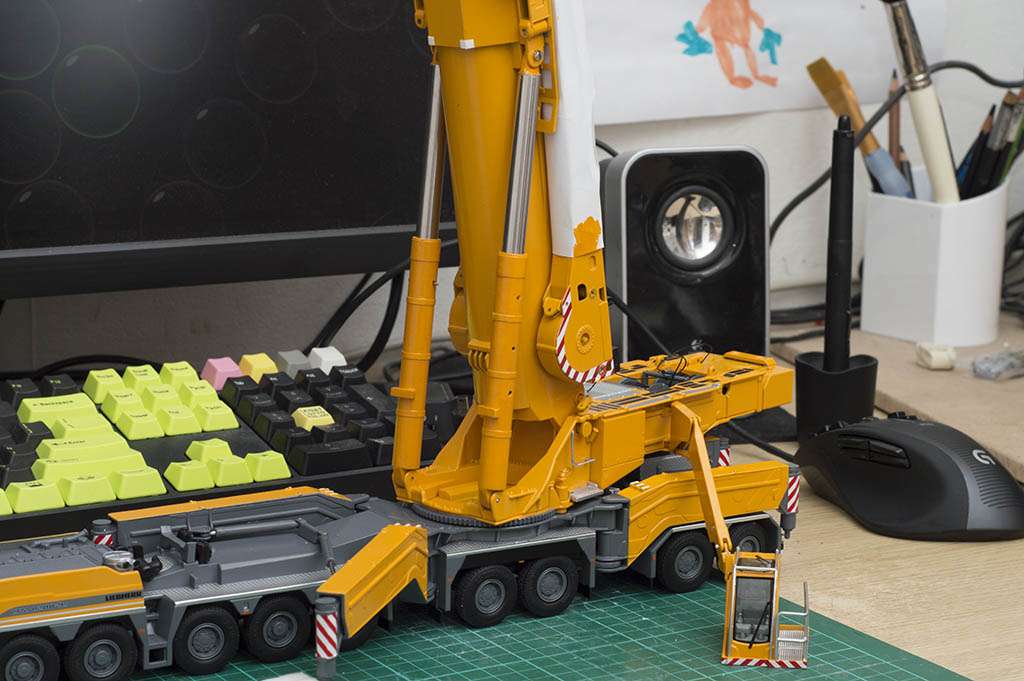 I also made a small jib for the whip line. This was tricky but not especially difficult, and instead of paying silly money for three brass pulleys I decided to make my own from styrene and they work very well.   The last thing I want to share is the poor quality of the last section of boom... I'm really disappointed this time in NZG because I don't feel that the quality of this 11200 is the same as my first one. If you look at the picture you can see that it is very badly off axis at the head of the boom. Does anybody else have this problem, and do you think I should get in touch with NZG about this? 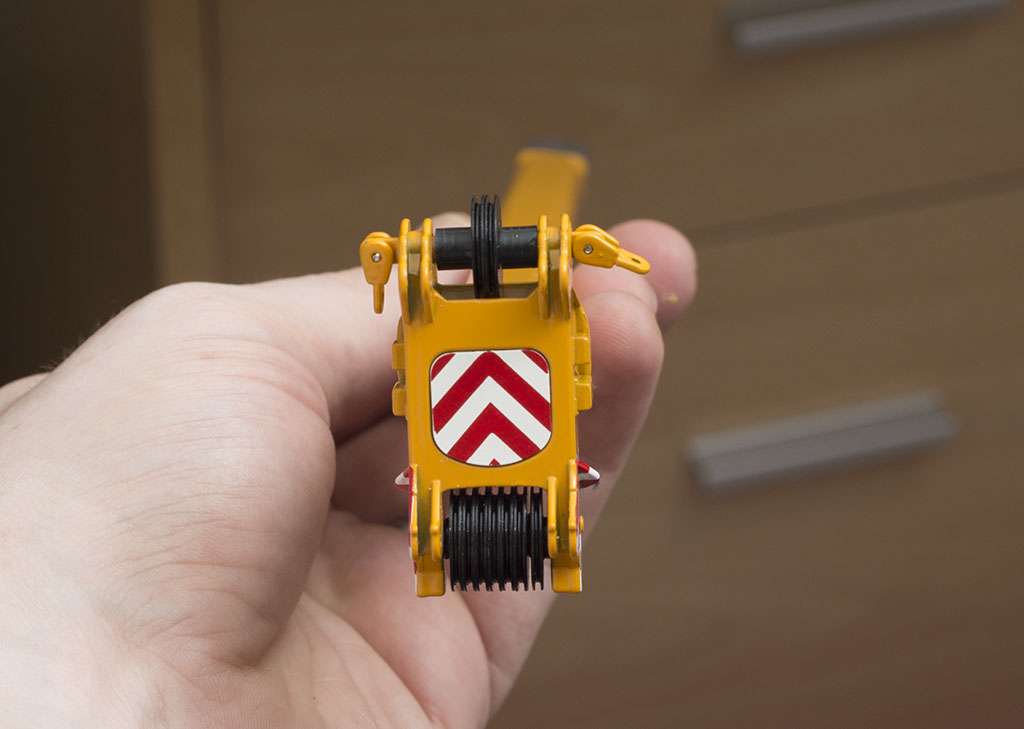 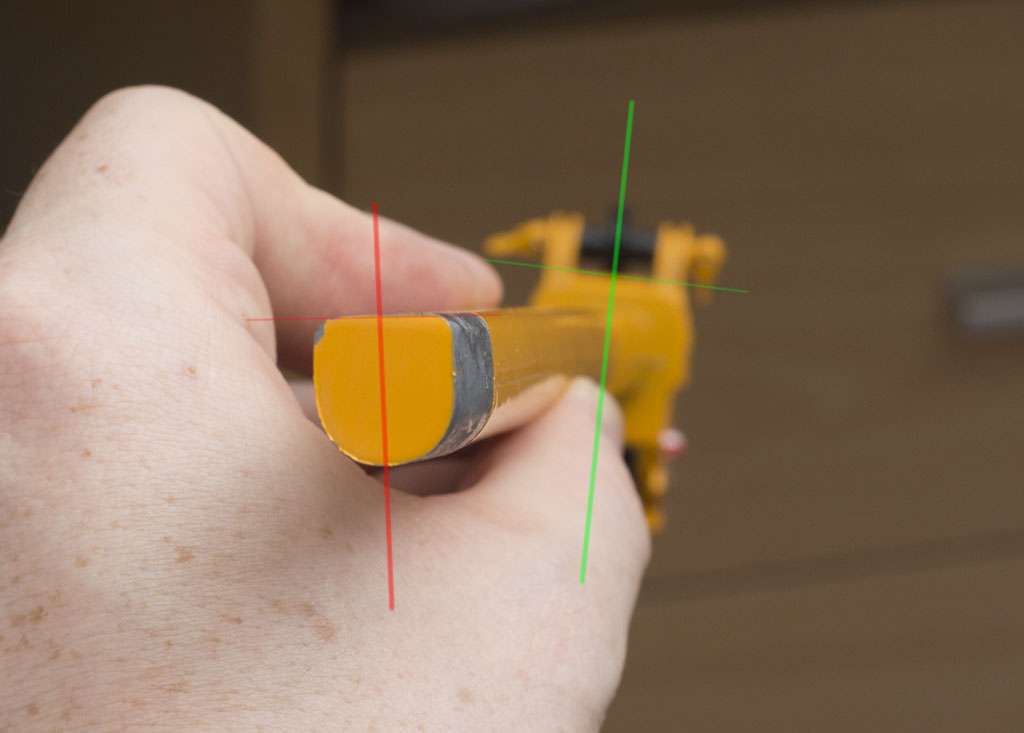 Thanks everyone. 
|
|

Rank: Advanced Member
Groups: Member
Joined: 6/27/2013
Posts: 937
Location: Quebec, Canada,
|
I really like the way you are explaining in details the different steps you've taken in modeling your crane. Thanks for sharing.  Stephane
___________________________________________________ Playing with toys since 1970, now building them.
|
|

Rank: Advanced Member
Groups: Member
Joined: 8/27/2014
Posts: 305
Location: Canada, Alberta
|
Nice cylinders man, and yes I would contact NZG about that issue. I have found the customer service to be one of the best and they helped me replace all the issues I had on my Denzai 11200.
A Millwright..... in Alberta.
|
|

Rank: Advanced Member
Groups: Member
Joined: 1/11/2007
Posts: 9,004
Location: Lincolnshire
|
Definitely contact NZG. They are usually very good.
I like the boom cylinders you've made but agree that the holes detract from it. In the past, I have used YCC cylinders and put some wooden rods down inside the cylinder jackets to hold the boom up. Cut to length depending on the angle I want.
Paul R
|
|
Rank: Advanced Member
Groups: Member
Joined: 5/11/2009
Posts: 570
|
Thanks guys. As a matter of fact I just contacted NZG this morning and I received a reply within an hour asking me for my address so they can send a replacement part. That is simply outstanding customer service! It is just as well because I have also since noticed that one of the pulleys on the boom head is warped. At least now I have spares!
Re. the holes in the cylinders, I was in two minds about drilling them and I decided ultimately that the compromise of better display potential at the cost of making these marks was worthwhile - the cylinders are completely sealed so I can't position them from inside. I did consider other approaches and ultimately it's nice to have the flexibility without having to remove the cylinders each time. I'm still tempted to try the screw idea with a bolt inside, much like the outriggers, although I'm not sure if the threads would support the weight of the boom. It really is ridiculously heavy!
|
|

Rank: Advanced Member
Groups: Member
Joined: 5/15/2013
Posts: 222
Location: Netherlands
|
Your boom cilinders look really good, nice job!
|
|
Rank: Advanced Member
Groups: Member
Joined: 5/11/2009
Posts: 570
|
|
|
Rank: Advanced Member
Groups: Member
Joined: 1/11/2007
Posts: 9,004
Location: Lincolnshire
|
Now those I'm liking!
|
|
Rank: Advanced Member
Groups: Member
Joined: 5/11/2009
Posts: 570
|
Me too Paul - and thanks! I'm really taking my time with these as they are not prototypes, so all my measurements are as precise as I can possibly make them and I want the finish to be the best I can possibly get. I've already put a lot of time into them and will be spending many more hours with detailing and then painting. I wanted to be sure of the load capability of the cylinders so in the test fitting phase I extended the boom a bit to put more weight on them, and they are completely solid even in this low boom position. I also did a test fit with the boom down, and in transport mode. Naturally, the cylinders would sit a bit higher because they are propped up with the blocks underneath, but even now I really like how PHAT they look. 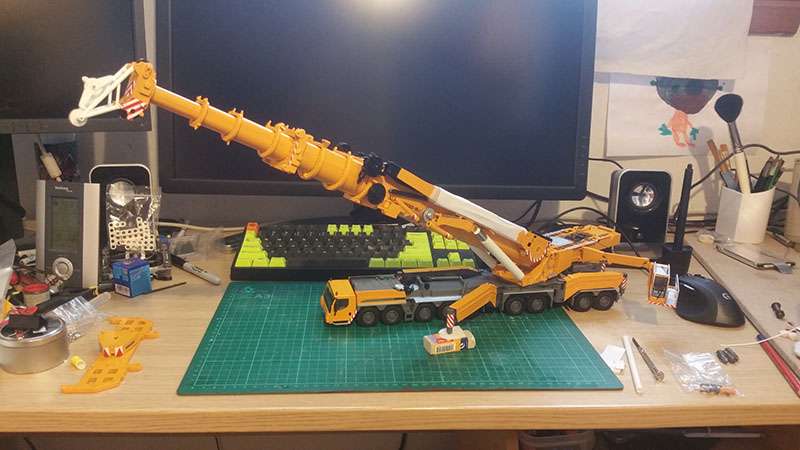 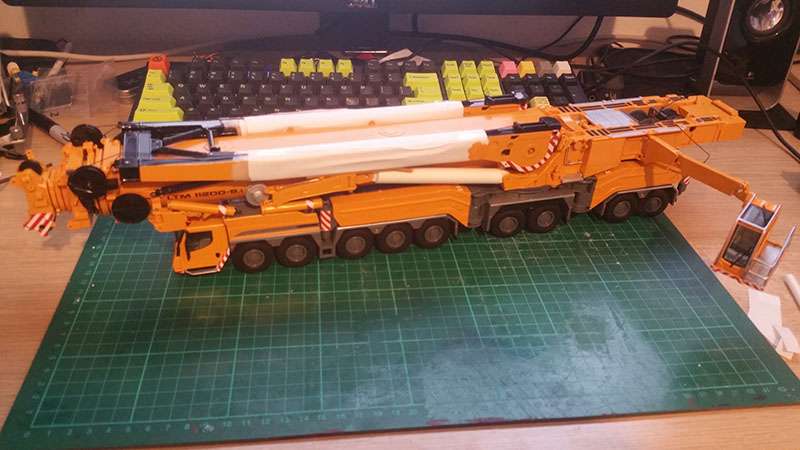 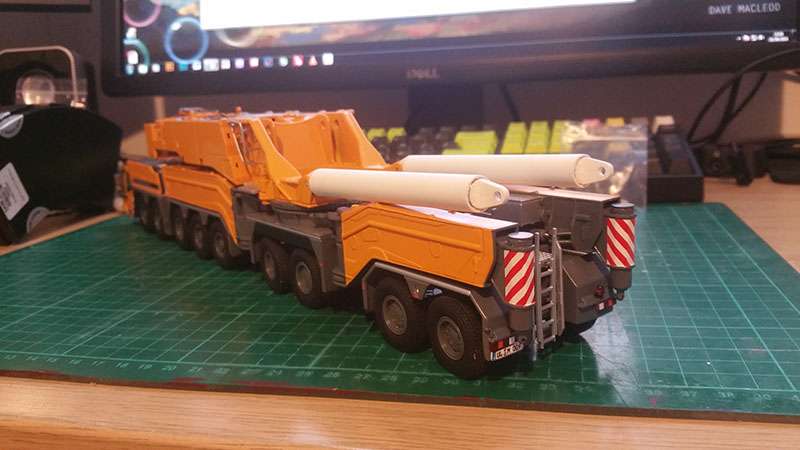
|
|

Rank: Advanced Member
Groups: Member
Joined: 8/10/2002
Posts: 1,588
Location: England
|
If you could develop a swivel connector at the top of the piston so that the piston could be extended/retracted by rotating it with your fingers, you would be on to a winner...
http://www.CranesEtc.co.ukhttp://www.Twitter.com/CranesEtchttp://www.YouTube.com/CranesEtcTVCranes Etc on Facebook
|
|
Rank: Advanced Member
Groups: Member
Joined: 5/11/2009
Posts: 570
|
Thanks Ian - it's a great idea and could be done with the right materials and equipment, but perhaps too expensive for any manufacturer to consider on a large scale? Maybe YCC will do it, or maybe we'll see more realistic cylinders like this on future scale models from the "big three"... one can only hope. At first my idea was to epoxy the bolt inside the upper part of the cylinder so that it could be adjusted by twisting the exposed metal part, but I've decided not to because it's nice to have the option of removing the bolt altogether, and indeed adjusting it with a power tool for convenience.
|
|
Rank: Advanced Member
Groups: Member
Joined: 5/11/2009
Posts: 570
|
So I've been able to put in a few hours each day on the cylinders to finish the detailing and then spend a considerable amount of time (and frustration) on the painting. With that out of the way, the cylinders are now pretty much finished and installed on the model whilst I think what I'll do next. I still haven't fully rigged her yet and I don't plan to do that for a while yet, but I'm really happy with how the cylinders turned out (especially the paint colour, which I mixed myself). I also finished up the auxiliary jib and am waiting on the arrival of my replacement boom section so that I can put NZG's own black metal pulleys into the part. As for livery, I'm pretty tempted to go with Max Bogl this time but I'm not sure about the yellow - is it just standard Liebherr yellow? If so, then it's pretty much a dead cert! 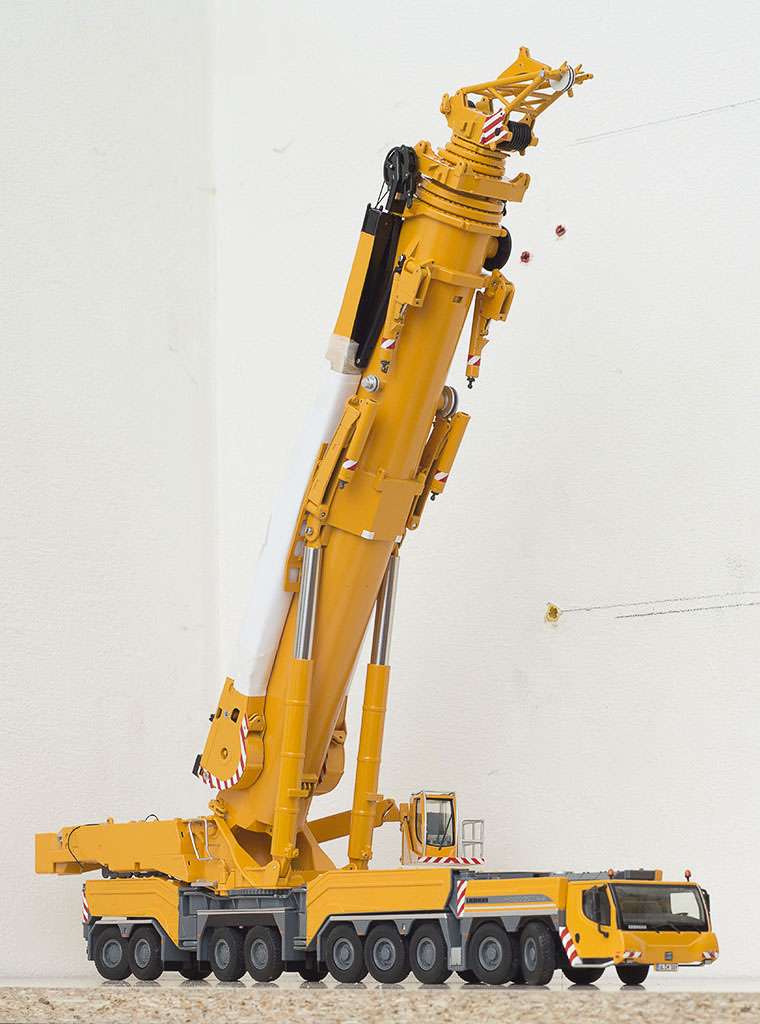
|
|
Rank: Advanced Member
Groups: Member
Joined: 1/11/2007
Posts: 9,004
Location: Lincolnshire
|
Looks awesome!
Paul R
|
|
Rank: Advanced Member
Groups: Member
Joined: 8/11/2016
Posts: 200
Location: Orlando, FL
|
Totally awesome work Davie82. I would never have the guts (even if I did possess the ability) to rip up a brand new crane to make modifications. I am just barely able to manage simple repairs on them. You sir, are truly talented - I am talking master talent here)!! On a side note, I have been just trying to replicate (approximate would be a better word) the NZG Liebherr HS 855 Boom Jib to use/fit on a Conrad Liebherr HS 885. Mega hours and frustration which so far have not amounted to much. Then I see your jib work (which you hardly even mention - I guess because it is such a common place build for you now).  I sure wish some day you would put up a tutorial (even just the beginning basics would be nice) on how to build a boom jib (or if you have already done that - please direct me to it). And don't even get me started on trying to build styrene shackles (I have now given up on that and just bought the die cast ones from Weiss Bros and YCC). However, if it IS possible to build styrene shackles, I would sure love to know how. *hint* *hint*  Simply amazing work. Thanks for sharing Simply amazing work. Thanks for sharing.
|
|
Rank: Advanced Member
Groups: Member
Joined: 5/11/2009
Posts: 570
|
Thanks Paul and Don!
Don - I'm really humbled by your kind words, and I certainly wouldn't consider myself a master compared to some of the other guys on this forum. I just try to do the best I can each time and that usually means flying by the seat of my pants, but with several projects under my belt I've definitely picked up some valuable tips and tricks. I'll see what I can do about putting a tutorial together for my approach to jib building, but it may take a while as I'm pretty busy at the moment!
A couple of things I would mention now are as follows: 1) appropriate selection of quality tools (very sharp knife, metal rule & square, vernier caliper, and lots of grades of sand paper or nail files). I often work with extremely small tolerances and the only way to do this is with a vernier (or digital) caliper. 2) accurate measurements. Measure, measure twice and measure again.
It goes without saying that a fair bit of maths goes into structures like the jib above, and even simple-looking things can be really tricky to put together in styrene. It all comes with practice, and (you guessed it) A LOT of patience and frustration!
|
|
Rank: Advanced Member
Groups: Member
Joined: 5/15/2013
Posts: 222
Location: Netherlands
|
Davie82 wrote:I'm pretty tempted to go with Max Bogl this time but I'm not sure about the yellow - is it just standard Liebherr yellow? Here's someone who has the Max Bögl version... looks like standard yellow RAL 1007, but without direct comparison you can't be 100% sure from photos. The real crane should have a different yellow, since RAL 1028 is the Max Bögl colour... and NZG has used RAL 1028 before, with the McNallys cranes. Edit: browsing through the Max Bögl topic on the Hansebube forum, you can't be sure either - when one and the same crane looks different on different photos  On most photos (further back into the topic) it looks darker though, so I'd say RAL 1028.
|
|
Rank: Advanced Member
Groups: Member
Joined: 5/11/2009
Posts: 570
|
Victor - thanks for the help! I didn't realise that Max Bogl used a different yellow as it looks almost identical from photos. They are extremely similar, with the Max Bogl yellow being very slightly lighter than Liebherr yellow. I won't be doing any repainting, so perhaps it'll have to be Senn Ag again after all! 
|
|
Rank: Advanced Member
Groups: Member
Joined: 5/11/2009
Posts: 570
|
My replacement boom section arrived in the post today and it has been fitted and the model is basically perfect (except for the superstructure cab, but that's a minor fix I can do myself). When I find the time I will upload photos of the jib with the metal pulleys installed and hopefully I'll be able to rig the model with both winches soon. 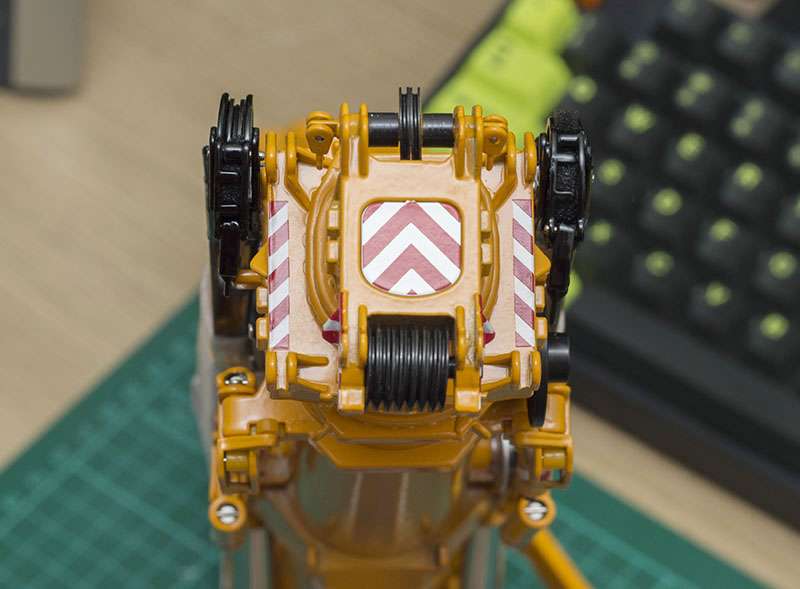
|
|
Rank: Advanced Member
Groups: Member
Joined: 9/11/2016
Posts: 87
Location: The West Island of NZ
|
Very nice clean work there Davie82
|
|
Rank: Advanced Member
Groups: Member
Joined: 5/11/2009
Posts: 570
|
Marty K - thanks! I'm ticking off things on my to-do list one by one as I find the time to do so, and something I really want for this model is the 5 ton weights so I can display it with full ballast. The only drawback is that the YCC ones are LUDICROUSLY expensive (almost £20 each including shipping), so I thought I'd have a go at making my own. I can say without any hesitation that this has been THE most difficult scratch building project I have ever undertaken, and it has been extremely frustrating at times, but I'm happy with the result. I certainly wouldn't sell these, but they'll do fine on my own crane. I made a master weight from sheet styrene and used it to make a mould, and this evening I've been pouring black fast cast resin into the mould and having mixed results because my resin is way past its shelf life, especially the isocyanate which has become so viscous it's almost impossible to pour or mix. From seven casts I have four good pieces, but I've got more resin coming in the post tomorrow or Friday and I should have a 100% success rate with the new resin. I only need four plates but I might make eight just to have them handy. More to follow soon - thanks for looking! 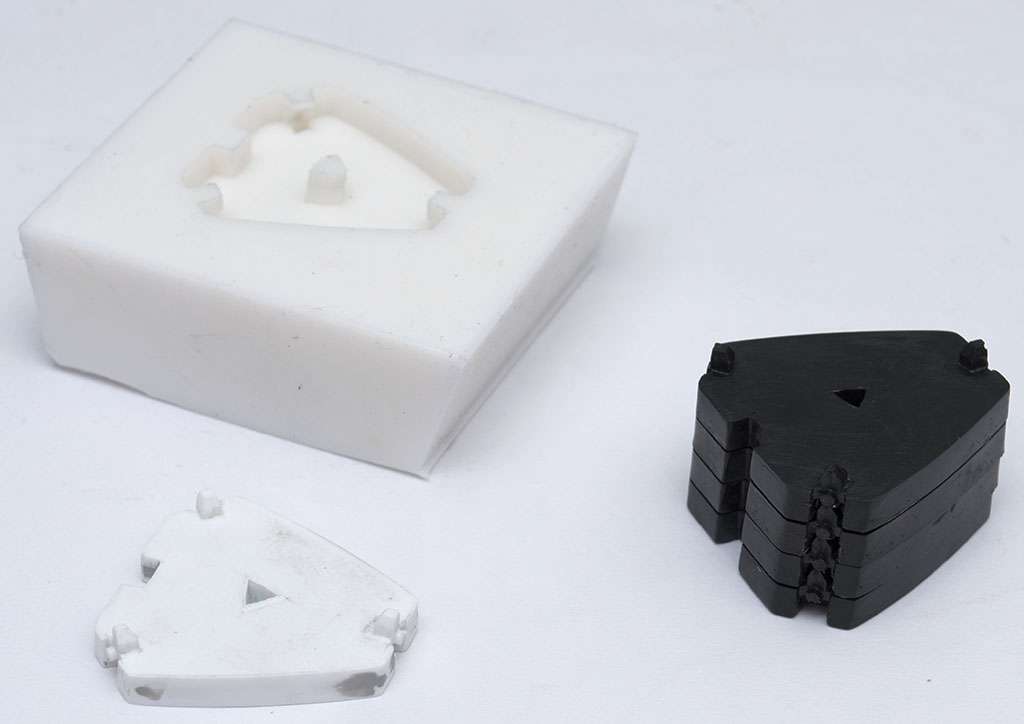
|
|
|
Guest |
