|
|
Rank: Advanced Member
Groups: Member
Joined: 5/11/2009
Posts: 570
|
So because of all the awesome building going on in this forum I've been inspired to scratch build an excavator again, and this time I'll finish it! But why the R984C? Well, simply put, it's my favourite construction machine, and the Conrad version is really crap (let's be honest). I want to make my version as detailed as possible, hence working in 1:24 scale, and I'll be taking my time to ensure that everything is faithful to the original machine. The R9150 was started 4 years ago and I'm amazed that there's still very little information available online, so it'll remain shelved for the foreseeable future. The R984C however is in plentiful supply around the world and I'm going to try to get access to the real machine so that I'm working with the best reference possible. For now, I'll make do with brochure schematics and photos. I don't even know if there are any R984Cs operating in the UK so I'll have to put my feelers out. Progress will be very slow on this one as I'm extremely busy at the moment, but I'll try to chip away at it a little at a time and hopefully it won't take four years.  This first part is still not finished but it's mostly done - I still need to fill some holes and do a lot of sanding to round off the sharp edges, and there are some details on the inside that need to be added. 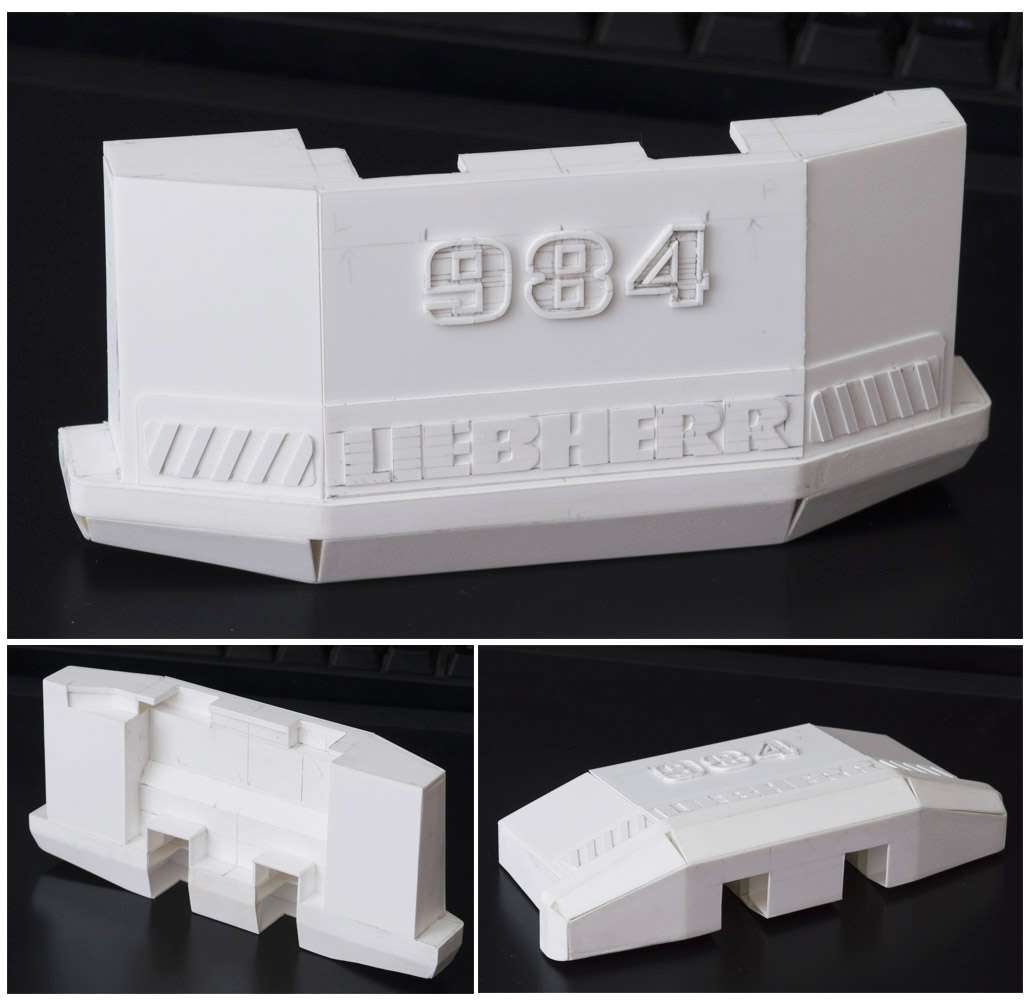
|
|

Rank: Advanced Member
Groups: Member
Joined: 2/22/2008
Posts: 213
Location: Columbia, MD
|
Davie82,
You are definitely off to a great start!! The detail you show on the counterweight alone shows that you are going to end up with a terrific model. Taking your time to get it right will pay off in the end with a model you will be very proud of, and the satisfaction you will receive knowing that you crafted it from scratch will be rewarding. Best wishes on this project, and show it off as you progress.
Models like this inspire.
Mario T
|
|
Rank: Advanced Member
Groups: Member
Joined: 1/22/2013
Posts: 203
|
Davie 82, I couldn't agree with you more. Conrad makes a solid model ,but the detail, not so good. I too would like to detail up the 984's that I have. Just can't seem to find close up pictures to do realistic detailing. I try to get it right without making things up. Good luck on the project. By the looks of the counter weight, its going to be great. I will follow with great interest. Mike
g
|
|

Rank: Advanced Member
Groups: Member
Joined: 6/4/2006
Posts: 7,744
Location: arlington, Tx
|
Great start buddy , you have to love the 1/24 scale easy to build and add detail. But man they get big 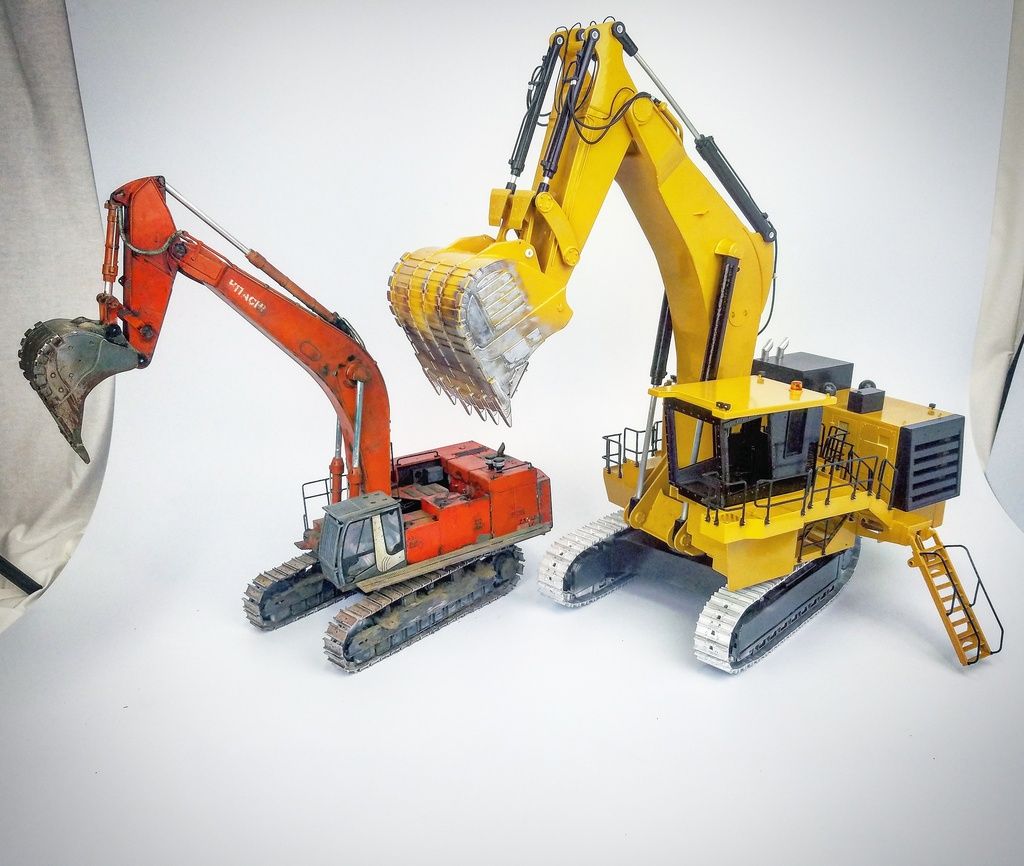
Nikl Scale Models nikl scale models shapeways store
|
|
Rank: Advanced Member
Groups: Member
Joined: 5/11/2009
Posts: 570
|
Thanks guys - I'm really excited about this one, even though it'll be really tough going at points. I'm already spending a lot of time just doing the planning, because there are many ways to build parts from styrene but I want the best-looking and most economic ways possible. I might do some casting but I want this project to be as "scratch built" as possible, so probably no 3D printing for me! Jason, I totally agree with 1:24 being great for detailing, but big as well. I put the machine together in Photoshop from the various components in the brochure, scaling them up as required. In doing this I discovered that Liebherr have not been accurate with the placement of pins on the stick, so I've had to adjust these myself based on photos, but I'm pretty happy with this 1:1 print of the machine in 1:24 scale, which will serve as the main reference for measuring proportions. The model is going to be around 24 inches long. 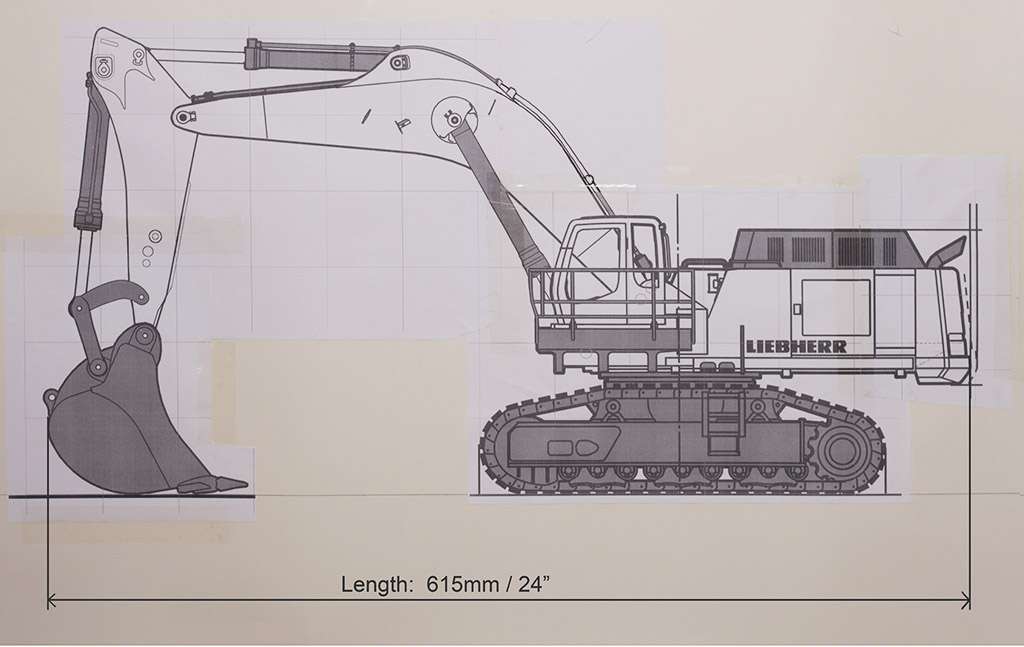
|
|
Rank: Advanced Member
Groups: Member
Joined: 5/11/2009
Posts: 570
|
I managed to set aside a little more time than I originally expected so I've been able to do the "hard maths" part of the process, which involves calculating the size of each crawler link so that they fit perfectly together around the drive sprocket (which has 12 teeth) and are able to fit round the track with appropriate tension. The real machine has 49 links per side... I had to adjust the idler very slightly to get this perfectly but I'm glad this is done and now I can think about building a jig so that all my links are exactly the same size. I may or may not cast some links in resin... if I'm building a jig it seems a bit pointless to spend extra time making everything required for the casting process, which itself can be very time consuming. Here's my schematic using a photo of a single link which has been duplicated and positioned manually around the track frame. I've superimposed a guide box over the link so that I know the external size and the placement of the pins in each link. The biggest constraint here is the drive sprokect, as the pins need to be at exactly the right spacing to lock inside it, so the tolerances are really tight! 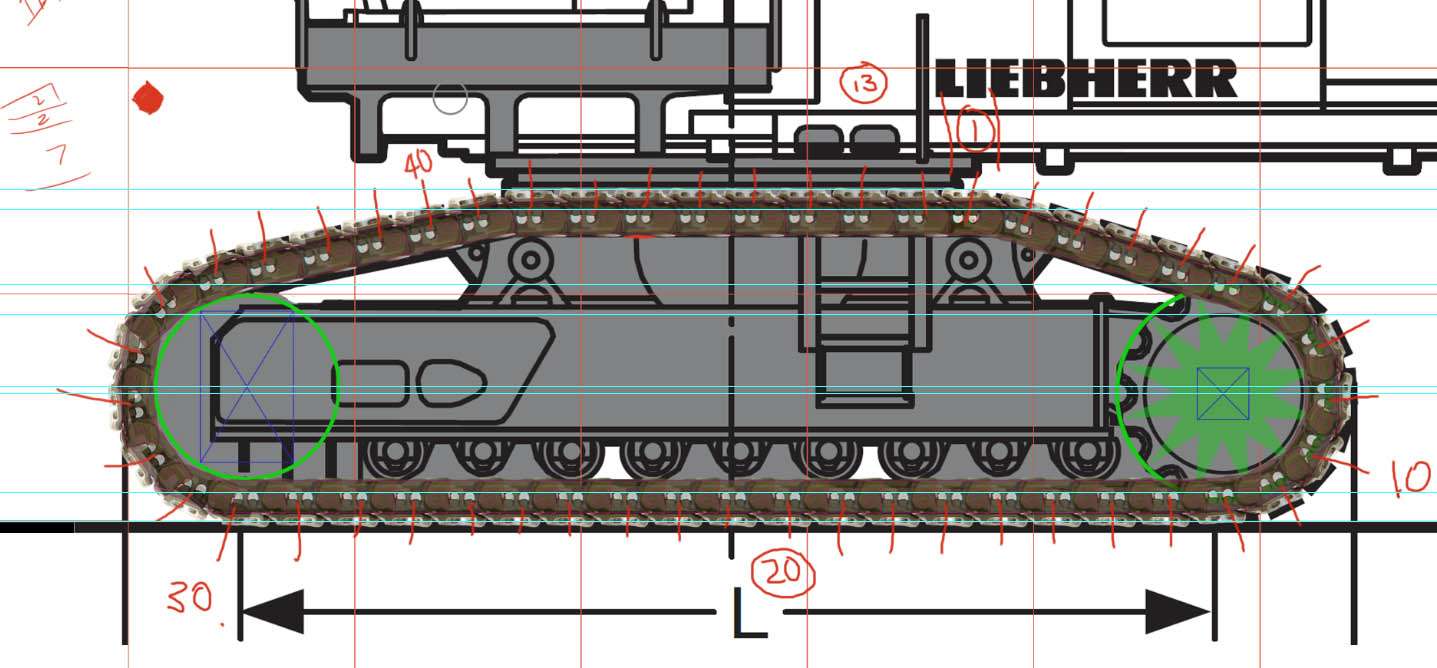
|
|

Rank: Advanced Member
Groups: Member
Joined: 8/19/2013
Posts: 694
|
Great! I look forward to following your project Davie
|
|
Rank: Advanced Member
Groups: Member
Joined: 5/11/2009
Posts: 570
|
Thanks Jamie! I made a lot of progress on crawler links yesterday - I've decided just to knuckle down and get them out of the way as it's by far the most laborious and tedious part of the project. This time round I'm doing it differently from how I did it on the R9150, so instead of bending the styrene to make the links I'm using pre-cut pieces of styrene to make a stepped effect on each side of the link. I have done 50 of these so far and it's taken several hours, and I'll hopefully be well underway this weekend. After this part is done, the next step is building a jig for the holes so that their spacing and alignment is as accurate as possible. Once the holes are drilled I'll be joining each pair of link halves at the back with a piece of styrene tube, so that the chain will be independent from the pads, just like on the real machine. This will of course be temporary as the pads when made will be permanently attached to the chain. Hopefully this will all become clearer as I make progress! Here's my pre-cut styrene - one half is 1.5mm pieces, and the other half is 1mm pieces. They are fixed with a thin film between so that the links don't rub against each other and there should be plenty room for paint before they are joined together. 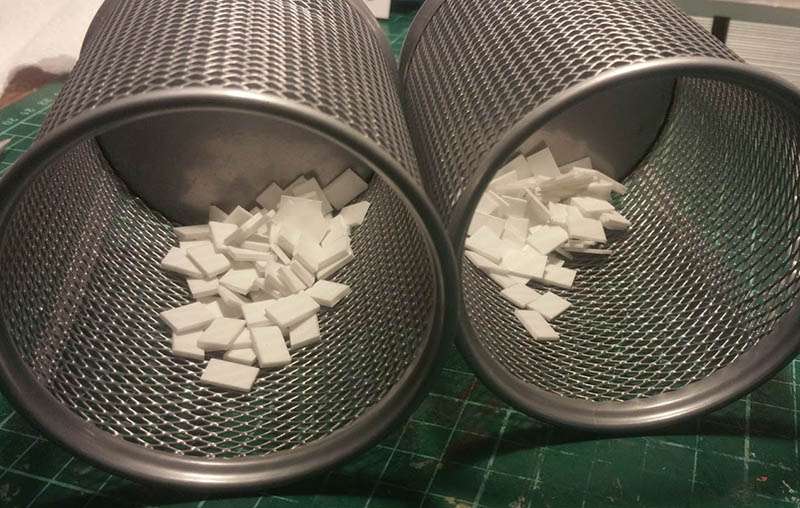 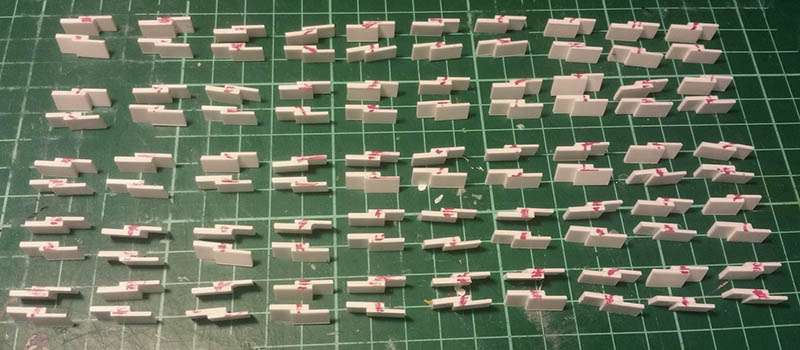
|
|

Rank: Advanced Member
Groups: Member
Joined: 6/4/2006
Posts: 7,744
Location: arlington, Tx
|
Looks like a huge pain, but the payoff will look great. I would just do about 8 then mold and cast. Or just 3d print them all, got to love technology
Nikl Scale Models nikl scale models shapeways store
|
|
Rank: Advanced Member
Groups: Member
Joined: 5/11/2009
Posts: 570
|
Yeah technology would take a lot of the monotony out of it, but it also takes away a huge part of the craftsmanship as well and I have to say it's the planning and cutting that I enjoy perhaps even more than the actual assembly! Having finished cementing all the bits of each link together, I made a jig for drilling the holes this evening. I've done all the holes for one side of the tracks, so that's 49 links, almost 200 holes drilled carefully with a lot of consideration for the orientation of the drill. I think I'll have to make another jig for the other side of the tracks, which works out nicely as it won't interfere with what I have already and it's easy enough to make. Having drilled and temporarily pinned each side of each track link together, I've started making the final links one at a time... VERY time consuming. I cut a width of slightly bigger tube and glue each side of each link together, making sure holes are aligned and the bond is strong. I'll probably go over it again later with CA just to make sure it holds. The links are not perfect by any stretch, but I'm very happy considering the tools I've been using, and a lot of this is flying by the seat of my pants, hoping it will work. Having to redo any of this would be a really big setback, so I'm planning carefully and crossing my fingers all the time.  Because this is 1:24 I'll be adding detail to each link; this part of the process is all about getting the shape and holes nice and tight. 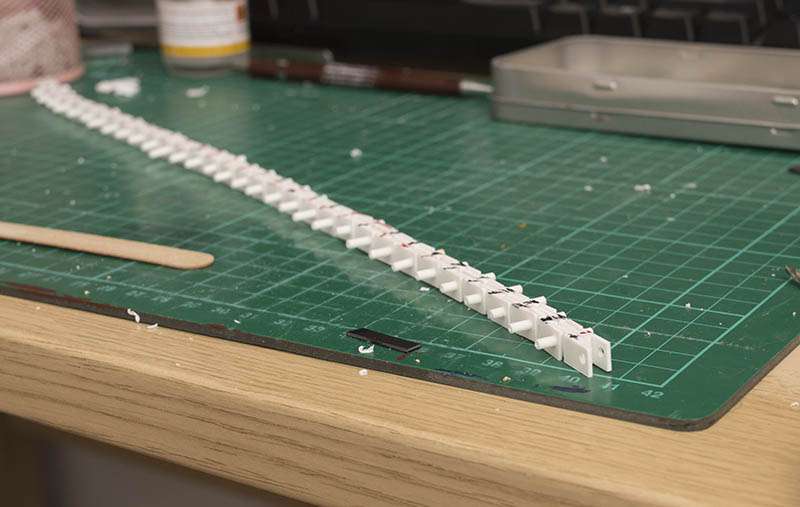 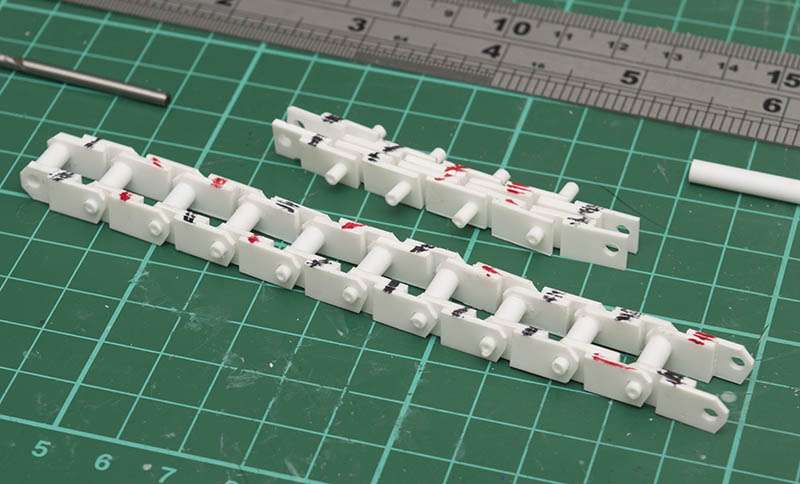
|
|

Rank: Advanced Member
Groups: Member
Joined: 6/4/2006
Posts: 7,744
Location: arlington, Tx
|
Looks great nicely done on the tracks
Nikl Scale Models nikl scale models shapeways store
|
|
Rank: Advanced Member
Groups: Member
Joined: 5/11/2009
Posts: 570
|
Thanks Jason! So I've been working hard at this (ridiculous number of hours already, working till midnight some days so I can squeeze as much time in as possible) and I've made really good progress on the undercarriage. I have finished the drive sprocket which will be duplicated in resin as I really don't want to make it again, and I've done the bulk of both track frames. I've also finished one side of the track chain, which contains 49 individually assembled links. I'm very pleased with the result this time as it's far superior to what I made for my 1:32 R9150, however there's still a long way to go in terms of finish and detailing. I hope to finish building and assembling the undercarriage before I start work on anything else... unless I get so fed up of it that I need to take a break! Some pics for now... more soon.  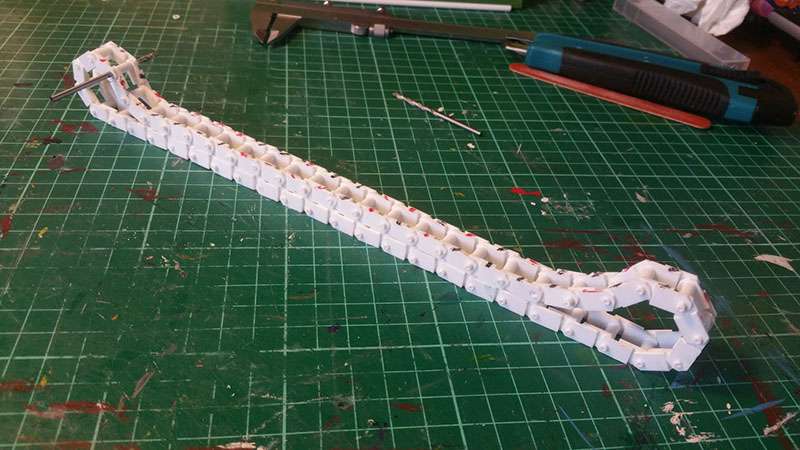 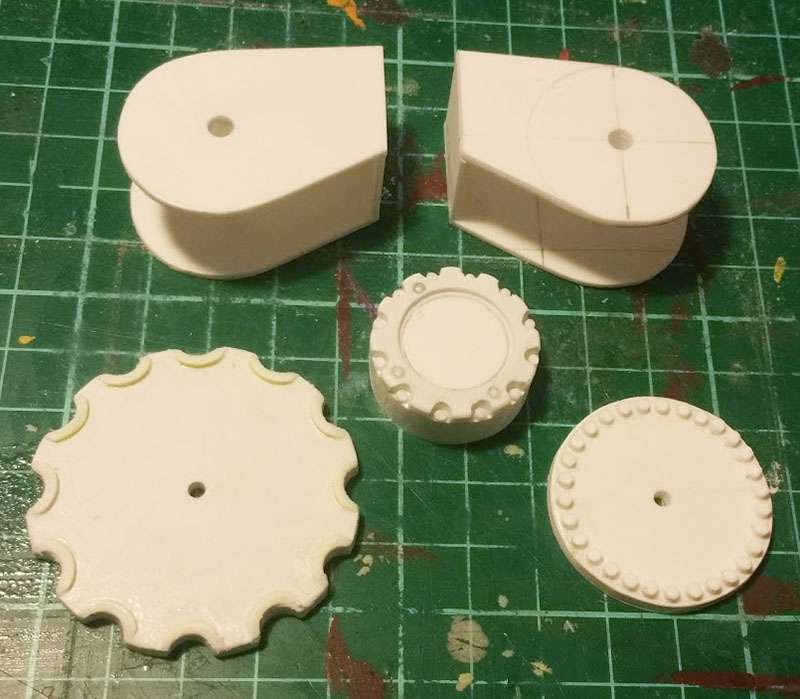 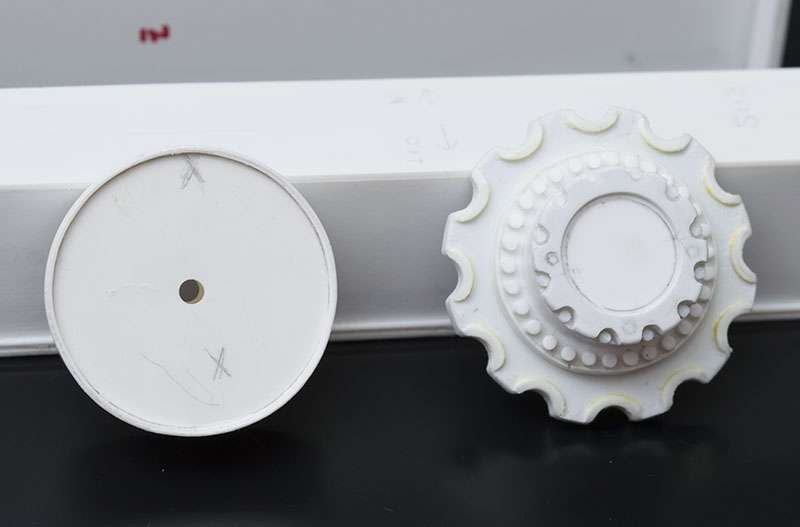 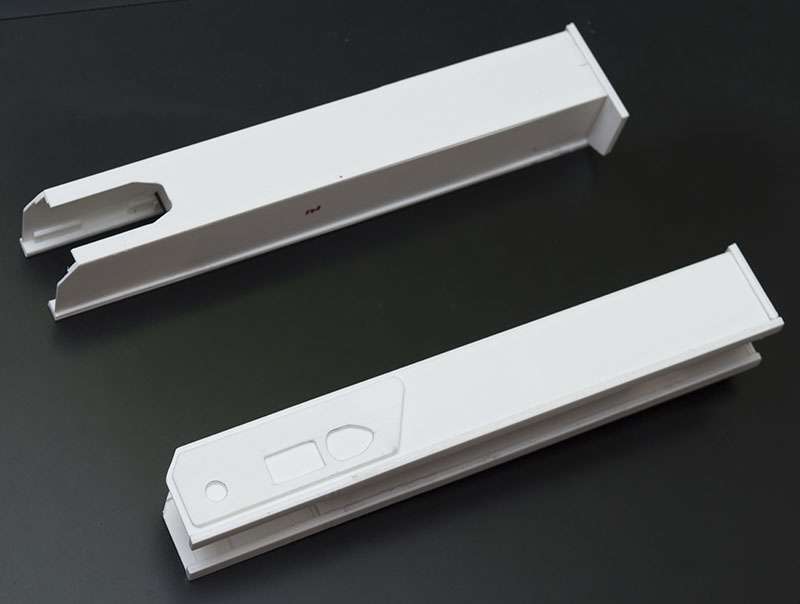
|
|

Rank: Advanced Member
Groups: Member
Joined: 11/26/2008
Posts: 2,559
Location: Edmonton, AB
|
Thanks for sharing! This is definitely going to be an impressive build, can't wait to see the rest of it!
|
|
Rank: Advanced Member
Groups: Member
Joined: 5/11/2009
Posts: 570
|
Thanks Antho! So today was very satisfying for me - it's the first time I've been able to provisionally assemble one of the crawlers to see how everything fits. I still have to do the rollers top and bottom, but I'm very pleased with how this has turned out. I've put a 1:50 figure in to show the size of this piece of the machine - it's big! 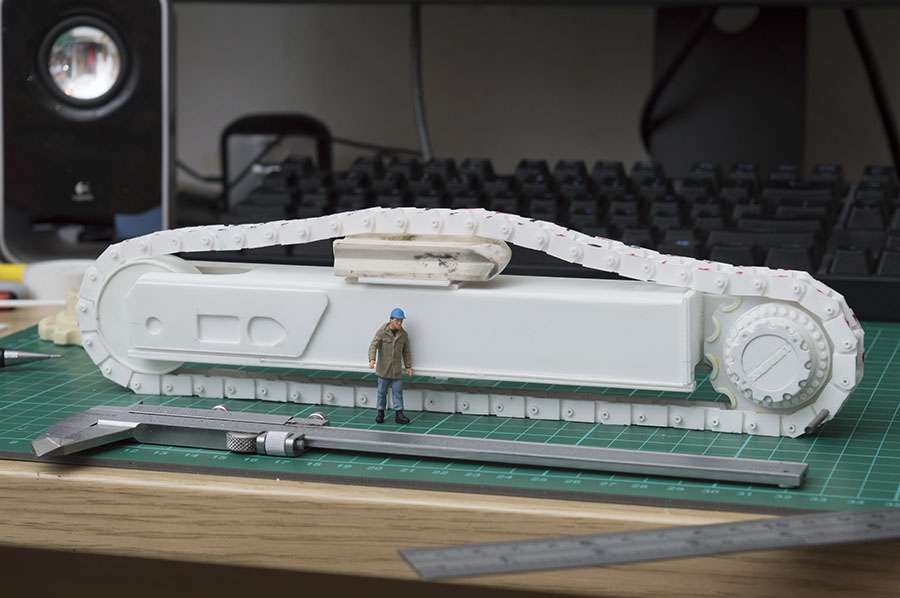
|
|

Rank: Advanced Member
Groups: Member
Joined: 10/4/2005
Posts: 984
Location: england
|
Looking good,so far  Looks like a lot of work(the tracks),but it will be well worth it,for the end product! 
|
|
Rank: Advanced Member
Groups: Member
Joined: 5/11/2009
Posts: 570
|
Thanks modelmaniac! Yes the tracks are a lot of work, and generally any part that has to be made a number of times can get tedious, but it's all about the end result as you say! I started work on the rollers for the tracks, very slow and tedious work with a lot of precise placement required. I have to make eighteen of these puppies, and I also need to make twelve of the other parts. My philosophy at the moment is just to keep going, regardless of how I feel... the more I do now, the sooner I'll finish and get on to the exciting parts like the boom and bucket! I'm also hoping to paint and weather the undercarriage first, which will hopefully give me a sense of achievement and the incentive to keep pushing on. This build will probably take several weeks/months, but I know I'm setting the bar high and giving myself a lesson in patience at the same time. I hope you're all enjoying the updates as much as I'm enjoying the process (most of the time!). 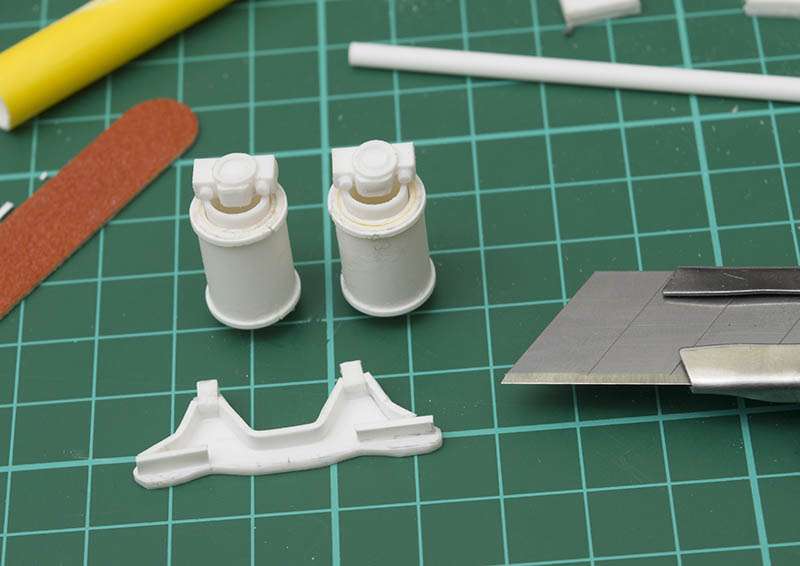
|
|
Rank: Advanced Member
Groups: Member
Joined: 5/11/2009
Posts: 570
|
Been working away on this to reach the next milestone, which I achieved this evening. I had a lot of corrective work to do on the second set of track links as my jig didn't work as well as I'd hoped, and I'm going to have to settle for 48 links on one side and 49 links on the other so that they "look" the same, but I'm cool with that. I simply don't have the means to work precisely to within a fiftieth of a millimeter - I'm using an old 12v hand drill and a craft knife and trying to get the very best results I can with my choice of tools. There's still a lot of detailing work to do on the undercarriage and a few bits and pieces to tidy (the resin drive sprocket needs to be cast again), but it's good to have the most challenging and tedious bits out of the way; for me, repeatedly drilling holes as precisely as possible is exhausting. All the rollers function as intended and the idlers are under spring tension, which can be adjusted. I've added more detail to a couple of the bottom rollers you can see... it'll be a lot of work to do that to all of them, but worth it. Next big job for the undercarriage is to build and fix the track pads, and I think I'll be putting that off for a while and perhaps make a start on the superstructure once I've taken a wee break from the project! 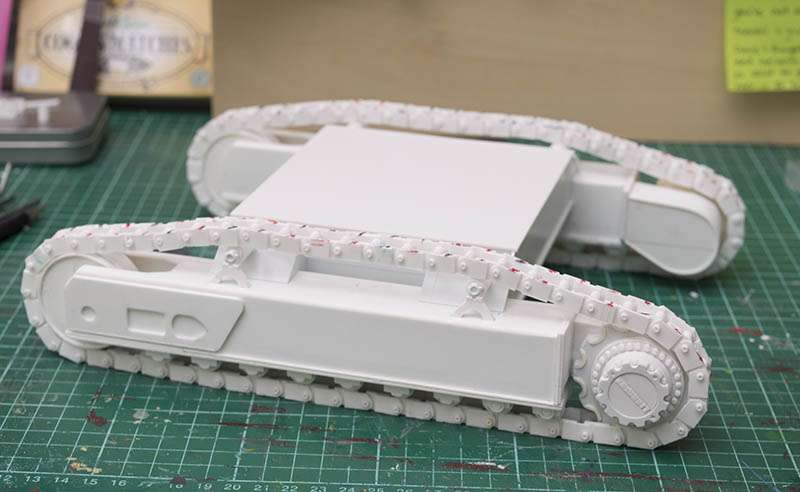 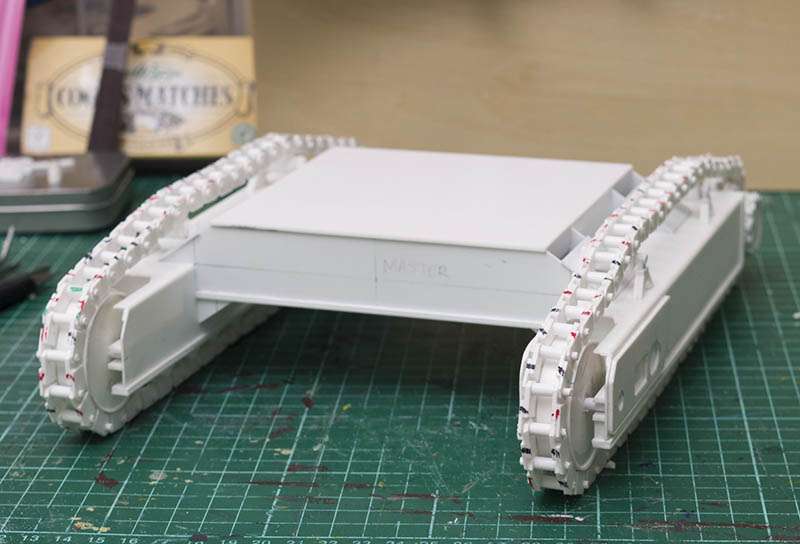 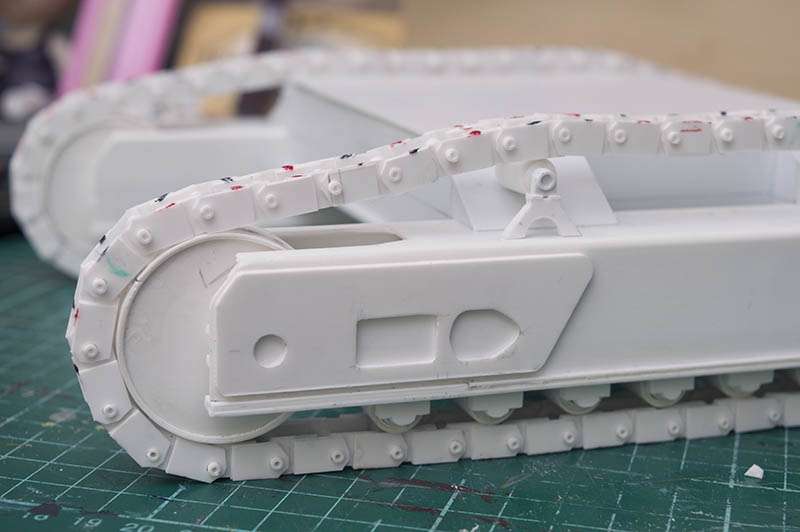 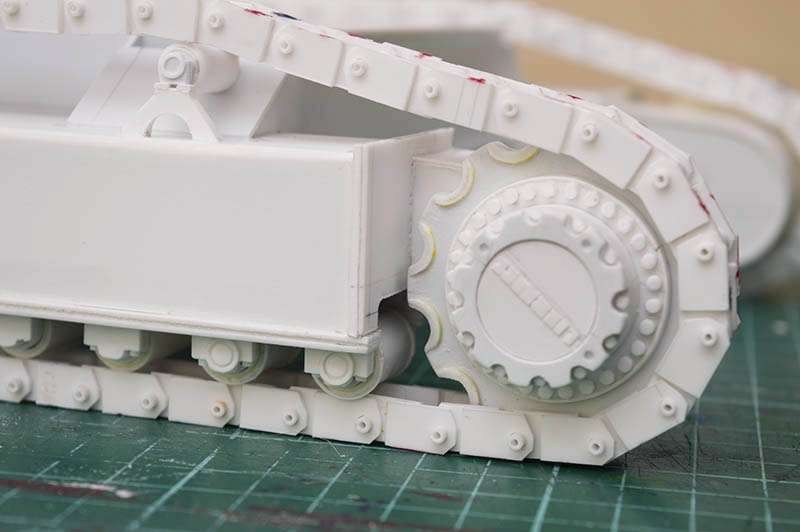
|
|

Rank: Advanced Member
Groups: Member
Joined: 8/27/2002
Posts: 4,827
Location: New Jersey
|
AMAZING !
|
|

Rank: Advanced Member
Groups: Member
Joined: 1/11/2007
Posts: 9,004
Location: Lincolnshire
|
That is as cool as anything!
Good luck with the next stage!
Paul R
|
|
Rank: Advanced Member
Groups: Member
Joined: 5/11/2009
Posts: 570
|
Thanks guys!  I took a wee break for a couple of days which was delightful, and I'm back to it a little at a time now working on detailing which is less repetitive and more enjoyable. I finished up the outside of one of the track frames after several hours of cutting, sanding and fixing in place. The small tie rings can move freely just like on the real machine and I'll paint them very carefully so that I don't seize them up. I plan to start some work on the turntable next - it's all drawn up and I'm ready to start marking out and cutting the styrene parts. More soon! 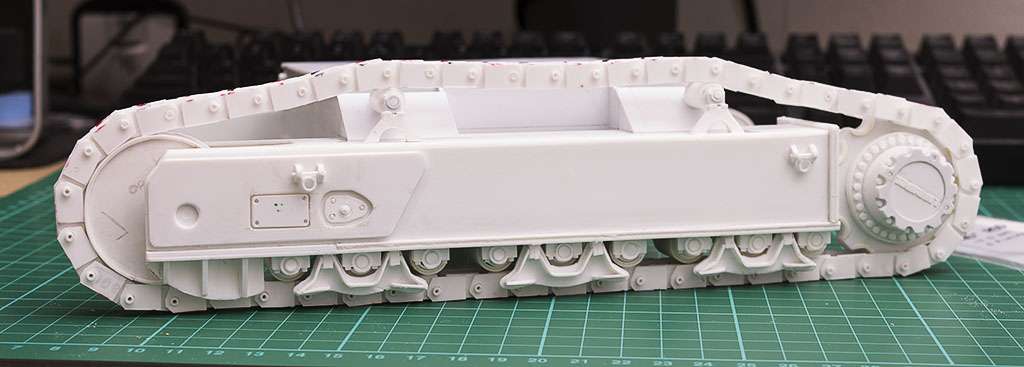
|
|
|
Guest |
