|
|

Rank: Advanced Member
Groups: Member
Joined: 11/26/2008
Posts: 2,559
Location: Edmonton, AB
|
I'm impressed by how fast this is coming along, fantastic work bud!
|
|
Rank: Advanced Member
Groups: Member
Joined: 5/11/2009
Posts: 570
|
Thanks Antho! I'm really enjoying the projcet.
I've been putting my feelers out and it looks like I'll be able to visit a site in England where there are two R984Cs operating. This likely won't happen for a while but hopefully I'll be able to take good pics of the machine and get all the ref I need to build an accurate replica.
|
|

Rank: Advanced Member
Groups: Member
Joined: 6/4/2006
Posts: 7,744
Location: arlington, Tx
|
Always makes it easier when you have the actual measurements. Keep it up buddy
Nikl Scale Models nikl scale models shapeways store
|
|
Rank: Advanced Member
Groups: Member
Joined: 5/11/2009
Posts: 570
|
Thanks Jason.  Visit to quarry with 984C is now confirmed and all I have to do is set a date and bring safety boots haha. Very much looking forward to it and of course I'll share pics once the deal has been done. It's a 700 mile round trip so I'm expecting to be pretty tired at the end of it, including an overnight stay for the sake of safety in travel. Here's today's update - I made the turntable, and now I'm just waiting on my 5mm steel balls arriving so I can make a ball bearing for the slew action so it remains perfectly level and no wear on the plastic parts. The next job is to start work on the superstructure and blocking out the various forms of the tanks and panels/doors. I expect that part to be relatively quick as I'll do more of the detailing later in the project. [Obligatory 1:50 figure wondering how he's gong to get down.] 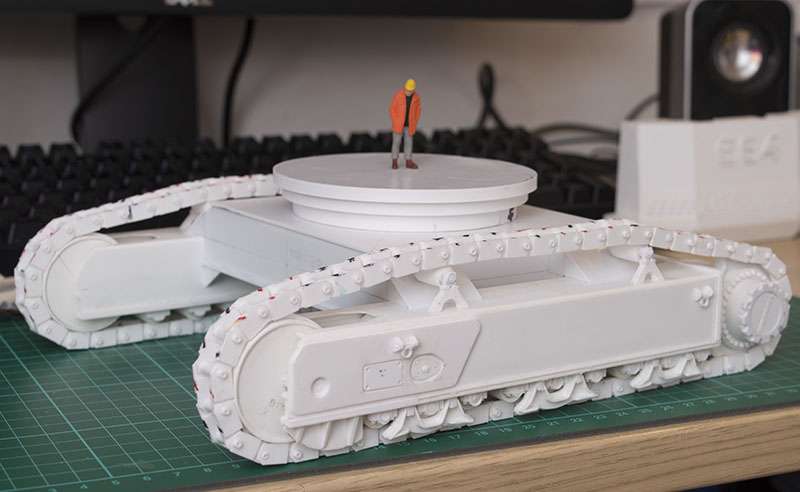
|
|

Rank: Advanced Member
Groups: Member
Joined: 9/12/2012
Posts: 484
Location: San Diego, California
|
Wow, just wow. How you and the other styrene builders muster the patience to hand build tracks, simply amazing.
|
|
Rank: Advanced Member
Groups: Member
Joined: 5/11/2009
Posts: 570
|
Thank you Dex - much appreciated! On the subject of building tracks from scratch... if I ever say I'm going to do it again, can somebody please shoot me.  Today's update: I finished the base of the superstructure. The shape of the frame is mostly guesswork as I have no detailed schematics for it, but I'm willing to guess it because it will be hidden inside the model. As long as the boom and boom cylinder pins are reasonably accurate, I'm happy. This has been a really difficult and painstaking part of the building process, making sure the pieces are all the same shape and size, and making sure the pin locations are perfectly level and in correct alignment (a nightmare). For this part about 80% of my time was spent just cutting and sanding sytrene sheets...ugh! Next I'll be working on the main volume of the superstructure in the form of the tanks (fuel and hydraulic fluid) and I'm going to make a start on the cab as well. After that it'll be time to do the boom and boom cylinders, which is when the machine will really take shape. 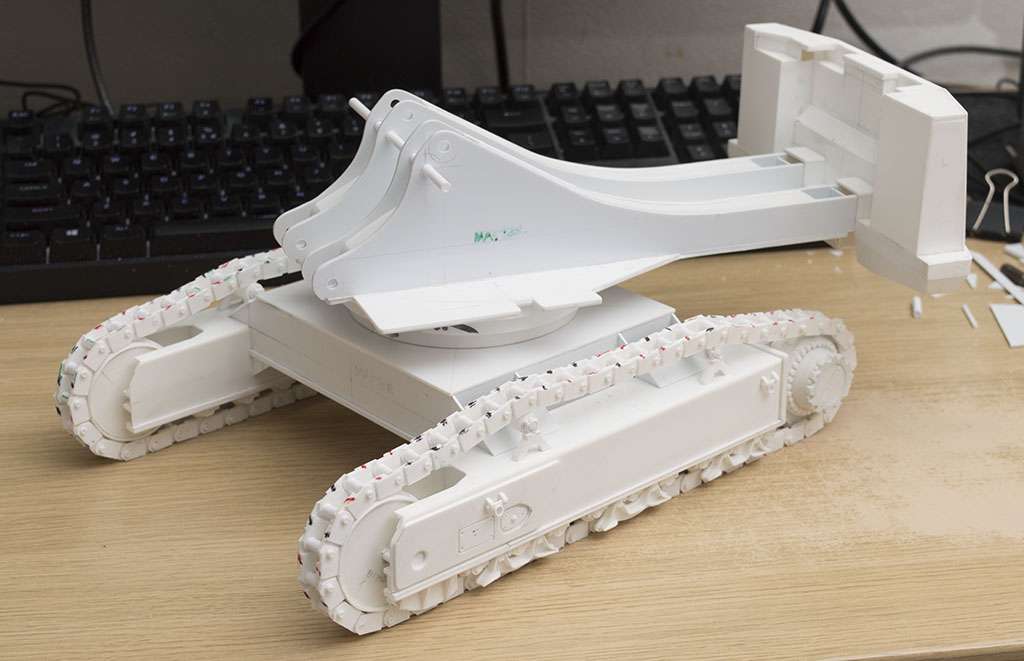
|
|
Rank: Advanced Member
Groups: Member
Joined: 5/11/2009
Posts: 570
|
Just a quick update - I was at the quarry this morning and got back home not long ago - around 700 miles round trip, and we stayed overnight just outside Leeds to break up the driving a bit. The guys at the site were amazing, giving me access to get all the pics I need to build a good solid model of the 984. Big thanks to Paul Argent for pointing me in this direction, and also to Paul and Andy at Alf Kitching for granting me access to the site and the machine. This is my dad standing next to the monster. I'll share some more pics once I get through them all in the next few days! 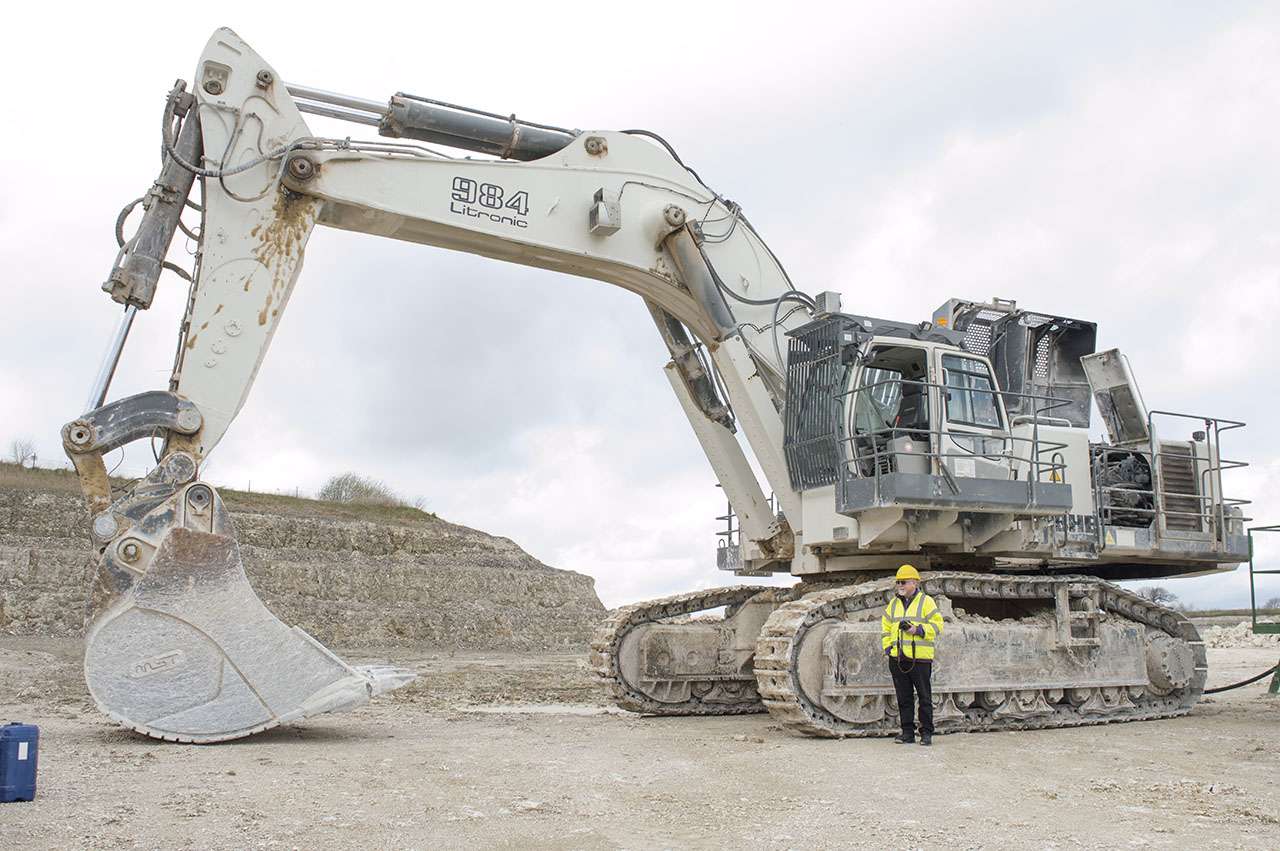
|
|
Rank: Advanced Member
Groups: Member
Joined: 1/22/2013
Posts: 203
|
Great pic. Hope you post pics of all the hydraulics. It would be great to get close ups of all the hydraulic lines, back of boom ,stick, etc. I would like to customize the model I have only if I can do it correctly. Thanks. Mike
|
|
Rank: Advanced Member
Groups: Member
Joined: 5/11/2009
Posts: 570
|
No problem Mike - I've created an album on Flickr here for anyone interested in the pics of the machine and will continue to add to it a little at a time. I'm glad I've chosen 1:24 for this model... I'm not sure it's possible to achieve this sort of detail in 1:50 and even in the larger scale it's going to be a challenge to model something that looks like this! 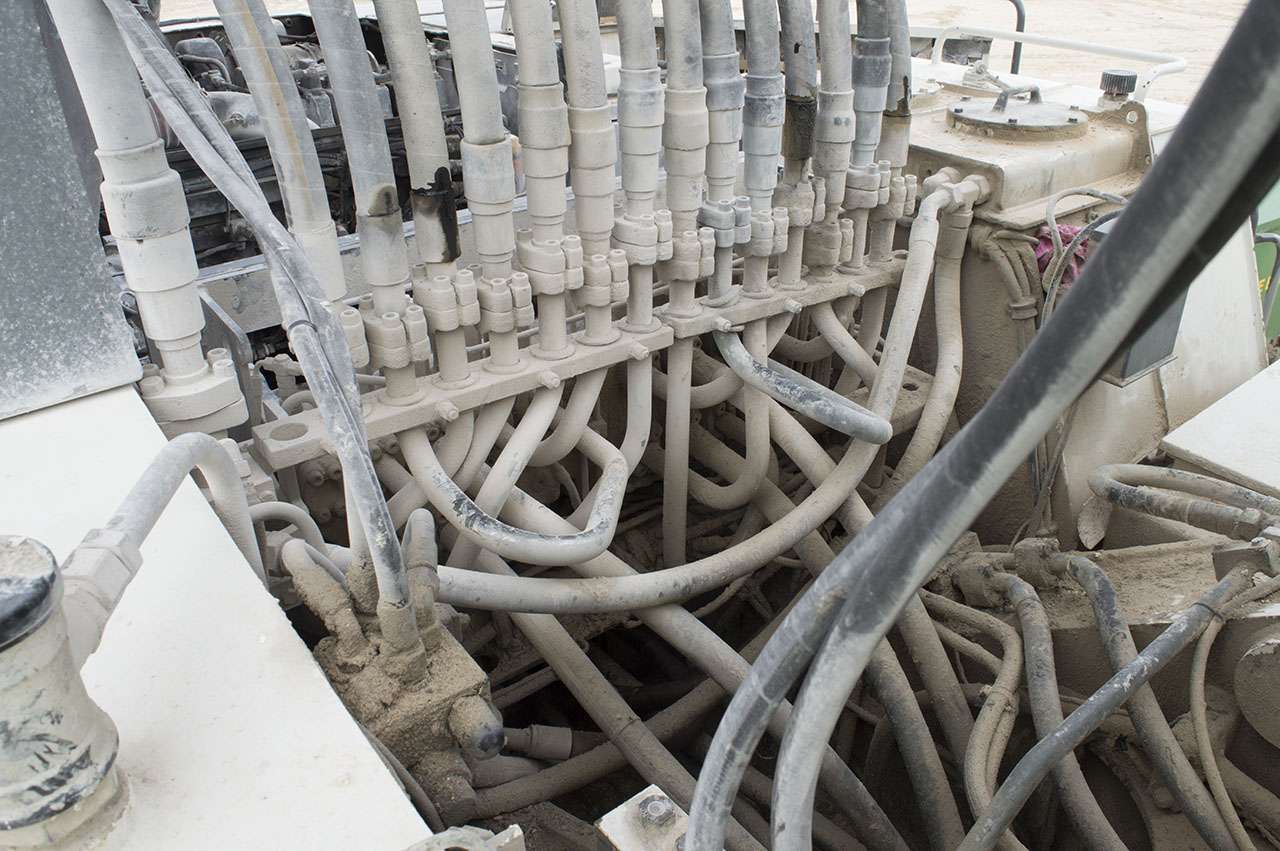
|
|
Rank: Advanced Member
Groups: Member
Joined: 1/22/2013
Posts: 203
|
Thanks for the great photos Davie 82. Wished I could be there to see that beast up close. Although I could never hope to duplicate that model in 1/50 scale , (without an electron microscope) it would help to follow the patterns of the hydraulics. Looking forward to the completion of your fantastic model. This is going to be great! Mike
|
|
Rank: Advanced Member
Groups: Member
Joined: 11/15/2003
Posts: 1,144
Location: North America
|
It's absolutely fantastic to see real scratch building done by hand, and not just gluing together laser cut and 3D printed pieces.
Please keep us up to date with all your progress?
|
|
Rank: Advanced Member
Groups: Member
Joined: 5/11/2009
Posts: 570
|
Thanks Mike and digggerr! I've been working away little by little on the superstructure, and I've ticked a few things off my list now that I have better photos to work with. The internals will be done much later in the process. The cab was a pleasure to work on as it's the first time I've built one at this scale and I really enjoyed shaping it and putting it together. I've ordered some tint film and will be experimenting with different colours until I get the right "fit" for the machine. The door will open just like on the real deal...it's taped in place for the moment to stop it falling off and getting lost or damaged. The door grill was a pain in the butt and I'm not 100% pleased with it as some of the slats are very slightly bent, but I'm happy to roll with it because it looks good enough and frankly I don't want to waste time on that sort of thing at this stage in the process. If it really bugs me later on, I'll just make the door again and do it differently. The hinges are made from little bits of 2.4mm styrene tube, and the pins are made from pieces of paper clip that I've bent into an "L" shape to stop them slipping through. Works a treat and I'm very pleased with the operation of the door. I'll try to update the thread roughly once or twice a week as my progress might slow down for the next wee while. 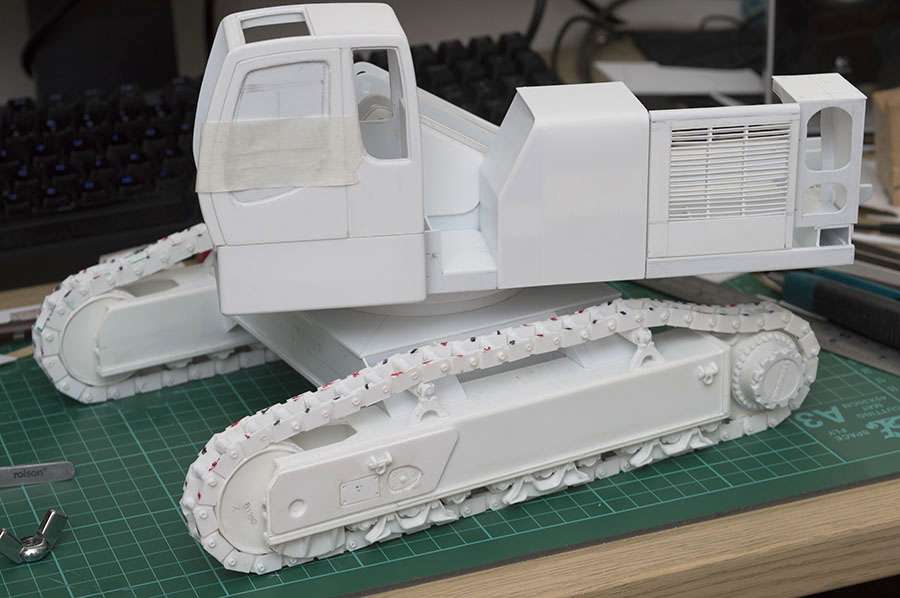 
|
|
Rank: Advanced Member
Groups: Member
Joined: 11/15/2003
Posts: 1,144
Location: North America
|
Davie82 wrote:The cab was a pleasure to work on as it's the first time I've built one at this scale and I really enjoyed shaping it and putting it together. I've ordered some tint film and will be experimenting with different colours until I get the right "fit" for the machine. The door will open just like on the real deal...it's taped in place for the moment to stop it falling off and getting lost or damaged.
The door grill was a pain in the butt and I'm not 100% pleased with it as some of the slats are very slightly bent, but I'm happy to roll with it because it looks good enough and frankly I don't want to waste time on that sort of thing at this stage in the process. If it really bugs me later on, I'll just make the door again and do it differently.
The hinges are made from little bits of 2.4mm styrene tube, and the pins are made from pieces of paper clip that I've bent into an "L" shape to stop them slipping through. Works a treat and I'm very pleased with the operation of the door.
I'll try to update the thread roughly once or twice a week as my progress might slow down for the next wee while. For what it's worth; take your time on this project? I was a big fan of your previous Liebherr project, but... Regarding the vent slats; once they're painted I think you'll be satisfied with them. In fact, had you not brought the matter up I doubt that anybody would have noticed including myself. While I don't know what you do for a living; I can't ignore the fact you would be a huge asset to most of the companies producing scale models.
|
|
Rank: Advanced Member
Groups: Member
Joined: 6/4/2006
Posts: 7,744
Location: arlington, Tx
|
Grill does not look that bad, I know they are a huge pain to make. You can do one thing to the final piece, just do a little weathering. Grill fins get bent all the time. Other then that it looks great Jason
Nikl Scale Models nikl scale models shapeways store
|
|
Rank: Advanced Member
Groups: Member
Joined: 5/11/2009
Posts: 570
|
Thanks for the comments guys - much appreciated. I'm probably going to redo the door anyway because I've realised it's not straight, which is a bigger problem than the grill. And I've since done two more grills so don't mind doing it again...I'll probably do a better job now anyways! Here are some updates - I've finished most of f the right side of the machine and also built the engine cover including hinges. These deviate slightly from the real machine because I want all the hatches to open so I'm making hinges that are functional rather than aesthetic. I know some model builders prefer to have accurate panel detail and cut lines etc., but I want this model to be the ultimate for posing which means everything needs to move and dismantle as per the real machine. I'm now going to build the boom, stick, and bucket - a very exciting but also enormously time-consuming part of the process, because a lot of the dimensions have to be guessed based on extensive and laborious studying of photos. Pics: 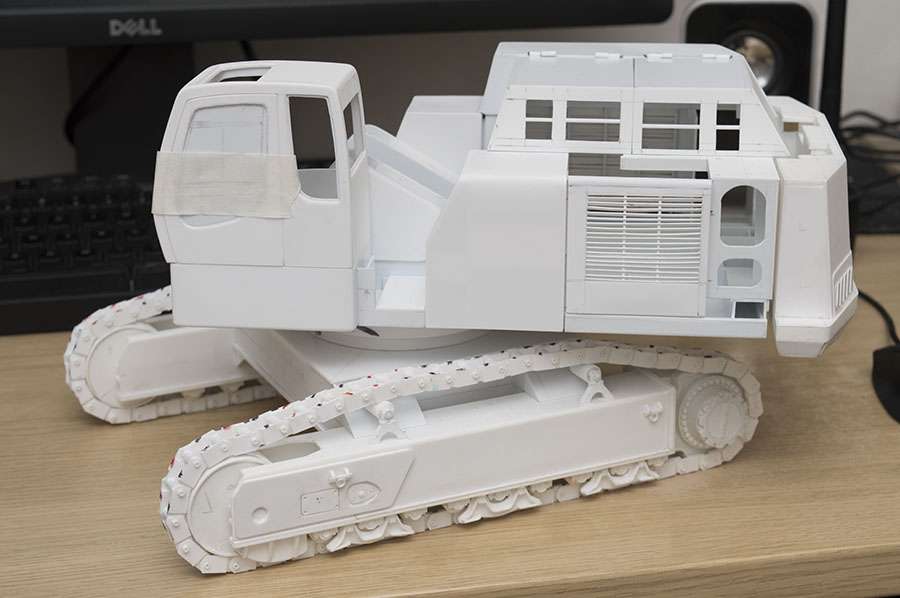 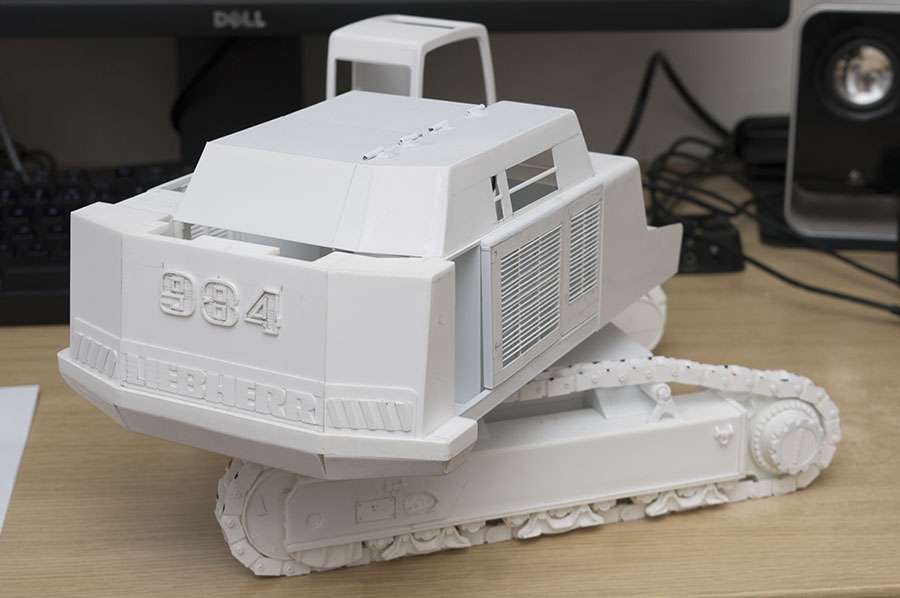 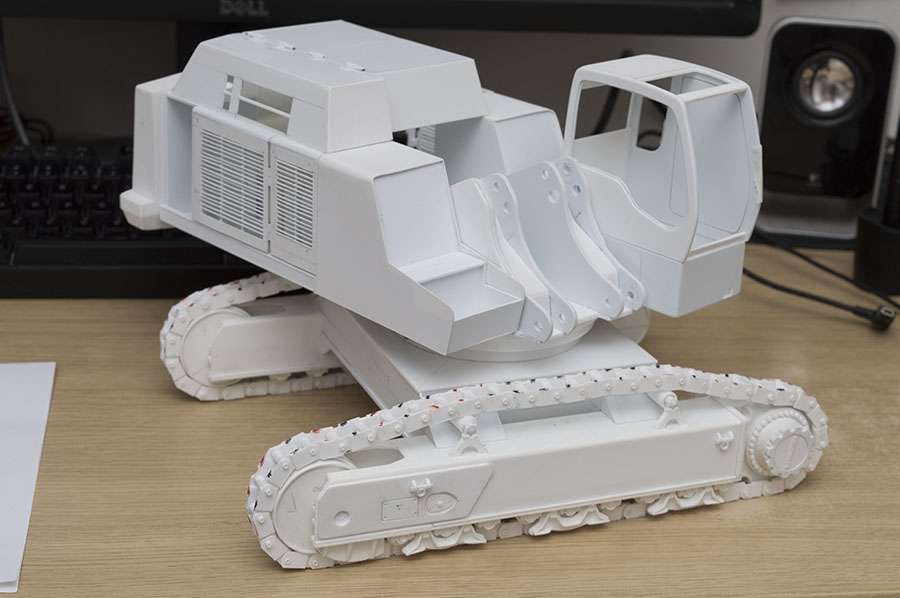 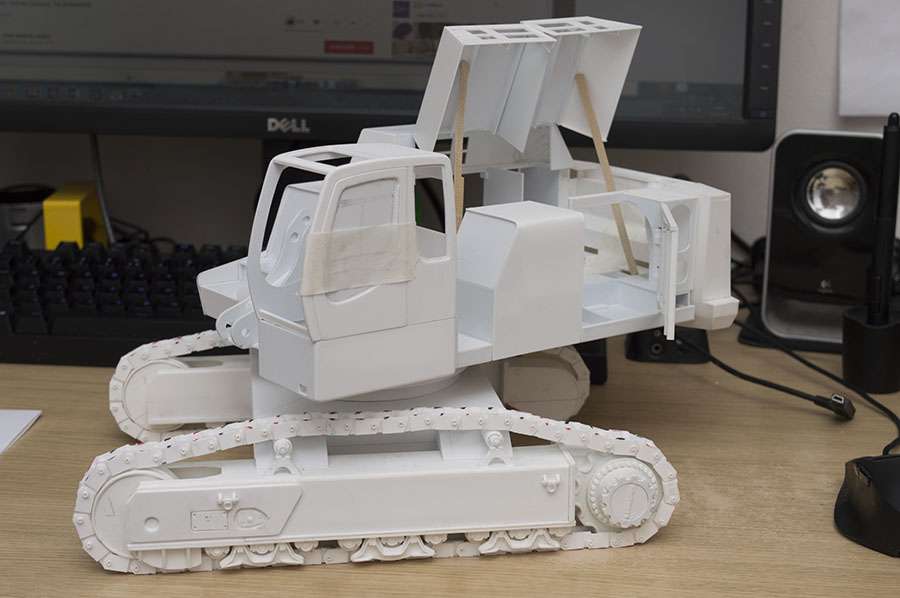
|
|

Rank: Advanced Member
Groups: Member
Joined: 8/19/2013
Posts: 694
|
Excellent work Davie! Can't wait to see it painted. Have you decided on colour?
|
|
Rank: Advanced Member
Groups: Member
Joined: 5/11/2009
Posts: 570
|
Thanks Jamie! Been leaning towards Liebherr white ever since I started the project, but I'm still a fan of their yellow also. There's just something about the white that looks more serious... hard to explain haha! Also I really like the colour Liebherr use... some say it's the same as RAL9003 ("signal white") but I think it's got a warmer hue to it, a bit more like ivory or cream. Here's a pic of me holding my "pure white" phone against the machine just to see how much it differed. 
|
|
Rank: Advanced Member
Groups: Member
Joined: 5/11/2009
Posts: 570
|
Here's a wee update on my recent progress. In the last week I've managed to put several hours into the cylinders and stick, which is almost finished in terms of its main shape and also including the linkage for the bucket. I need to apply filler in various areas to make sure my contours are in check, but most of it is finished and I'm really pleased with the result... it was really hard work, especially cutting out these awkwardly shaped holes. I want to build the linkage strong because the cylinders will be quite stiff, and so far it's working really well because it means I will be able to pose the model even with a lot of weight in the bucket. I will probably build the bucket next, and then the boom, and hopefully it'll look a lot more like a 984 by that point! More pics coming soon. 
|
|
Rank: Advanced Member
Groups: Member
Joined: 11/15/2003
Posts: 1,144
Location: North America
|
My God man, you are so gifted to be able to do this by hand!!! In my opinion you can't post enough photos of this build, so please keep them coming?
If I may ask; are you keeping records of the time invested and expense involved? Since I'm not talented in the area, I cannot imagine these measures so please share (even if only by PM)?
With regard to the color; I don't think you can go wrong with the classic yellow with the white cab, but the off-white and grey are also a nice contrast. Either way; it's going to be fantastic.
Thanks again for sharing with all of us.
|
|
Rank: Advanced Member
Groups: Member
Joined: 5/11/2009
Posts: 570
|
Thanks digggerr - it's my pleasure to be able to do this and to share it with the community. I'm just about to go to the shop to buy more "stuff" as I have run out of a couple of things and I'll be working on the bucket today so I'll share more pics and info later on this evening. Thanks again!
|
|
|
Guest |
