|
|

Rank: Advanced Member
Groups: Member
Joined: 12/8/2005
Posts: 708
Location: Germany
|
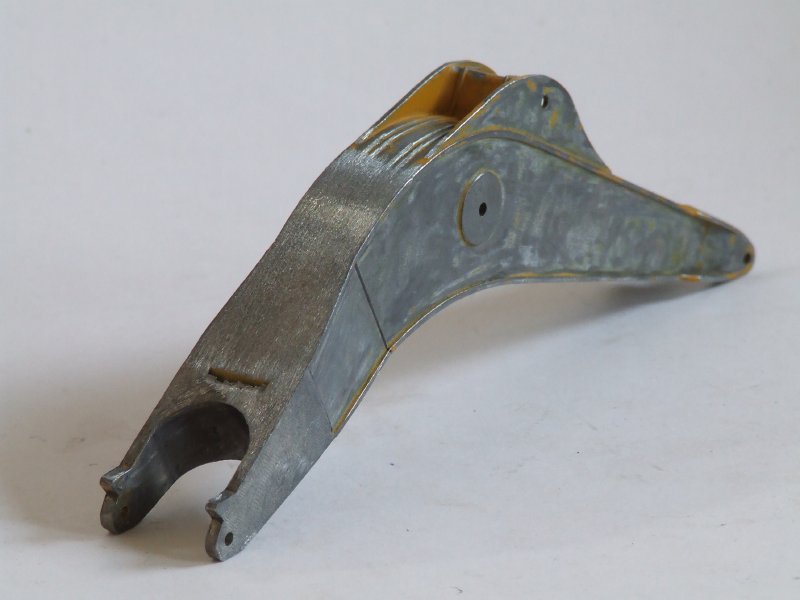
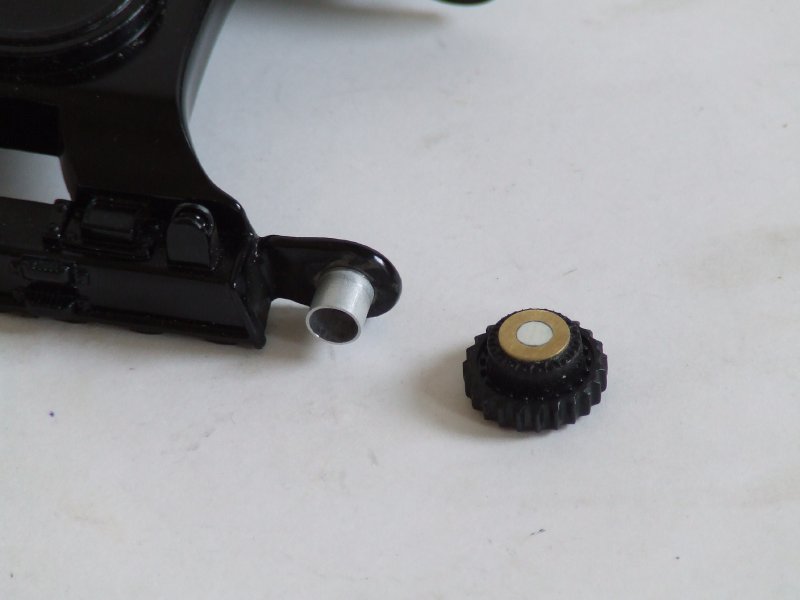 Let´s take a look at the turas wheels.I wanted them to look more realistic.So it was also necessary to make a few modifications on the undercarriage.Meanwhile I stripped off the paint from this part,too. And then lengthened it by putting in small styrene stripes on the inside and the spaces between the cutted parts. 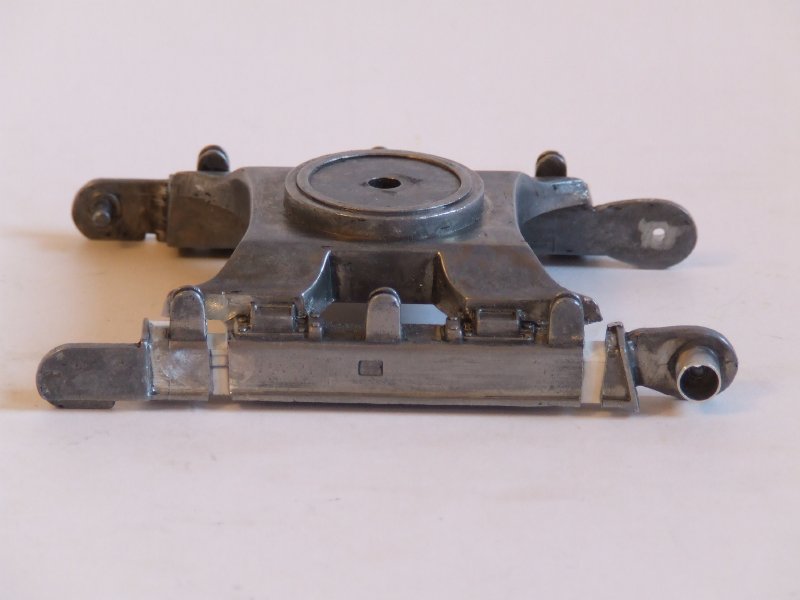 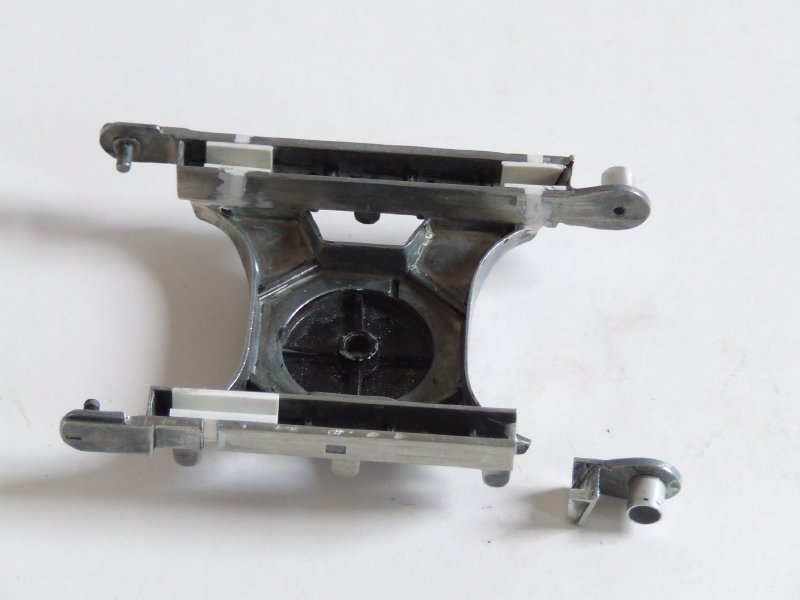 I made silicone moulds from the steps on the side before I cut them off.As well of the small rolls on the underside. Back to the bodyworks.I drawed the shape on a piece of styrene and then cut out the spaces in between. 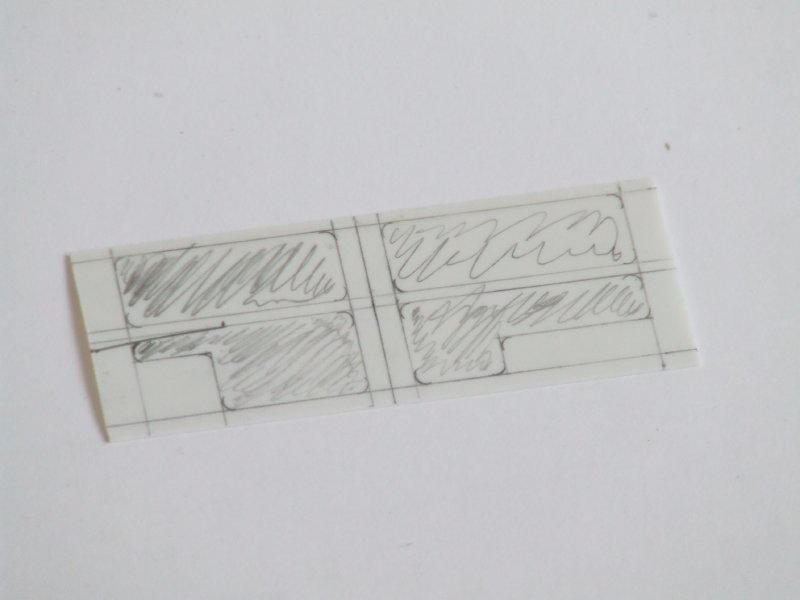 I looked a whole while to find something that had the right surface for the fine structures on the side. I couldn´t use this from the 365 for it was not big enough. And finally I found a computer cable.Now I reproduced the surface with a silicone mould. 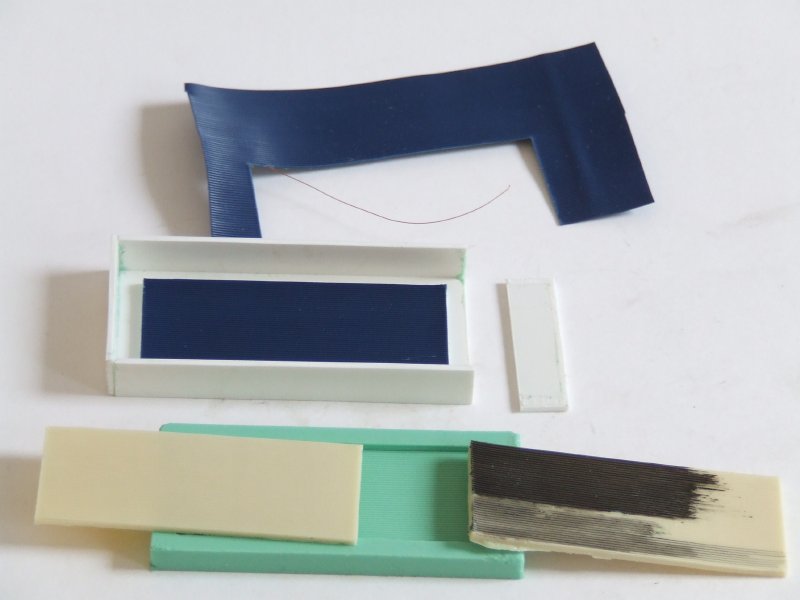 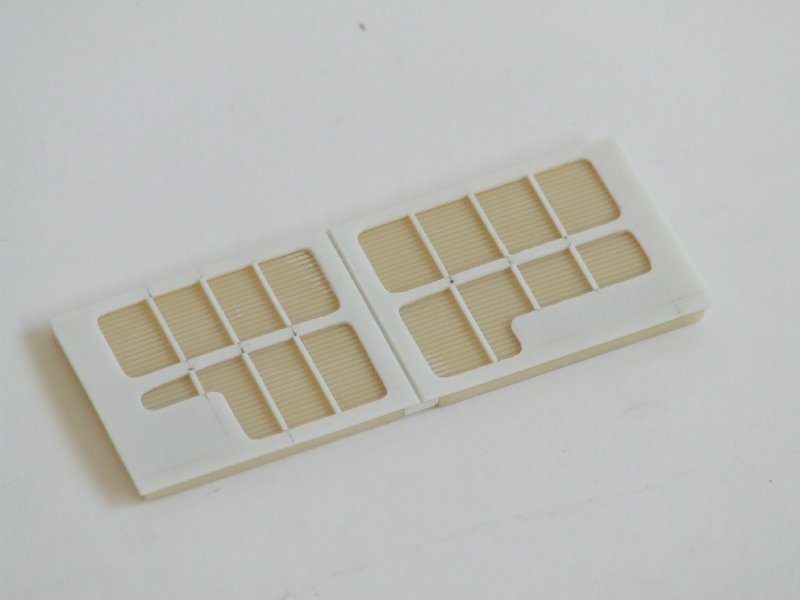 Cut it and glue it together and you have the first side panel. Meanwhile I was also looking around for something to use for the huge airfans that sit behind this panel. And I finally discovered that I could use the cover from my cutting wheels box for my Dremel tool. 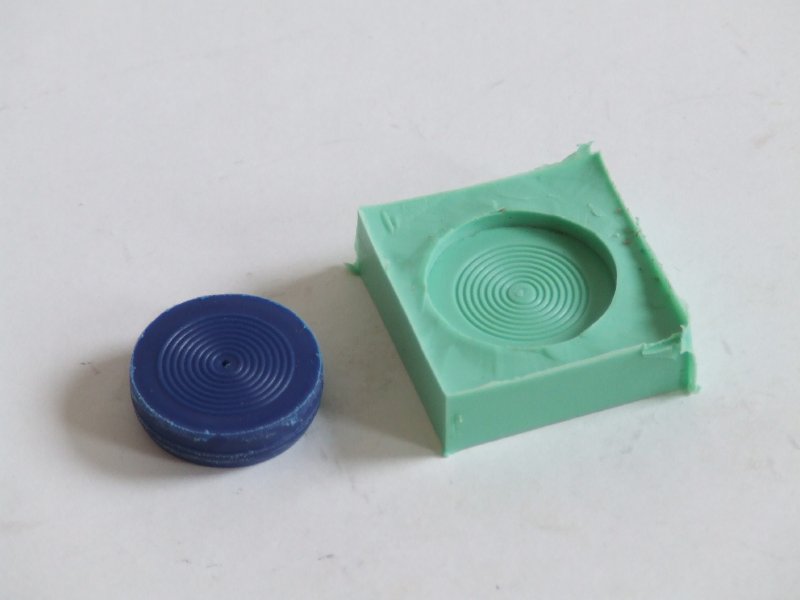 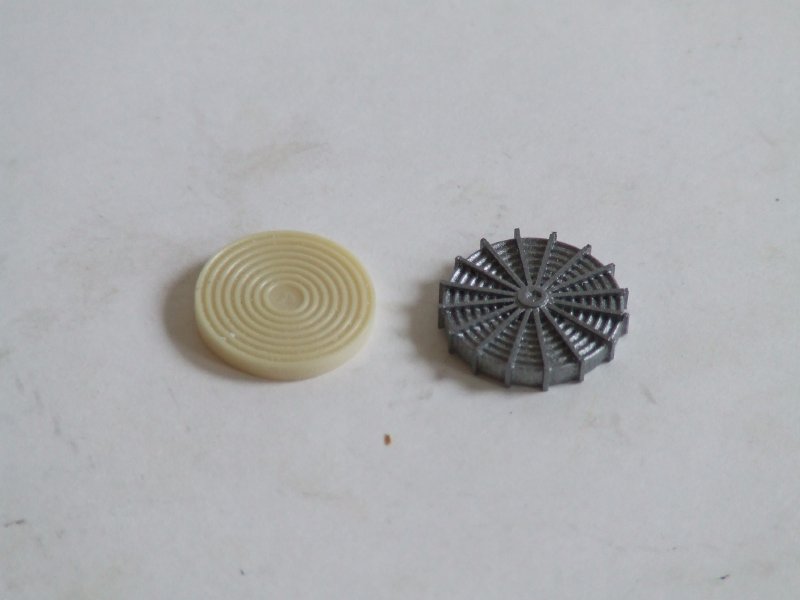 Back to the base plate: I added some parts and drawed on the lines for every piece on it. 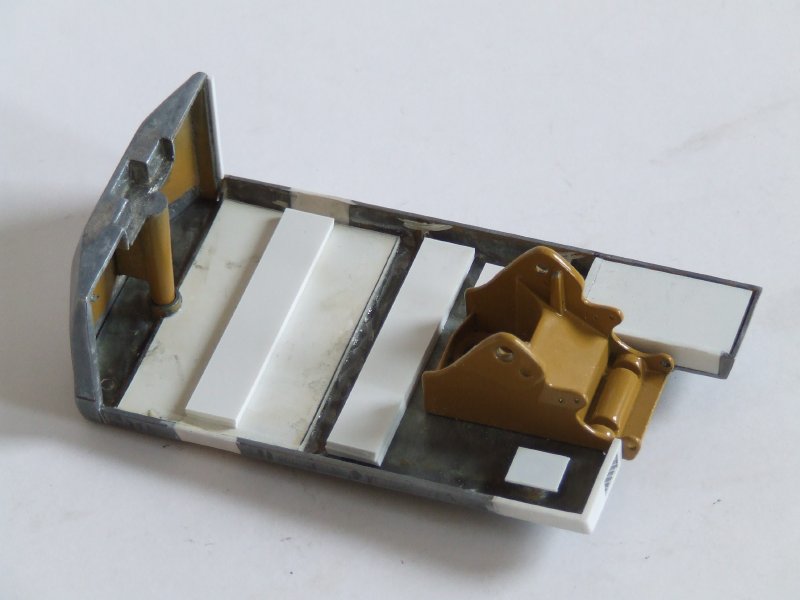 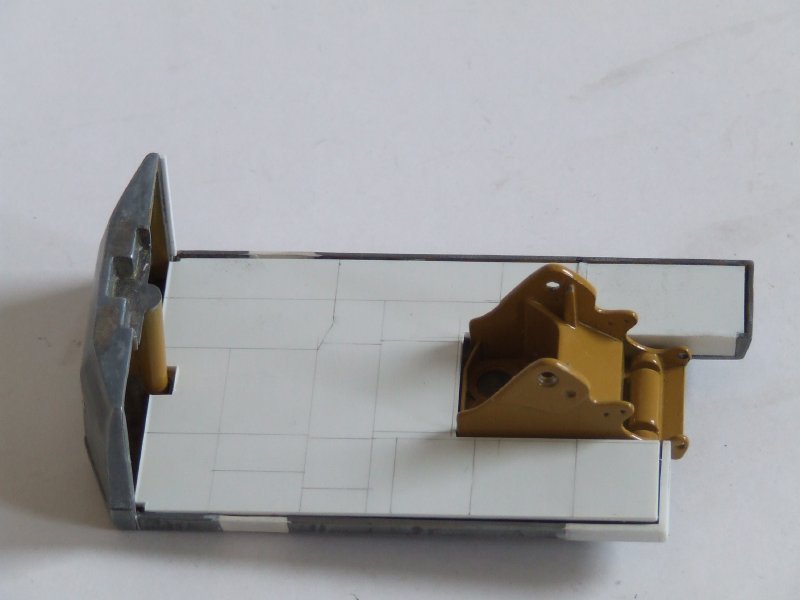 It´s easier to work on it when you have a plain surface.
|
|
Rank: Advanced Member
Groups: Member
Joined: 12/8/2005
Posts: 708
Location: Germany
|
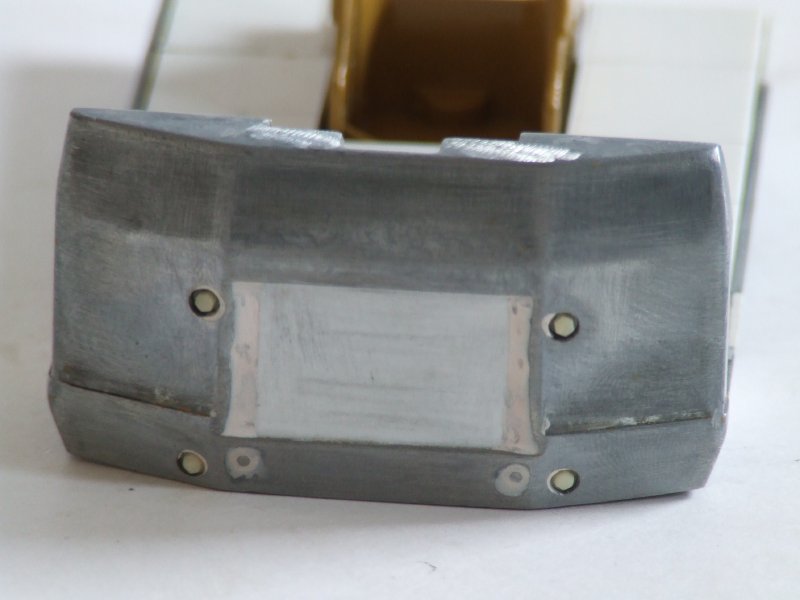 Modifications on the counterweight. 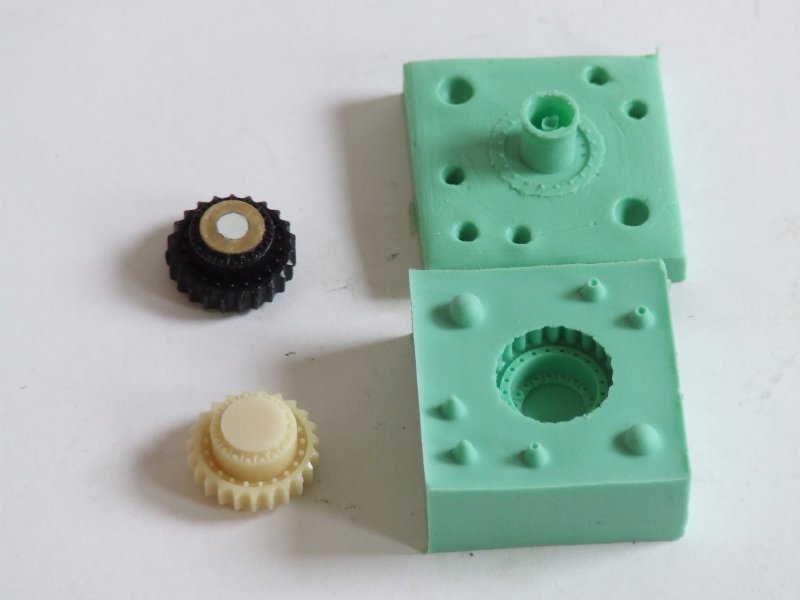 Reproduction of the modified turas wheel. 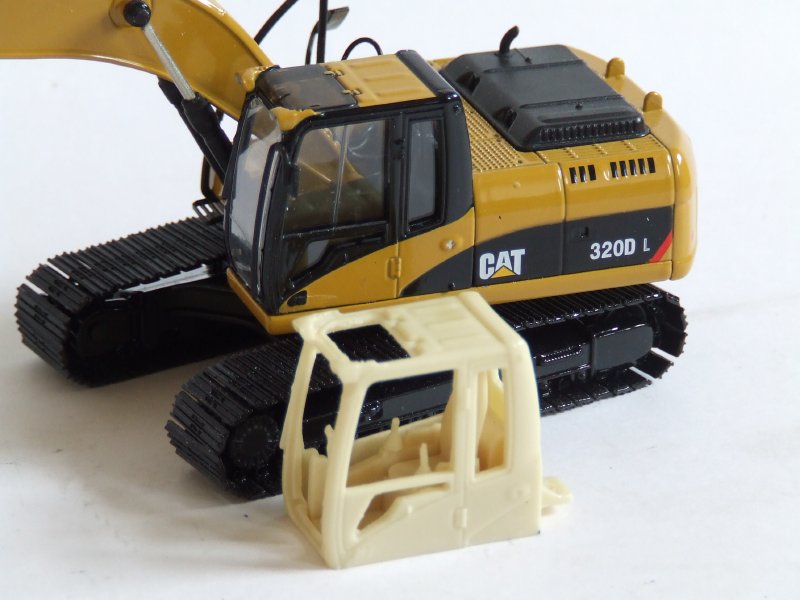 I took a resin copy from the cab of my 320d model.So when CAT will introduce the d-model of the 385 I will only have to change the decals.  Unfortunately this is the last cab I could reproduce because the mould got broken. 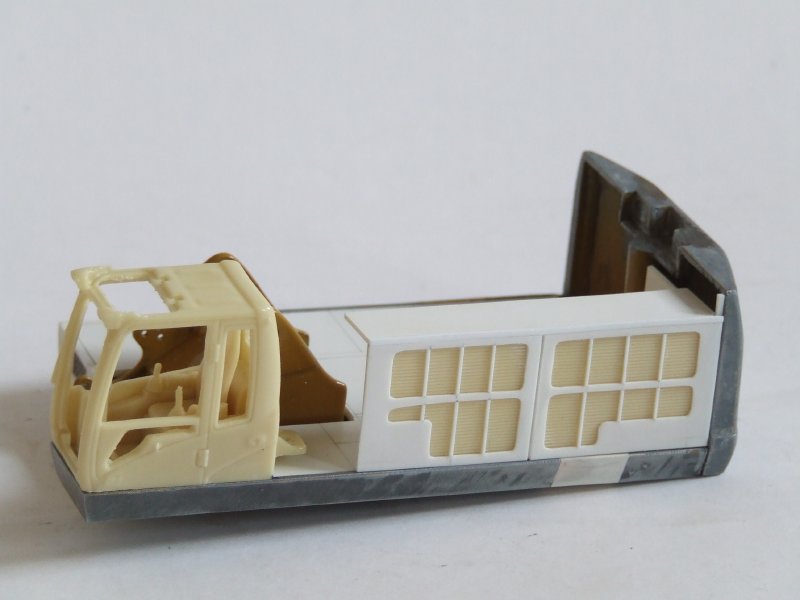 Putting on the first parts on the base plate. 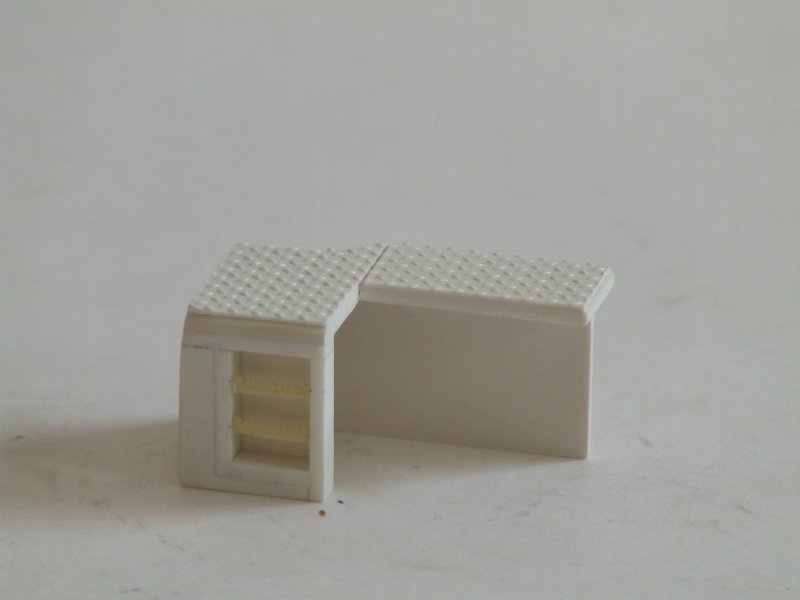 And then build the next one. I always build small parts,then connect them with others to modules and sections that make the model. This is somehow like building a ship.  Let´s see if it fits together.And yes,it does. Now,i´m adding part by part. 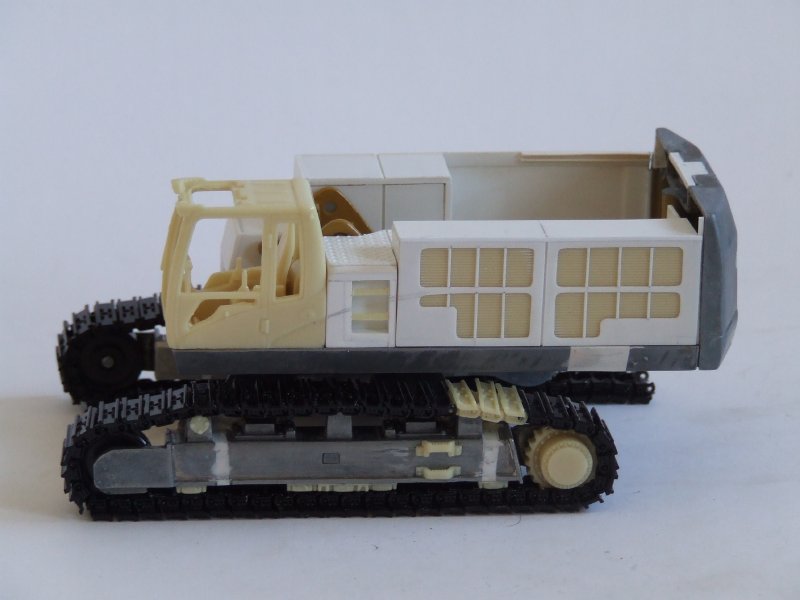 You can maybe see that I had some big problems with the tracks.It took long time and patience to fix them.
|
|
Rank: Advanced Member
Groups: Member
Joined: 12/8/2005
Posts: 708
Location: Germany
|
It´s getting pic heavy now? This is maybe also the best documented project I ever did. We are about at the half now. Now,it was time to think about the boom options.So I cut out some of the drawings and pics I had and held them on to the model to see how it would look like. standard boom: 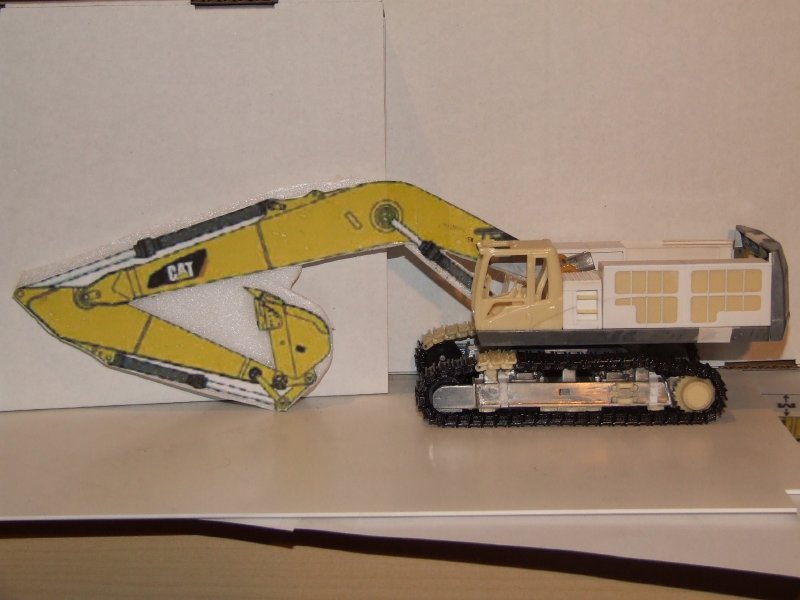 ME-boom:  I also showed these to some fellows on the german forums to have their opions. I then decided myself to make the ME-boom. Meanwhile I went on building panel parts.This is the part in front of the engine compartment. 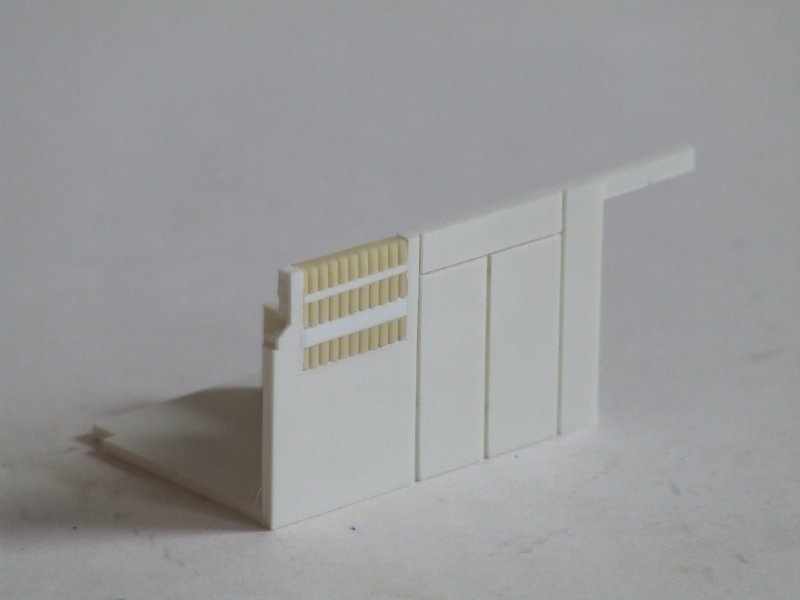 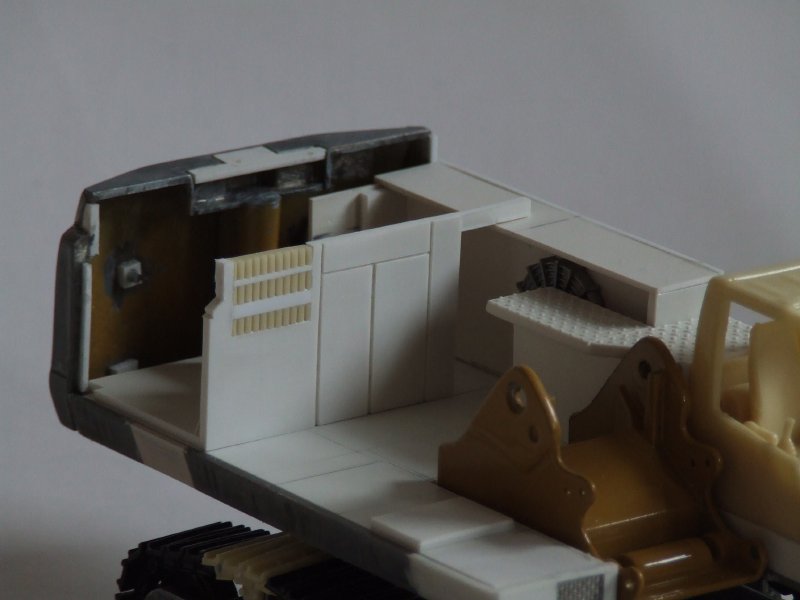 Always testing if they fit together well.I really can´t tell how many times I put the parts together and then disassembled them again. 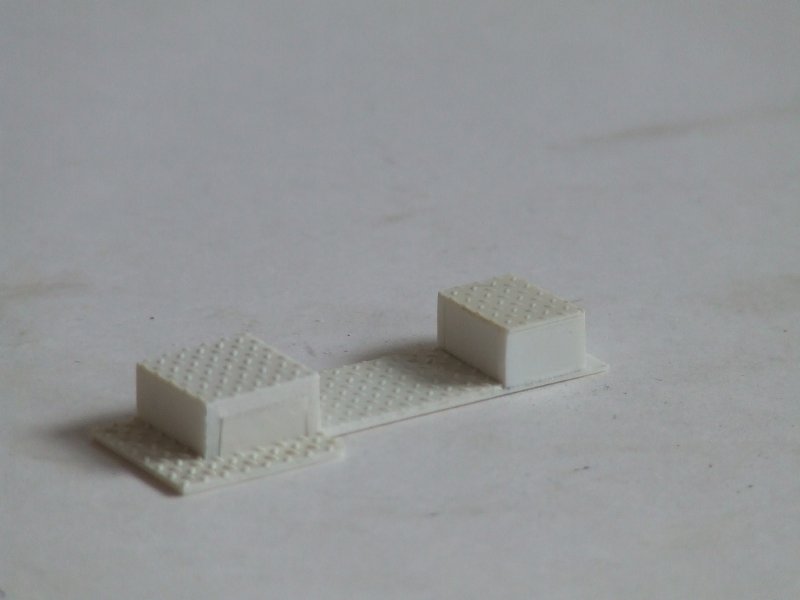 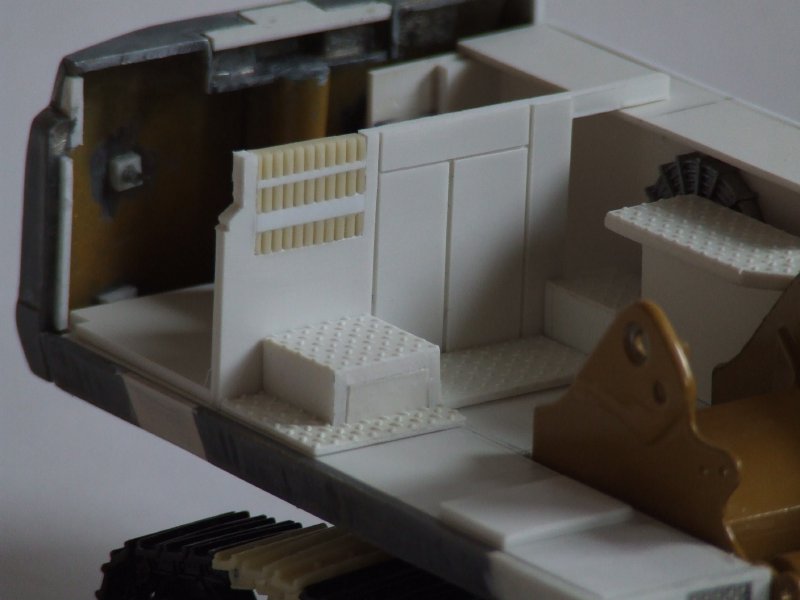 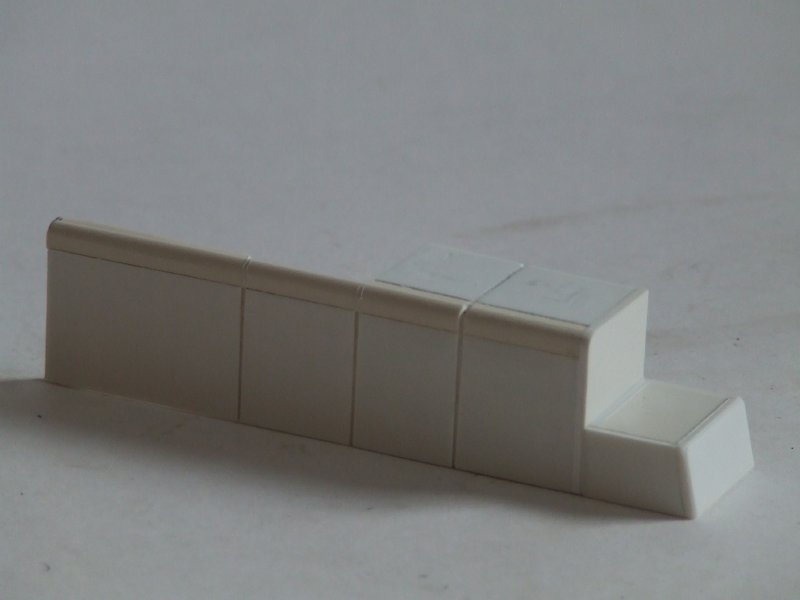  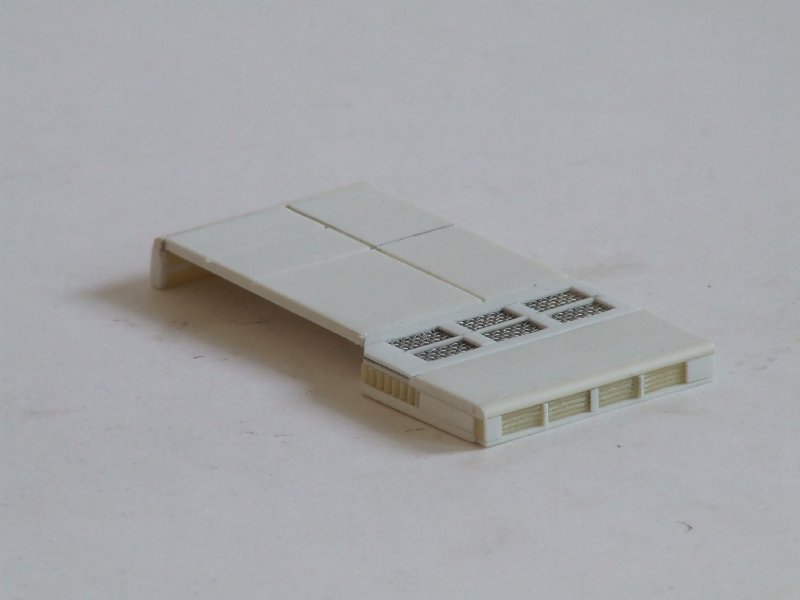 
|
|
Rank: Advanced Member
Groups: Member
Joined: 12/8/2005
Posts: 708
Location: Germany
|
 Then I had a lucky moment.I could purchase a boom from a Conrad Liebherr 984 model for cheap money.This was the perfect base for my ME-boom. The only thing was that it came without the main hydraulic cylinders.I will come back to this soon. You can see the first rough modifications to make it fit on my model. The first cuts on the stick: 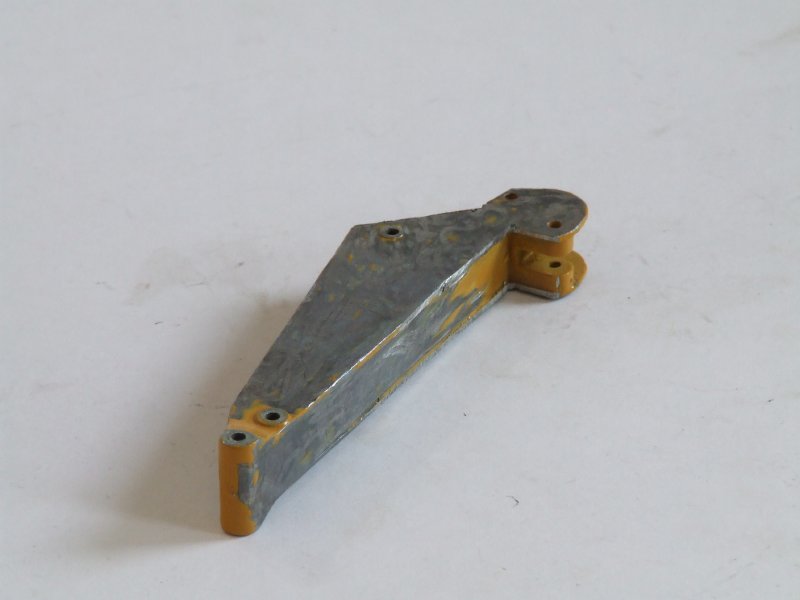 The boom was a little long.So I decided to cut off a bit from the front end.Sounds easy,but it is not. I drilled out the new holes to hold the stick before I cut off the boom.You have to be very,very careful when you do this.One mistake and the part is dump. 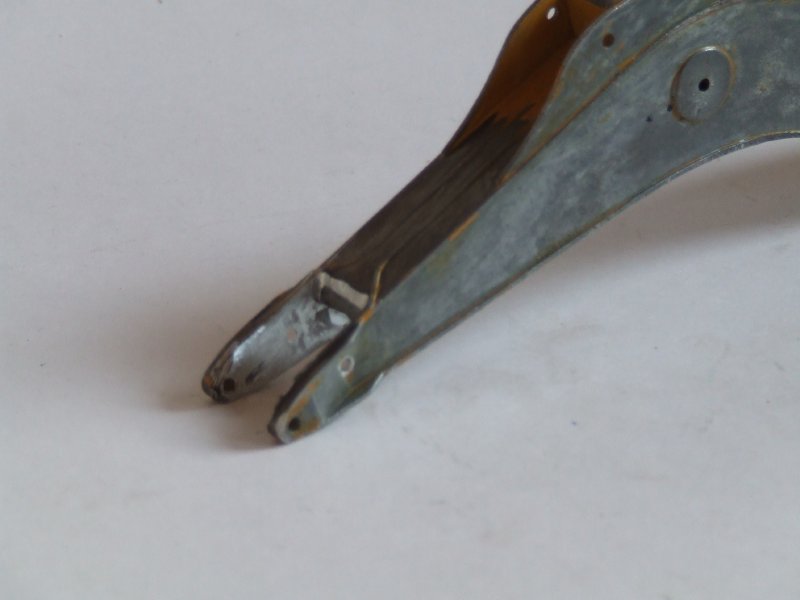 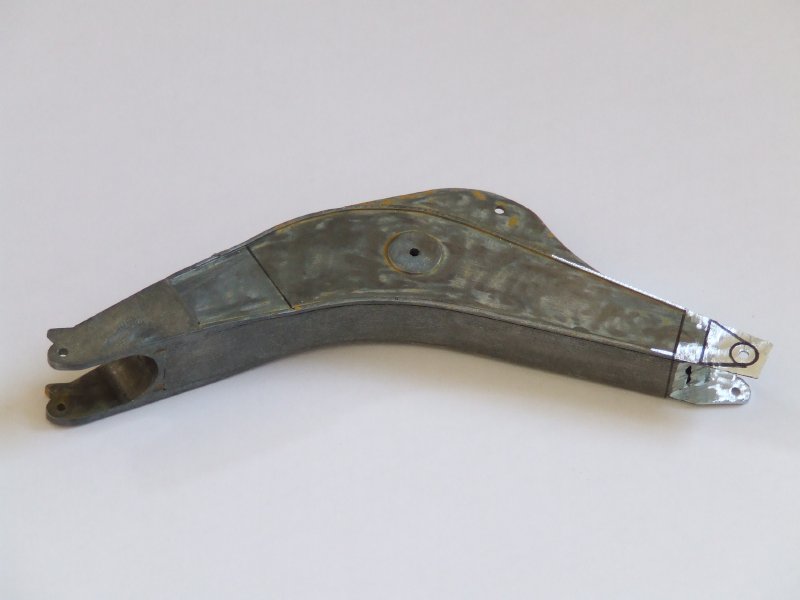 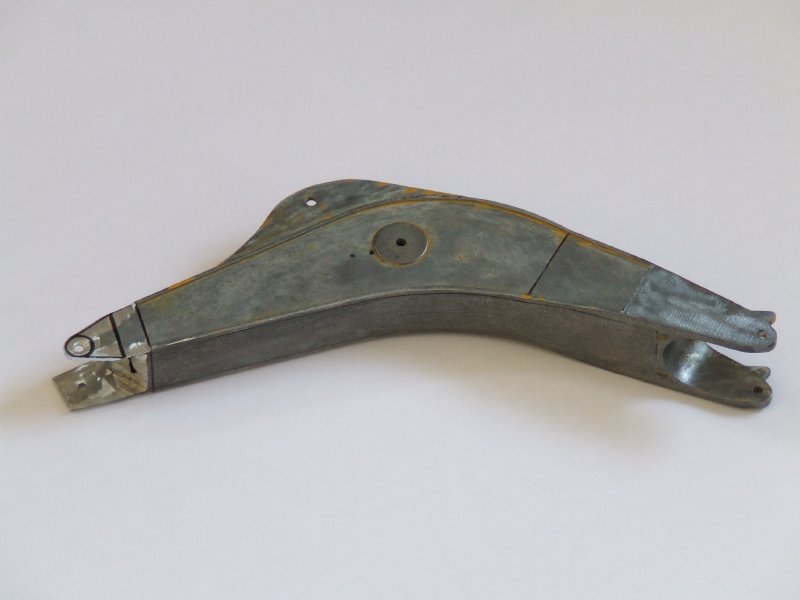  more modifications on the boom.I made a deep cut in the top and glued in the new parts.There´s some huge forces from the stick cylinder on these parts. 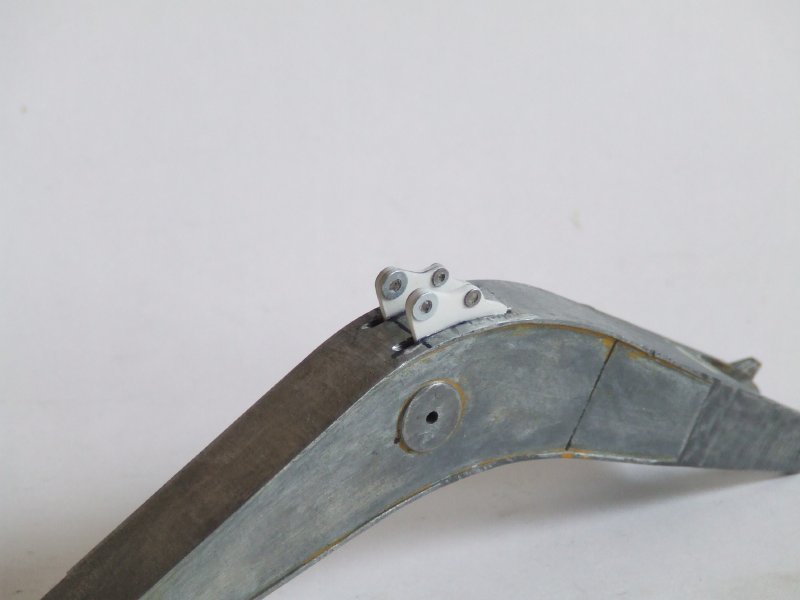 modifications on the stick.I filled the gaps with resine. 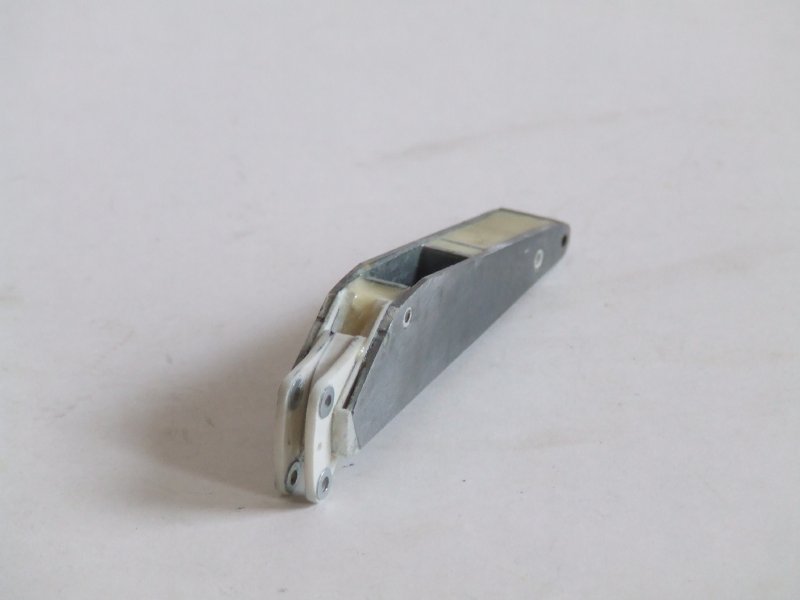 Sometimes you have to be creative to make the parts  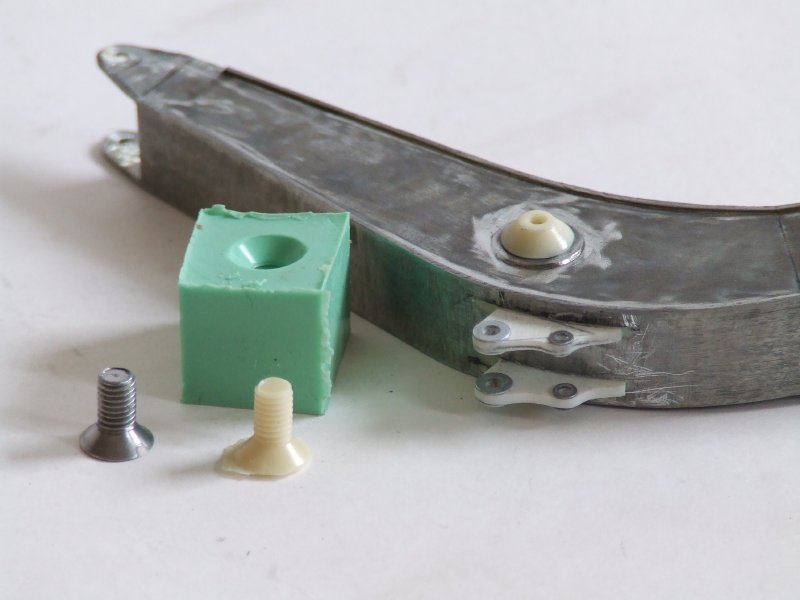
|
|

Rank: Advanced Member
Groups: Member
Joined: 6/1/2006
Posts: 4,065
Location: Dublin Ireland
|
Janh,that is one amazing piece of work!!! jaw dropping detail and the shear amount of work you have put into it!! this deserves all the credit it gets!!!! 
Why is "phonetically" spelt with a "ph"? ... It's better to be silent and thought a fool, then to speak up and remove all doubt The complex of Newgrange was originally built between c. 3100 and 2900 BC,[2] meaning that it's aproximately 5,000 years old. According to Carbon-14 dates,[3] it is more than 500 years older than the Great Pyramid of Giza in Egypt, and predates Stonehenge by about 1,000 years.
|
|
Rank: Advanced Member
Groups: Member
Joined: 12/8/2005
Posts: 708
Location: Germany
|
As I said the boom came without the main hydro cylinders.But the Liebherr boom had two stick cylinders.So I decided to take these as the main ones and make a new cylinder for the stick. I had been thinking about this long before I started this project and yet I had done some attempts to make my own hydraulic cylinders.The other possibility would have been to ask Conrad to give me a spare cylinder. 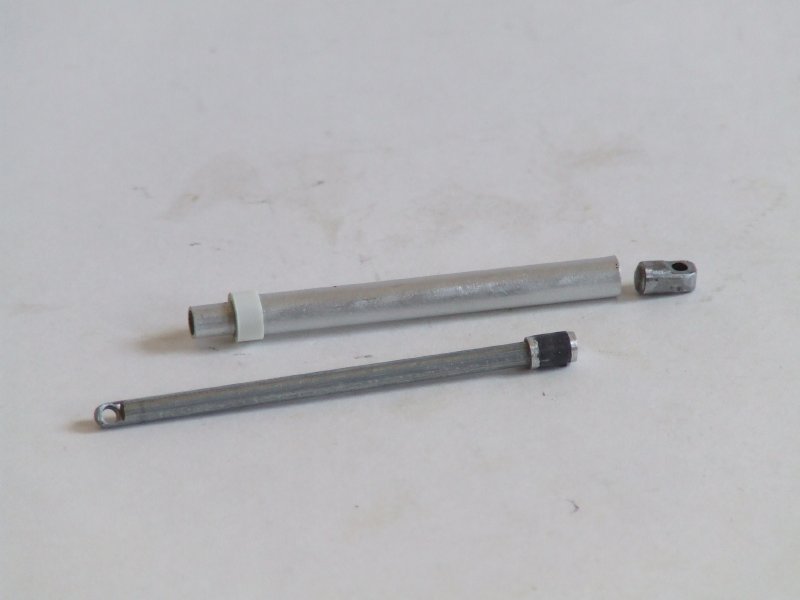 The cylinder is made of a big nail that moves in alumium tubes.To make it move smoothly I used a rubber tubing that gets smaller when you heat it up with a hair dryer.Sorry,I don´t know the english word for this special kind of rubber tube.It is finally fixed by two small alumnium rings. Let´s put this together and you have a complete cylinder: 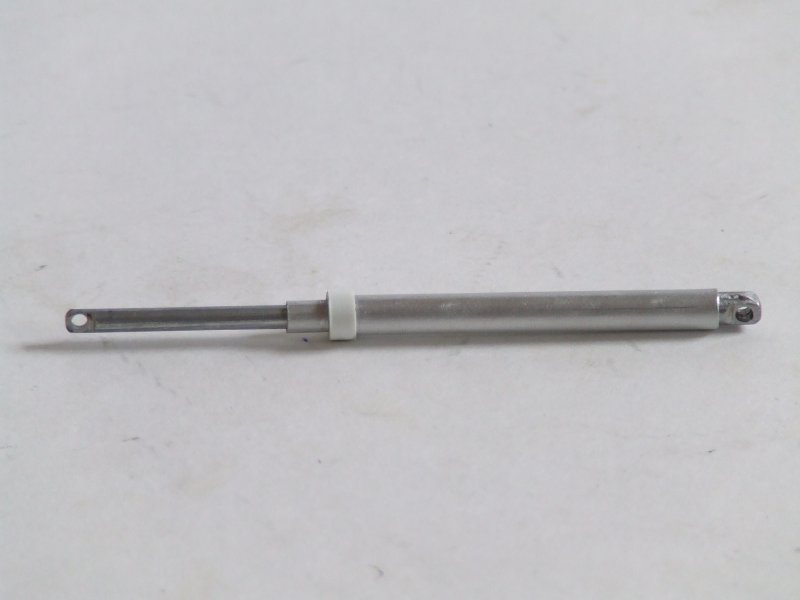 Meanwhile I finished the boom and stick: 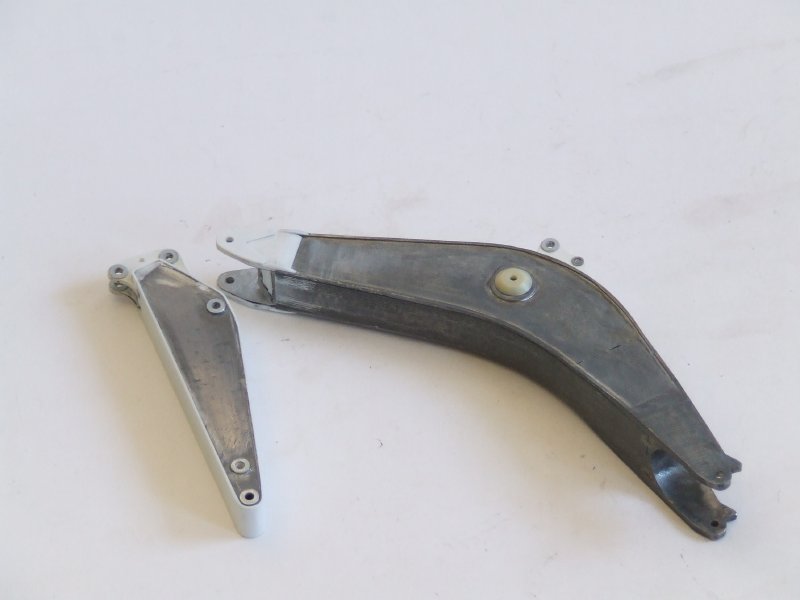 Already looks like a 385,doesn´t it? 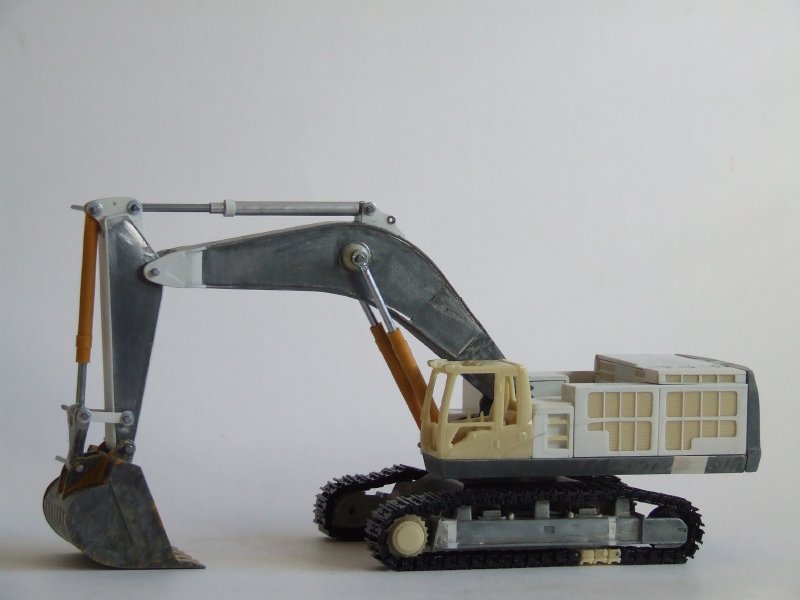 I decided to make a custom made bucket for the model.The one from the 984 was a bit too large and I didn´t like the shape also. 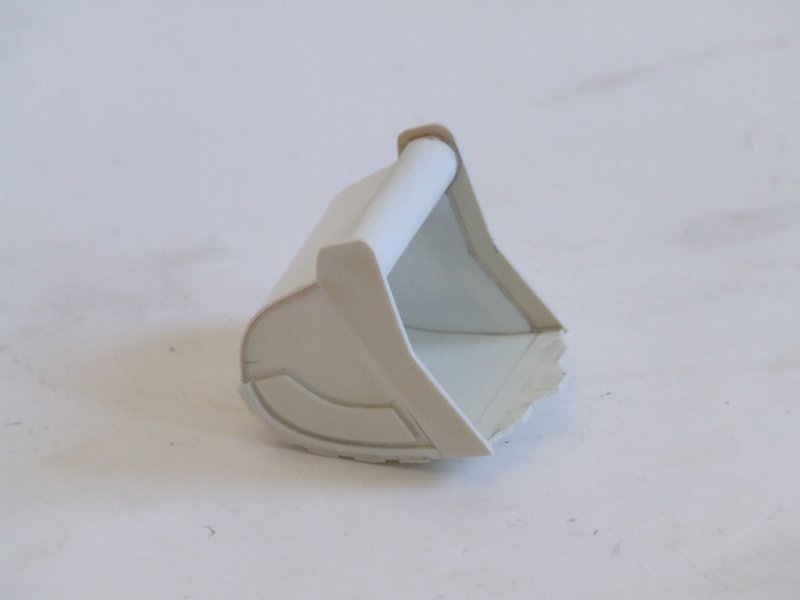 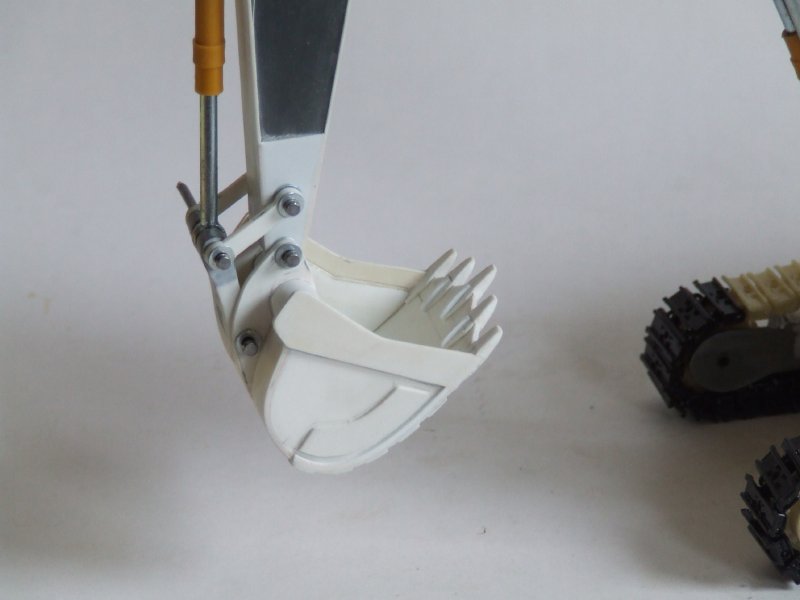 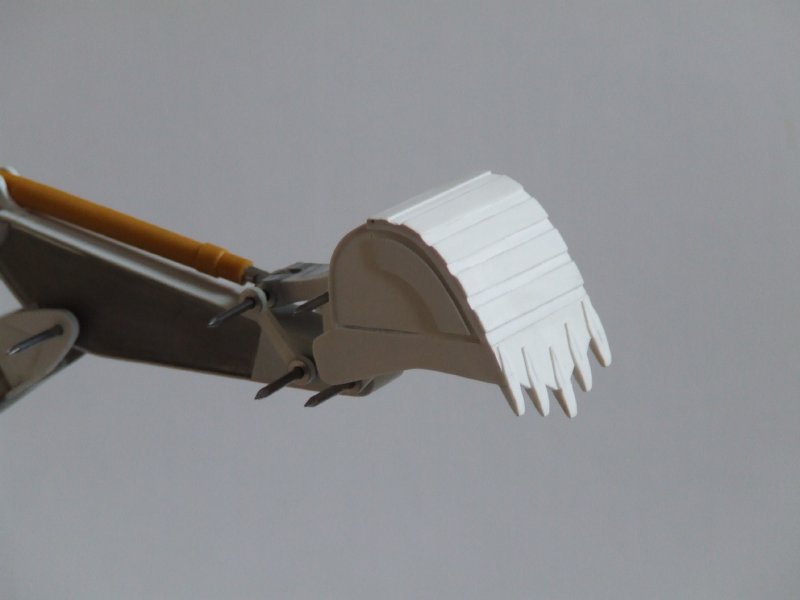 I have great skills at making buckets for excavator models.  For those who don´t know: I sell about a thousand resin buckets and other attachments per year.
|
|
Rank: Advanced Member
Groups: Member
Joined: 12/8/2005
Posts: 708
Location: Germany
|
I was so happy with the bucket I decided to make an extra feature. 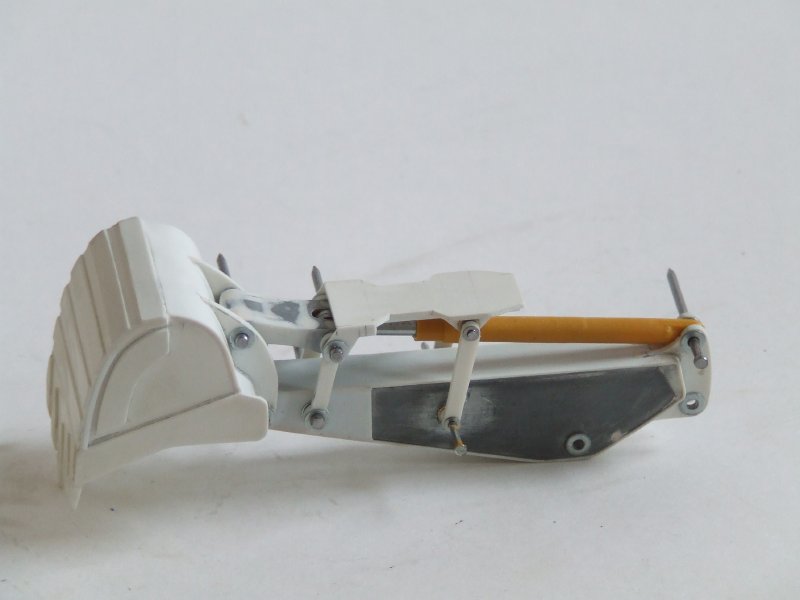 The machine I thought of is working in a quarry mine.And so I gave it a protection shield for the bucket cylinder.I never did something like this before and was worried if it would move properly. And yes,it did.These are the moments that give you the power to go on building,even when there´s no end in sight,yet. Back to the body: I added the walkways.These are made of steel mesh,brass profiles and styrene.I needed more than one attempt to get them done. 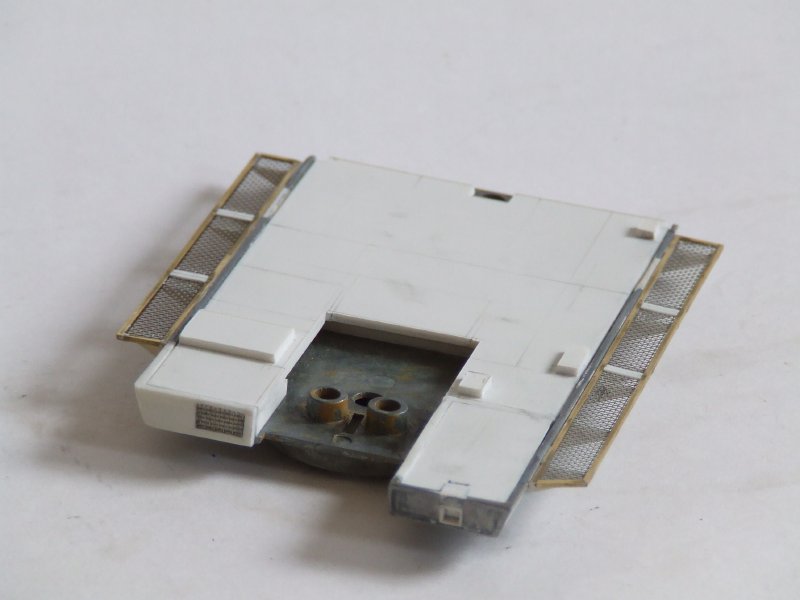 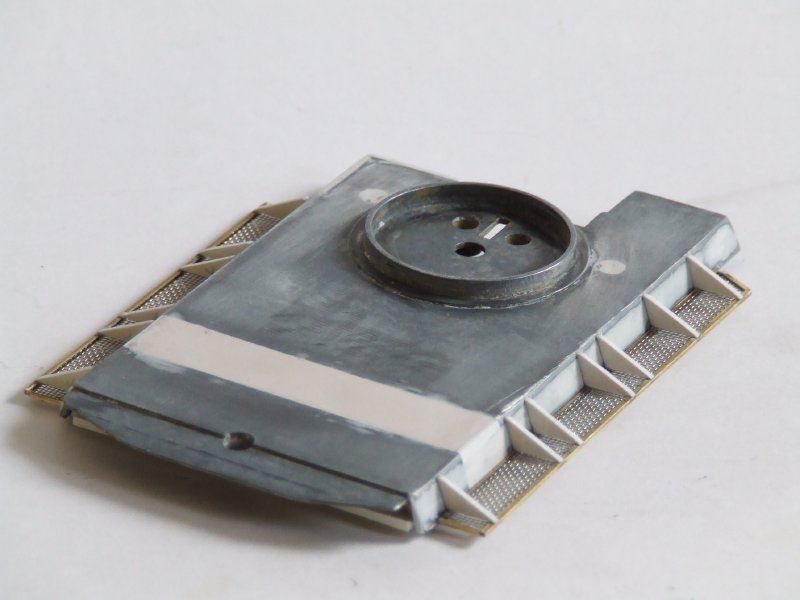 Now,it´s time to paint the first parts.This happened last sunday. 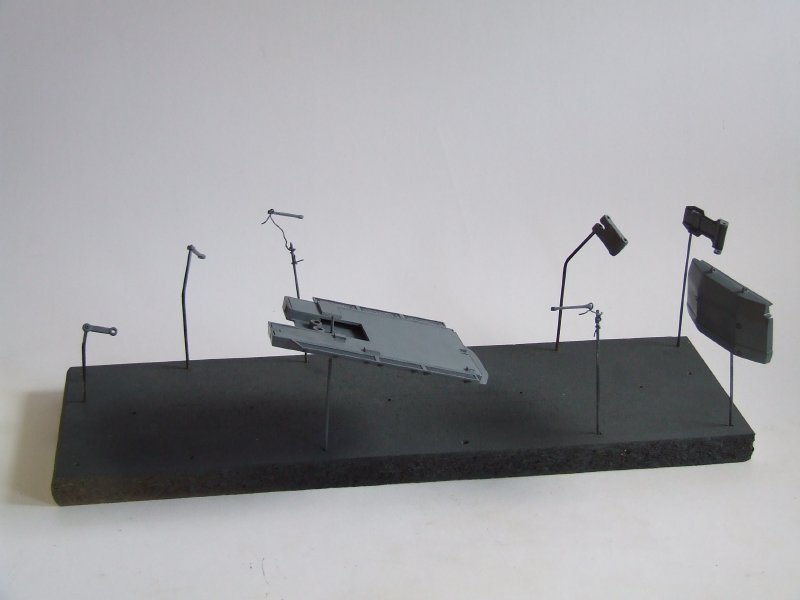 Adding the hydro lines to the boom: 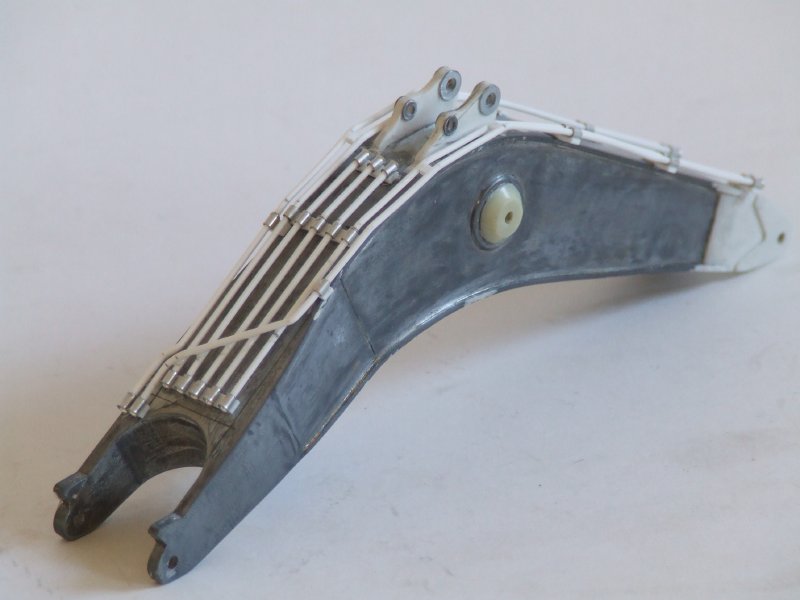
|
|
Rank: Advanced Member
Groups: Member
Joined: 12/8/2005
Posts: 708
Location: Germany
|
Remember I made silicone moulds from the details on the undercarriage? Now is the time to put them on again. 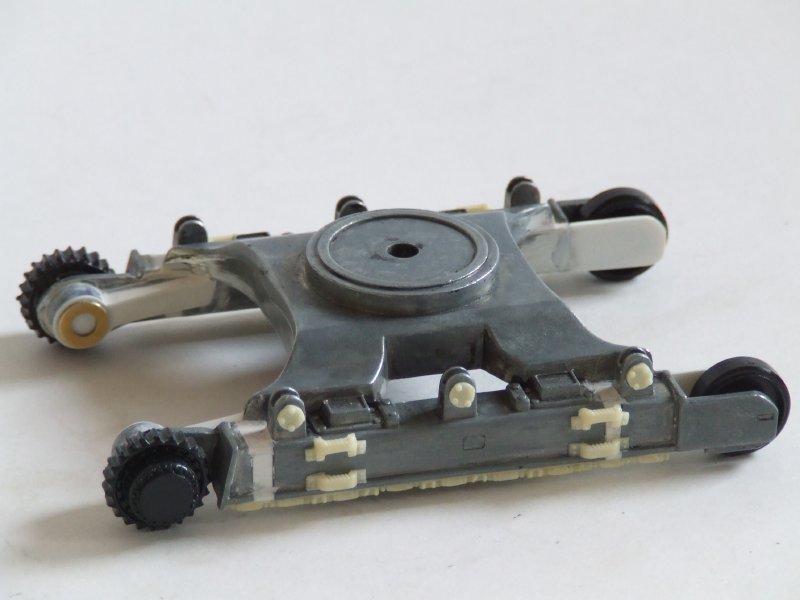 And then paint the parts: 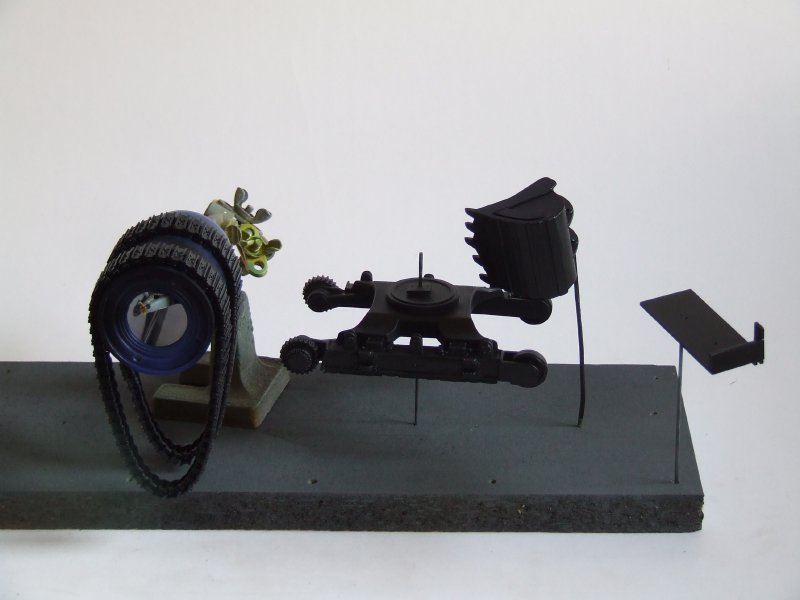 And put them together: 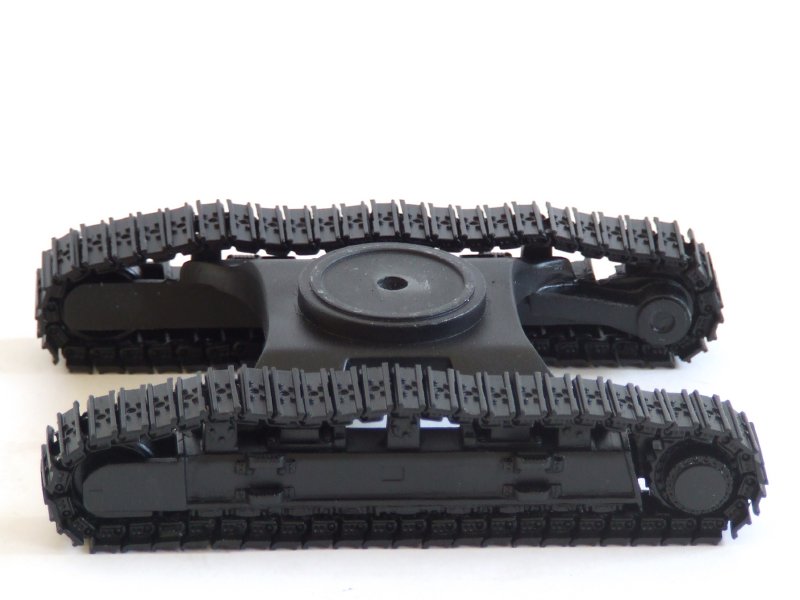 Time to fill the last gaps and build the last major parts.At This point I worked about 12-16 hours a day on the model to get it finished. 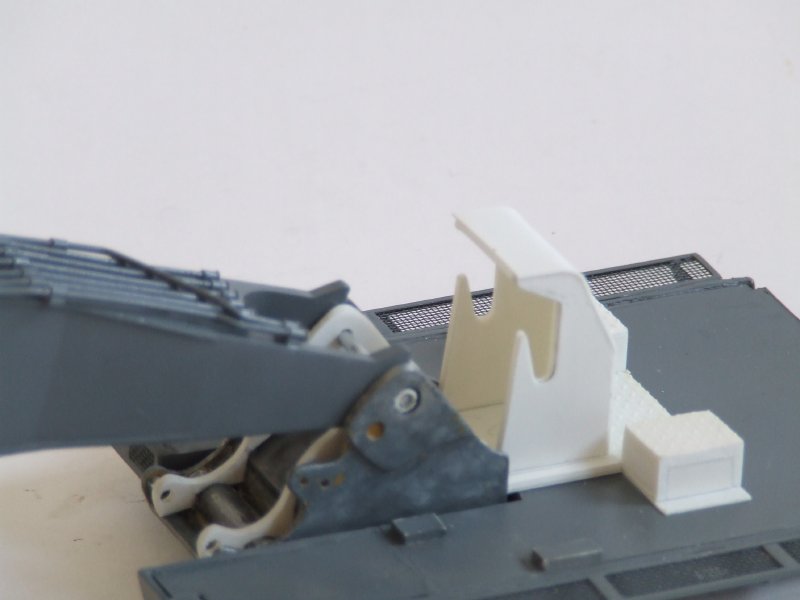 Put some grey primer on them.I use the grey primer for two reasons.First it´s much easier to detect mistakes on the surface of the parts when they all have the same colour. Second is that the yellow colour will look exactly the same on all parts when you put on the primer before the real colour. 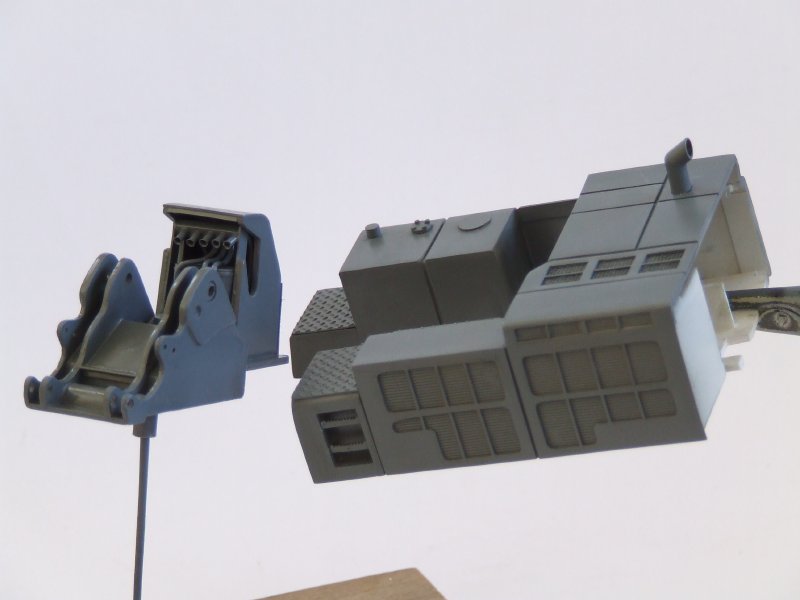 Adding the last details.This day was horror.The parts on the ladder didn´t want to stay together.But I had to paint them the same day to get finished.It was 10:30 pm when I got into the garage to paint them.Only about 4 hours behind the plan. =>:-< 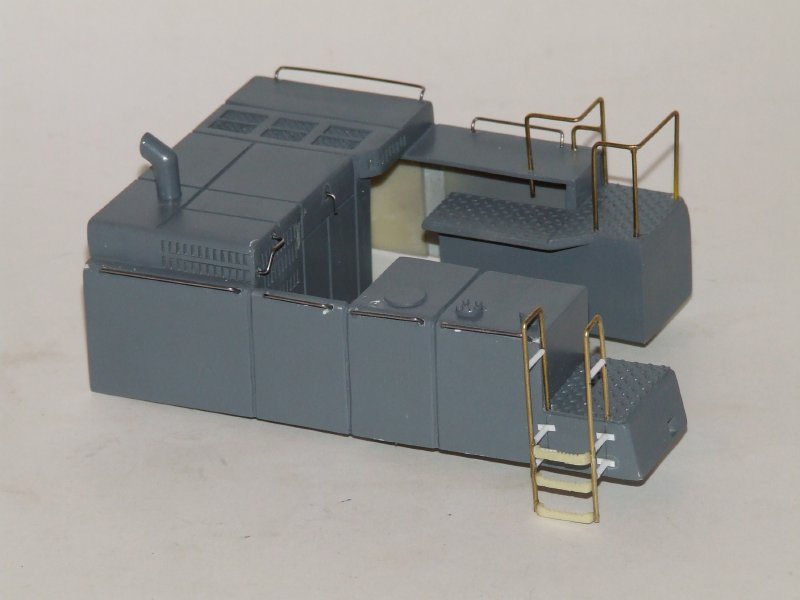 Now,I was really in a hurry and sorry,I don´t have many more photos of the last stages. Final paint job on the cab: 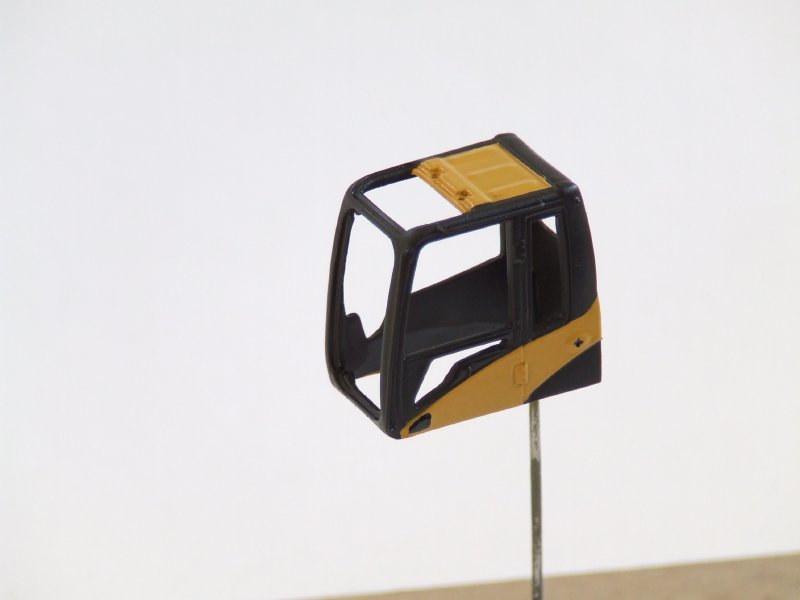 put on yellow colour:  then covered them with tape and painted the black parts: 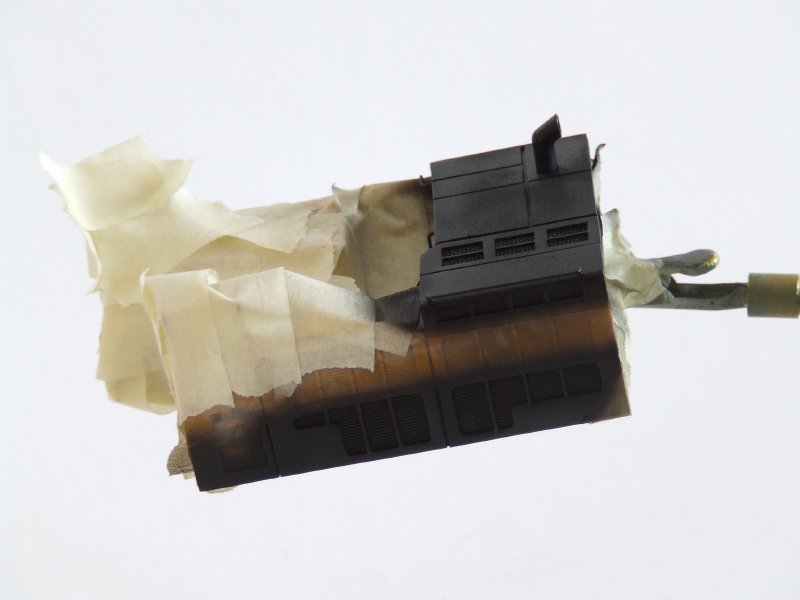 Strip off the tape and you are done: 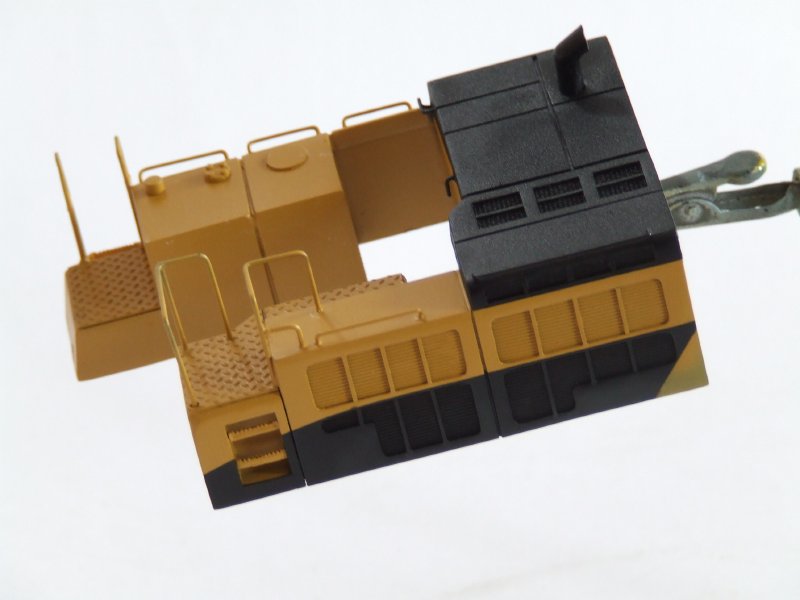 When I stripped off the tape from the counterweight I ripped off some of the colour,too. This was only about the last of many,many misfits that happened. And also,I would like to say that these were only the main steps on the way to make the model.It would be too much to show every single,little step I made.And what you can´t see at all is the think work behind the whole project.I mean I started with nothing and now the model is finally done. I have to say I didn´t even dream it would come out that fine.There is not much left that I could say of,I could have done any better. Thanks for watching and for the kind words to everyone! And once again: I will post more pics of the finished model when I get the decals. Jan
|
|

Rank: Advanced Member
Groups: Member
Joined: 5/27/2007
Posts: 2,757
Location: Mansfield/Ft. Worth, Texas
|
Fantastic job! This model is looking very nice!
 "Building the future!" "Building the future!"
|
|

Rank: Advanced Member
Groups: Member
Joined: 4/17/2009
Posts: 159
|
I said it yesterday, but, wow! I was so impressed with the time you have taken to show us how you did things, a great inspiration! That checkplate is fantastic and all you moulding work was phenomonal.
I was suprised however that only 3 extra lengths of track were needed?
Great work Jan!!!!
|
|
Rank: Advanced Member
Groups: Member
Joined: 12/8/2005
Posts: 708
Location: Germany
|
Aussie Boy wrote:
I was suprised however that only 3 extra lengths of track were needed?
Great work Jan!!!!
You could even build a 385 without lengthening the tracks at all. Check the spec sheets from CAT. track lenght on the 365 is 5860mm track length on the standard undercarriage on the 385 is 5840mm In 1/50 scale this makes a difference of 0.4mm ! So when you wanted to build a 385 with the short/standard undercarriage just take the one from the 365 model. track length on the L-undercarriage on the 385 is 6360mm This is + ~ 10mm in 1/50 scale So 3 additional track pads is enough for this. Whoever thinks you could build a CAT 385 from a Joal Komatsu PC 1100 is totally wrong.The Komatsu is much too big as a base model for this custom. Jan
|
|

Rank: Advanced Member
Groups: Member
Joined: 4/15/2007
Posts: 543
Location: Arizona
|
Janh,could you post a pic of the tools you used.Just so one might get more of an idea of what type of things to have in the future.Thanks.This model is CCM caliber in my book.
|
|

Rank: Advanced Member
Groups: Member
Joined: 2/4/2006
Posts: 391
Location: Peru, Indiana
|
Unbelievable work!
Chris
|
|
Rank: Advanced Member
Groups: Member
Joined: 12/8/2005
Posts: 708
Location: Germany
|
thundercrane wrote:Janh,could you post a pic of the tools you used.Just so one might get more of an idea of what type of things to have in the future.Thanks.This model is CCM caliber in my book. I don´t have any special tools.The most important one is probably a sharp hobby knife.And the second is a Dremel.I mainly use it with the cutting wheel. And I have a lot of tools to polish things like different kinds of sandpaper (always take the water proof) and about a dozen of different files. Then I have a second milling machine like the dremel.That´s a cheap one.I have it mainly in case of that the Dremel has a defect.This happened two times last year. I should count how many times I switch it on and off a day.Must be several hundreds times probably. You should also have a pincer for small parts and some tongs.And glue is important for me.I have a stock of at least 50 tubes of super glue.So I never run out of this stuff.I also have different special glues,like two component glue (glues very strongly) and a special one for plastics. And I have some rulers to meassure things.I have to change the rulers every two or three months,because they are getting used from cutting. My workshop always looks like a mess.  That´s why I don´t post any photos of it.I just can´t keep my stuff in order.And the resin cut offs make a lot of dirt on the floor. I do have a lot of other tools,too.But honestly I do not use them very often. I also have a third milling machine that I use for very filigrane drilling operations.It´s not very powerful,but it can run at very low speed which is ideal when you work on styrene parts. The major part of my workshop is filled with materials of all kinds.I could open up a hobby shop with my styrene and metal stock.You can never have enough different ones of these. I also have a big box with model parts.I always hope I can use these someday for a new project.But some of them I keep for more than 10 years now.Maybe it´s about time to sort out some of them. For painting I have a compressor and two different spray guns.A single action for bigger parts.It´s very easy to clean.And a double action for smaller and high quality parts. For this particular model I only used the double action.Cool thing,but it takes 15 minutes to clean it and it has an open paint can.So you always have to empty it when you finish painting.For the other one I have the paint in small glasses that can be attached to the spray gun. Jan
|
|

Rank: Advanced Member
Groups: Member
Joined: 6/4/2006
Posts: 7,752
Location: arlington, Tx
|
Quote:My workshop always looks like a mess.
That´s why I don´t post any photos of it.I just can´t keep my stuff in order.And the resin cut offs make a lot of dirt on the floor.
I know what you mean. My models do not come close to your work. I hope one day to be as talented as you are. Thanks for the inspiration to push myself to learn more about modeling. One thing I really liked was the used of the computer wires what a great idea Jason
NIkl Scale Models
|
|

Rank: Advanced Member
Groups: Member
Joined: 8/9/2006
Posts: 795
Location: New South Wales, Australia
|
Jan, From the moment I saw the start a while ago, I knew this was going to be a show stopper. Well done mate! This is by far one of the best, if not the best, CAT model I have ever seen!!!!! Love your work mate!! Cheers, Craig
 The Caucasianaasian The Caucasianaasian
|
|

Rank: Advanced Member
Groups: Member
Joined: 3/8/2005
Posts: 115
Location: Norway
|
Fantastic work  Tor Kjetil
|
|

Rank: Advanced Member
Groups: Member
Joined: 7/30/2008
Posts: 225
Location: uk
|
I must Agree with Craig on this one!! Gets my vote for custom of the Year!!! Only one thing i see wrong with it! I believe it would look better in my House? Well done.. Gaz
|
|

Rank: Advanced Member
Groups: Member
Joined: 9/8/2007
Posts: 2,764
Location: Norfolk,va
|
|
|
Rank: Advanced Member
Groups: Member
Joined: 9/15/2002
Posts: 553
Location: Kentucky
|
That is just truly amazing work!!! Wow is just about all that can be said of that model. Great job.
|
|
|
Guest |
