|
|
Rank: Advanced Member
Groups: Member
Joined: 2/8/2006
Posts: 2,612
Location: Iowa
|
Just another thought. While you have the model stripped,it wouldn't hurt to take a small fine tooth file and touch up some of the rough spots around the doors and windows and any other areas that might need a "fine" touch.
You'd be surprised how much better you can make a "cheap" model look with a little TLC and time and with-out investing much $$$.
|
|
Rank: Advanced Member
Groups: Member
Joined: 2/8/2006
Posts: 2,612
Location: Iowa
|
And a GREAT BIG HEADS UP. If you use Super Glue to put the plastic window back in, DON'T set it in and seal the cab to the body right away. Let it air dry overnight in the open air first. It wouldn't hurt to have a small fan blowing a slight breeze on it. The Super Glue gasses WILL adhere to your finger prints and etch to the plastic inside if you don't.
|
|

Rank: Advanced Member
Groups: Member
Joined: 6/29/2007
Posts: 574
Location: Atlanta, GA
|
Steve, good info all around. I will follow your tips and try to clean her up. I broke the plastic getting it out so I am now contemplating chopping the cab to an open, no door version. Haven't made up my mind yet. Bug
ITW Security
|
|
Rank: Advanced Member
Groups: Member
Joined: 2/8/2006
Posts: 2,612
Location: Iowa
|
gabugman, Thanks.
As for the plastic (just an idea),you might try your local hobby shop for some clear plastic sheets and try fitting those in. Not real easy but doable. Open cab no door doesn't sound to bad either. Different (custom work) is good too. :d/
|
|

Rank: Advanced Member
Groups: Member
Joined: 6/29/2007
Posts: 574
Location: Atlanta, GA
|
OK gang, back at it after a short sabbatical. First off, Tomcat, I gave Dean your best wishes but without knowing your real name he said "I ship alot of stuff to MI, maybe it's David?" Couldn't help him there...  After a second coat of Citristrip and some picking/brushing, everything came out clean! I took that opportunity to remove the cold frame from the garden process and move it into the paint booth process! (Btw, the cold frame worked for early season germination but was really not much account. I feel like you really need a greenhouse to start early season seeds). Here's the real paint booth in action 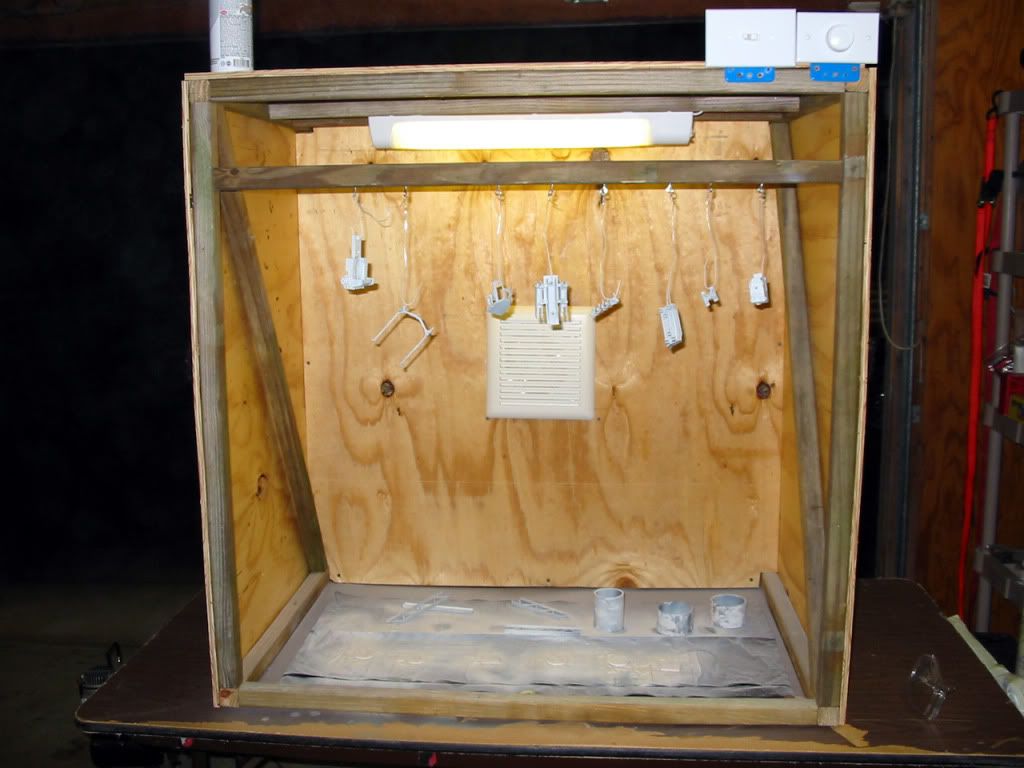 I have a couple more pieces to get primed and then I get to do my first round with the airbrush - can't wait! 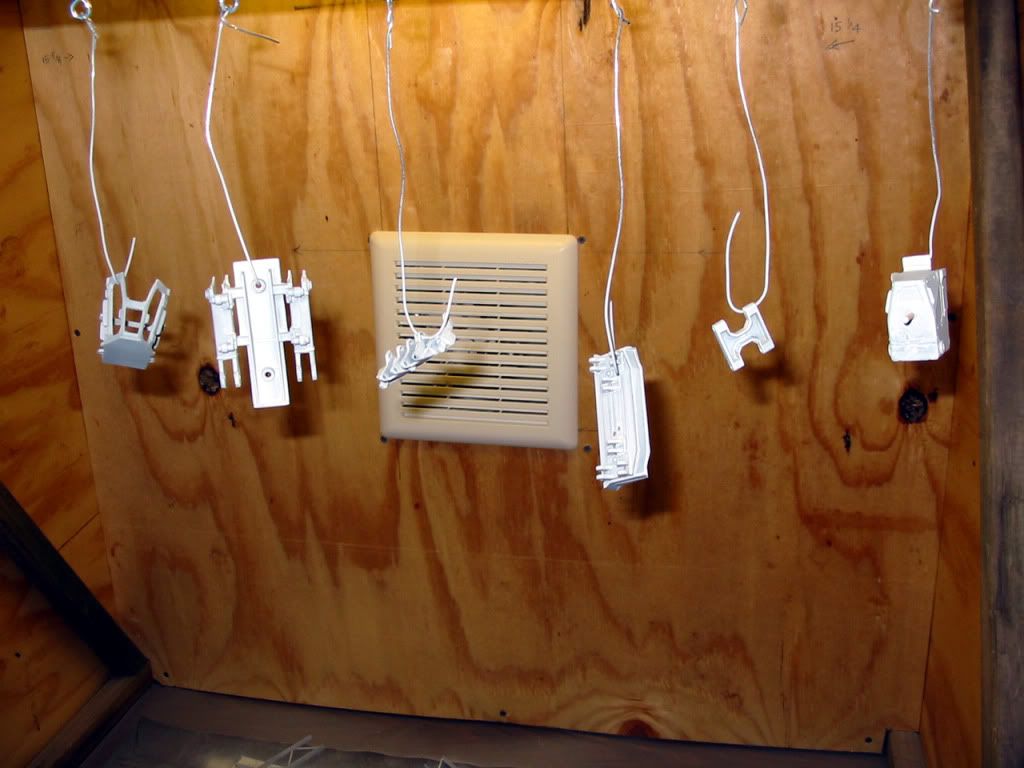 Hope to get in some trial and error over this weekend. I hafta get the 3" flex in place and the end of line fan. Bug
ITW Security
|
|
Rank: Advanced Member
Groups: Member
Joined: 2/8/2006
Posts: 2,612
Location: Iowa
|
OUTSTANDING !!! I was hoping you'd be back with more.
|
|

Rank: Advanced Member
Groups: Member
Joined: 6/29/2007
Posts: 574
Location: Atlanta, GA
|
Over the weekend I finally was able to use the airbrush - an artist I am not!  I also learned that your priming better be decent or the paint will look like crap!  So, off came the paint, primer and I had to buff everything out and re-prime some pieces. No wonder some of you start a project and show up a year later with the end result. Well, all except Don Campbell. That guy must live in his shop! Re-painting to commence this week and some updated pix! Bug
ITW Security
|
|
Rank: Advanced Member
Groups: Member
Joined: 2/8/2006
Posts: 2,612
Location: Iowa
|
Hang in there. If everything always went right the first time,it'd take all the fun out of it.
Try letting the primer barely dry and then painting right away. Most primers will dry fast and the paint sticks better.
|
|

Rank: Advanced Member
Groups: Member
Joined: 1/14/2009
Posts: 764
Location: michigan
|
Bug,
Dean has been a very good friend to me for the last three years. I know for a fact that I keep him in business. Pretty much my whole CCM collection came from him and as did all my cranes, my blast hole drill, and lowboys. But looking good on the little project. Little tip-a-reno.....Sand your primer with a 320 grit or higher to give the paint something to stick too. And it gives you nice glossy finish. I will drop you a PM of the little project I am working on, I have been workin on for a year. And a little tip I learned with the the stripper is you need to wash it soap and water and it will remove all the residue and make the paint come out better.
Anything is possible if you don't know what you are talking about.
|
|

Rank: Advanced Member
Groups: Member
Joined: 6/29/2007
Posts: 574
Location: Atlanta, GA
|
Well, imagine my surprise whan I tried to paint a couple pieces yesterday and no paint would come out!  So I broke out the assembly diagram for my Iwata and cleaned her up real good. Every thing back together with some struggling but done. What's this, it actually works?! Haha, evidently the guy I traded my mower to for this set up had put it back together incorrectly. Now I feel like an artist! Paint coming out as desired and spraying smoothly. One issue I seem to have is after each color I am still needing to clean it up to get it to spray well for the next round. My manual sez I should just need to run some cleaner thru it but that doesn't seem to be doing the trick?! I'll admit that I have not lubed the needle per the instructions but I don't have any of the recommended lube. Can I substitute? Will this make the diff in cleaning as well? Bug Edit for a pic! 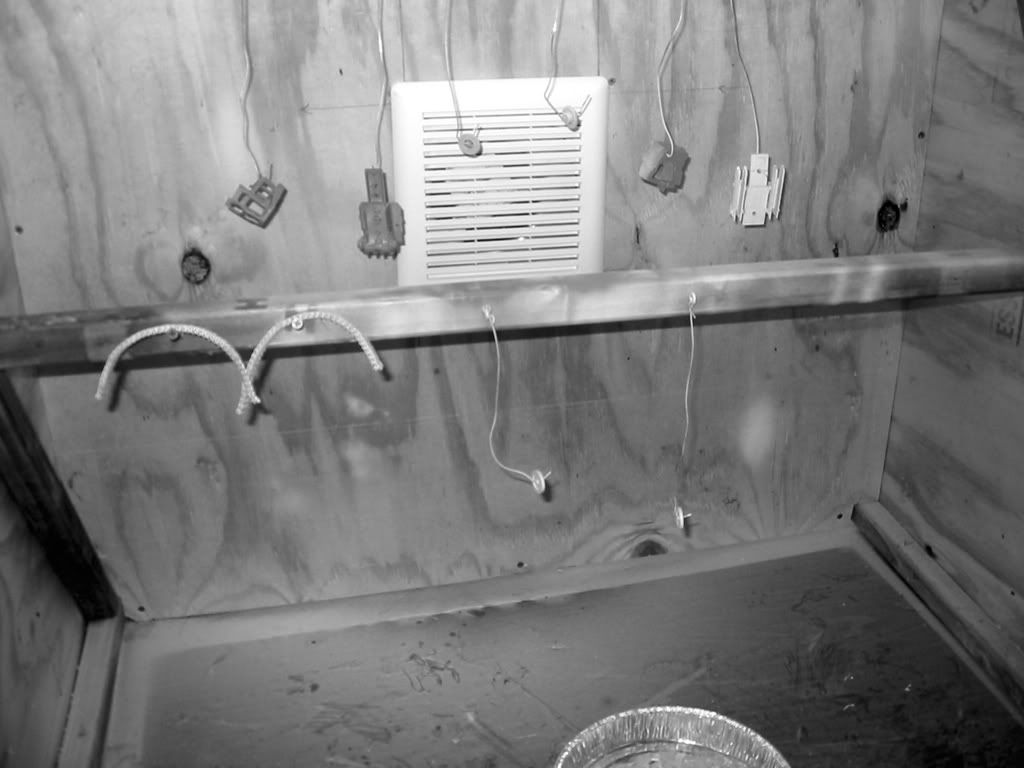
ITW Security
|
|
Rank: Advanced Member
Groups: Member
Joined: 2/8/2006
Posts: 2,612
Location: Iowa
|
Interesting. I just run some paint thinner through mine (after painting or switching colors) until it comes out clear,then turn up the air a little to blow it out. Then test a little paint while re adjusting the air and back at it. I do strip mine down all the way after the end of the project and clean everything then.
|
|

Rank: Advanced Member
Groups: Member
Joined: 6/29/2007
Posts: 574
Location: Atlanta, GA
|
Hi, been MIA and wanted to catch up! Soooo, the model hasn't seen much progress since the last update but remember that cold frame/spray booth? Well here's the results of that lil endevour: 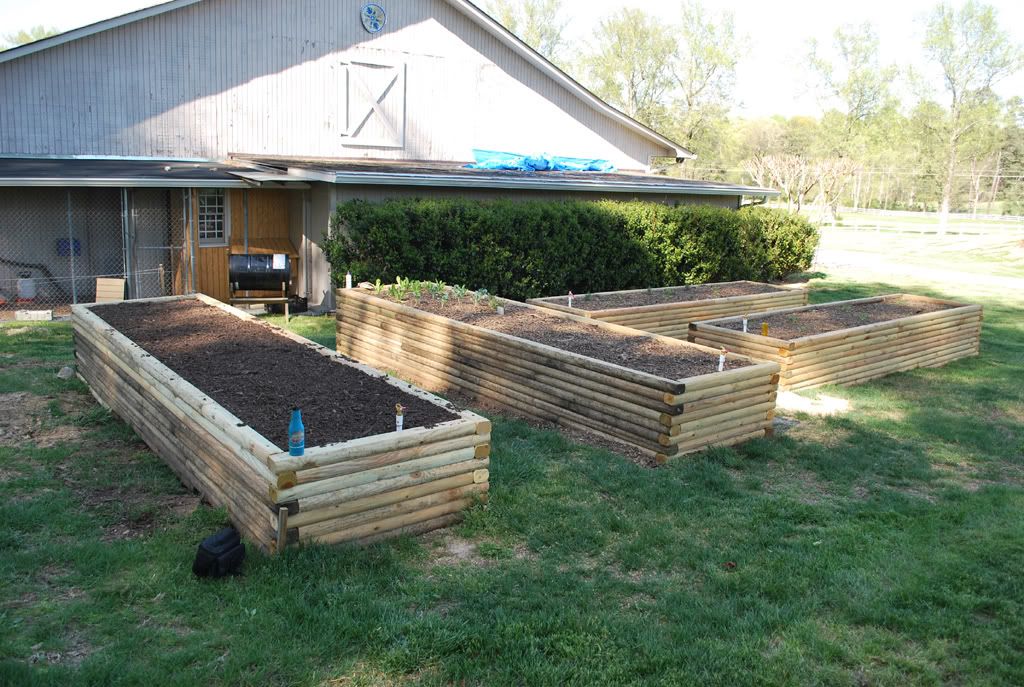 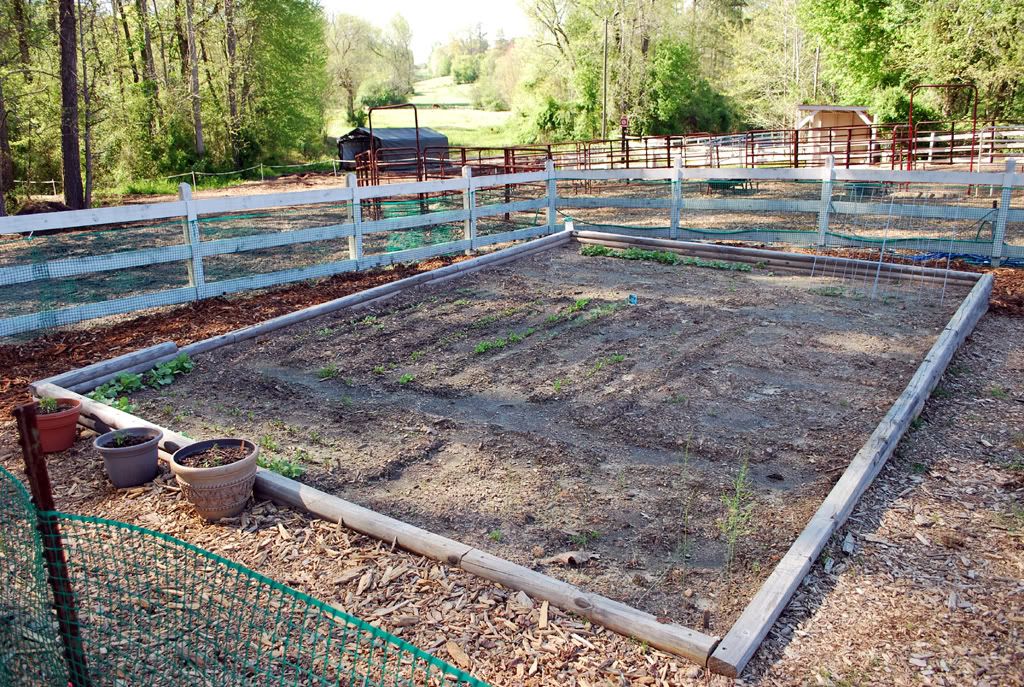 Everything's coming along nicely. Winter in GA has been reluctant to let go so it has been somewhat cool this spring. Good for lettuce, not for beans/corn/peppers! We've already harvested our first batch of radishes and am waiting patiently for the bibb lettuce! Can I suggest a cold beer with some fresh radishes?! I may actually get back to the 850 sometime this month. My son and some of his friends went into my shop and moved my table, upsetting one of the pieces and knocking it on the floor. I hadn't dull coated yet so the paint chipped and will require re-doing! DOH! Spring on a farm, gotta love it!
ITW Security
|
|

Rank: Advanced Member
Groups: Member
Joined: 2/28/2006
Posts: 3,464
Location: rhode island
|
this is a cool post. i like the progress pics .its interesting to see others go through the process of re working a model. and not to highjack but i love the garden beds. and the yard in general. we are trying to make that sort of thing here at the new house. we have some ducks and are waiting on a variance approval so we can get miniature donkeys. a large garden was tilled and ready but we are stilll getting frost here. allways wanted to own a farm but ill settle for a mini one for now. thanks for sharing the pics
brian
|
|
Rank: Advanced Member
Groups: Member
Joined: 2/8/2006
Posts: 2,612
Location: Iowa
|
brian falcone wrote:this is a cool post. i like the progress pics .its interesting to see others go through the process of re working a model. and not to highjack but i love the garden beds. and the yard in general. we are trying to make that sort of thing here at the new house. we have some ducks and are waiting on a variance approval so we can get miniature donkeys. a large garden was tilled and ready but we are stilll getting frost here. allways wanted to own a farm but ill settle for a mini one for now. thanks for sharing the pics
brian Agreed (on everything too). Hard to do a garden here. Toooo many White Tail Deer. Almost have to put the bird feeders on a flag pole.:d/ ...still waiting to see the finished model or more progress.
|
|

Rank: Advanced Member
Groups: Member
Joined: 6/29/2007
Posts: 574
Location: Atlanta, GA
|
Back again and making progress but need some info on re-riveting. I have cut and placed some copper tubing for my new rivets but am unsure how to flare the ends. I have read that some of you use nails and others have made your own tool and am curious how both work? Bob?
ITW Security
|
|

Rank: Advanced Member
Groups: Member
Joined: 6/29/2007
Posts: 574
Location: Atlanta, GA
|
Well, here we go! After much-o struggling and lots of heavy handed plier-ing, here's where we ended up: 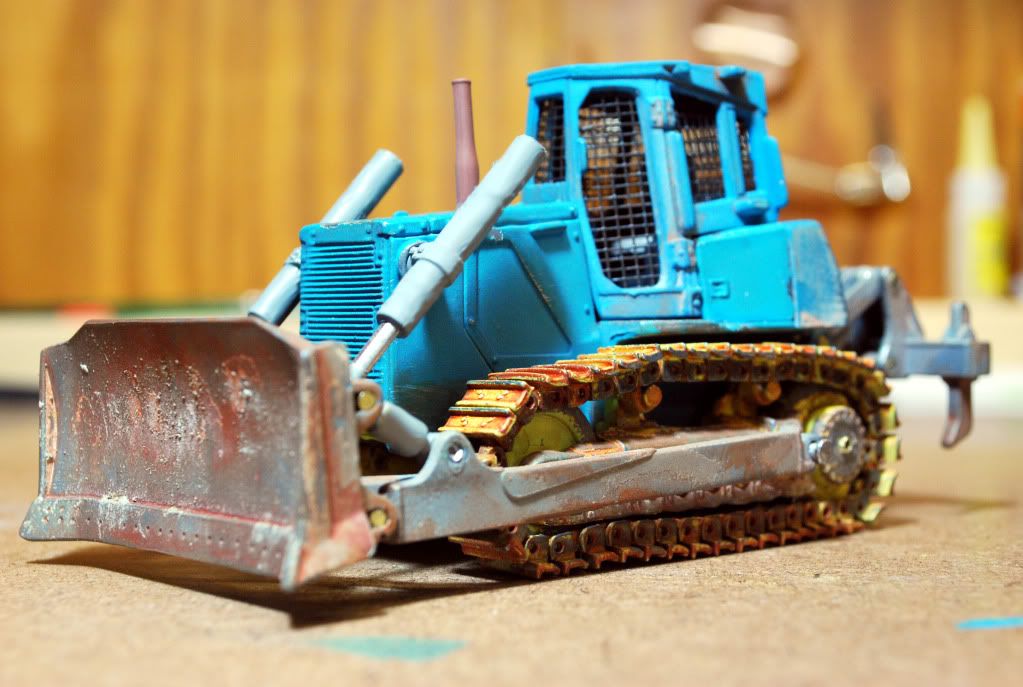 I know it's not pretty (to most) but weathered was what I was after all along. There are some things that I know I could have added but finally after almost a year I was ready to just get it over with! I found this process from start to finish quite involved and patience trying. No wonder Woc still hasn't finished his 112! There is alot of room for improvement and I'm sure I will become more proficient at this as I continue to to try and customize/design some of the things I want in my collection. Curiously BobM just went thru a tute on the customization of the LTM1300, something that is next on my list for learning/customizing. Hopefully my Ainscough attempt will be better than my JD! One thing that interests me immensely is trick photography with my models. I have been researching all the methods people use to make them look realistic. What do you think about this?  Btw, here is where my paint booth finally landed after all the ancillary jobs: 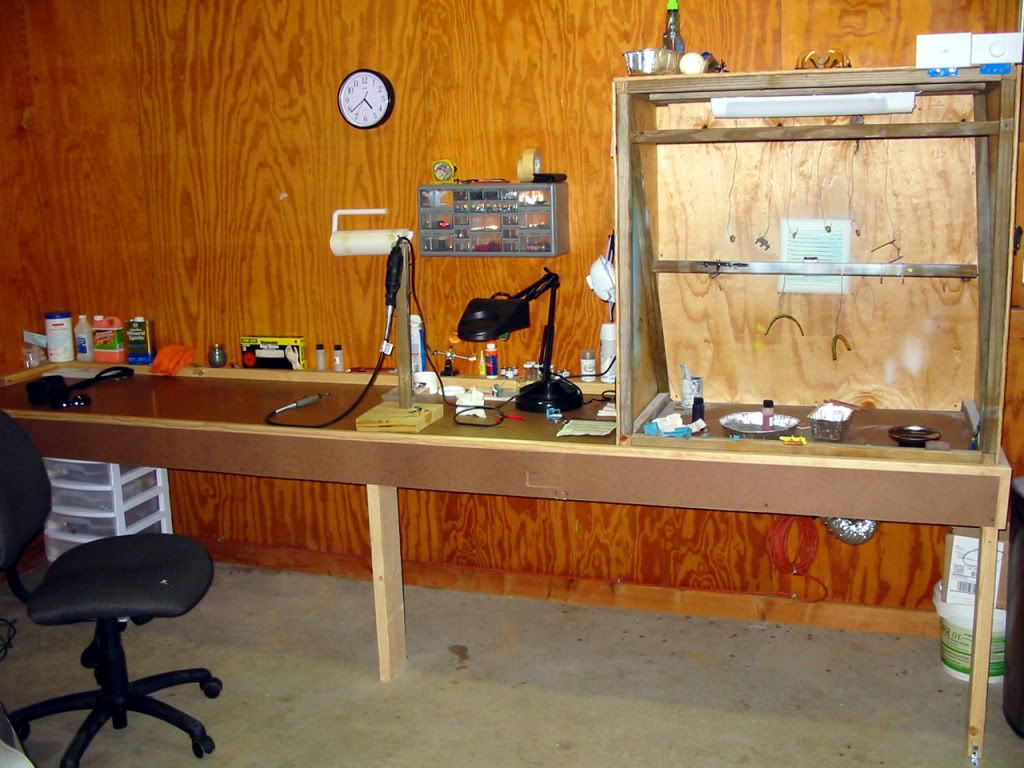 Thanks to all for the tips and encouragement! Fred
ITW Security
|
|

Rank: Advanced Member
Groups: Member
Joined: 3/21/2006
Posts: 5,046
Location: B-town
|
I like the final results of the dozer......looks well broke-in.
The photo superimposing looks pretty good too.....especially if it's your first time.
Chris
|
|
|
Guest |
