|
|

Rank: Advanced Member
Groups: Member
Joined: 5/15/2013
Posts: 222
Location: Netherlands
|
kerst wrote:
Their tires are great. They just a little bit on the big size for this scale, so it all gets tight,
I was wondering if they don't touch when steering. Model wheels always take up more space then the original, since the pivot point is more away from the center of the wheel. That, and then they are also bigger...
|
|

Rank: Advanced Member
Groups: Member
Joined: 9/7/2005
Posts: 1,154
Location: Copake, NY
|
Victor Pay wrote:kerst wrote:
Their tires are great. They just a little bit on the big size for this scale, so it all gets tight,
I was wondering if they don't touch when steering. Model wheels always take up more space then the original, since the pivot point is more away from the center of the wheel. That, and then they are also bigger... That was certainly a challenge, but i got them to stay clear of each other while steering. Kerst
 http://forums.dhsdiecast.com/default.aspx?g=posts&m=1096251 http://forums.dhsdiecast.com/default.aspx?g=posts&m=1096251
|
|

Rank: Advanced Member
Groups: Member
Joined: 6/18/2007
Posts: 1,025
Location: South of the Weminuche
|
|
|

Rank: Advanced Member
Groups: Member
Joined: 6/27/2013
Posts: 937
Location: Quebec, Canada,
|
This is exactly the type of project I wish I'd do once retired  For now, I am playing with small tools due to limited space. Kerst, one question: did you had the blueprints for the making of your parts or did you figured it out approximatively? Wonderful project my friend. Wishing you good luck for the final steps, but I am confident it will be one of a kind as far as piece of artwork and engineering. My wife would say I've got saliva dripping out my mouth...  Stephane
___________________________________________________ Playing with toys since 1970, now building them.
|
|
Rank: Advanced Member
Groups: Member
Joined: 9/7/2005
Posts: 1,154
Location: Copake, NY
|
Ironstef70 wrote:This is exactly the type of project I wish I'd do once retired For now, I am playing with small tools due to limited space. Kerst, one question: did you had the blueprints for the making of your parts or did you figured it out approximatively? Wonderful project my friend. Wishing you good luck for the final steps, but I am confident it will be one of a kind as far as piece of artwork and engineering. My wife would say I've got saliva dripping out my mouth... Stephane Thanks for the nice words! I don't have the blueprints, just documentation and lots of pictures found on the Internet, so I have to do a lot of figuring out, which is fun. Kerst
http://forums.dhsdiecast.com/default.aspx?g=posts&m=1096251
|
|
Rank: Advanced Member
Groups: Member
Joined: 9/7/2005
Posts: 1,154
Location: Copake, NY
|
Faun carrier The outrigger boxes are ready and bolted to the carrier. Next will be the outrigger beams. I am also thinking how to build the gearbox and transfer case and which motor to use. There is not a lot of space, so they need to be designed carefully. 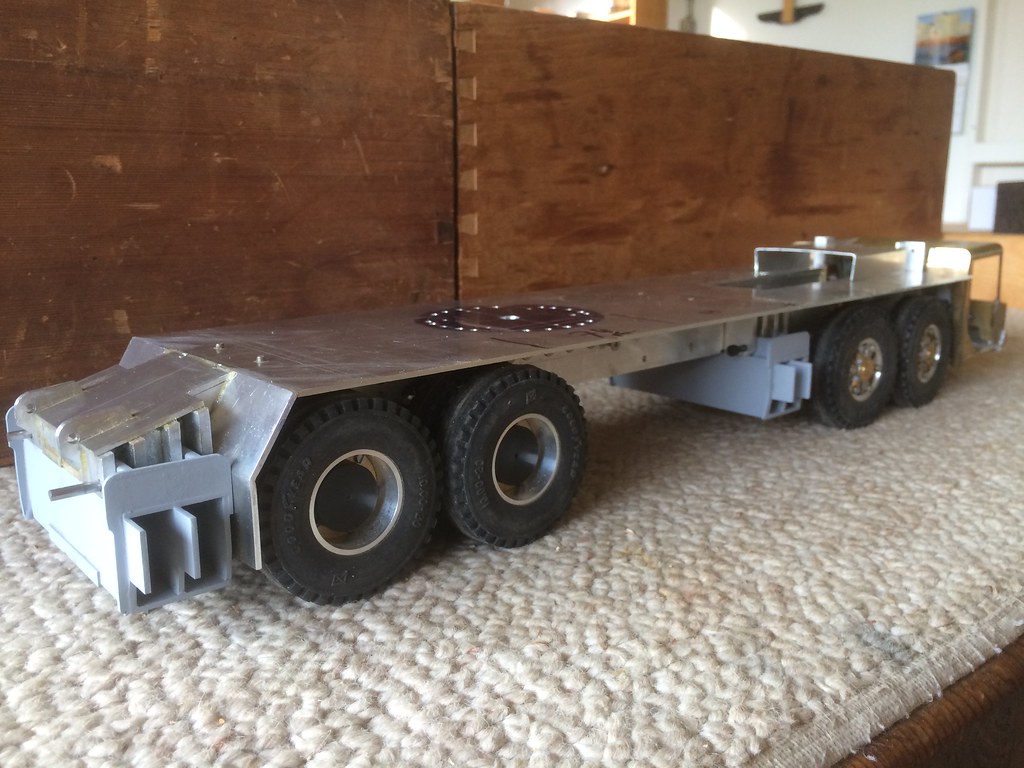 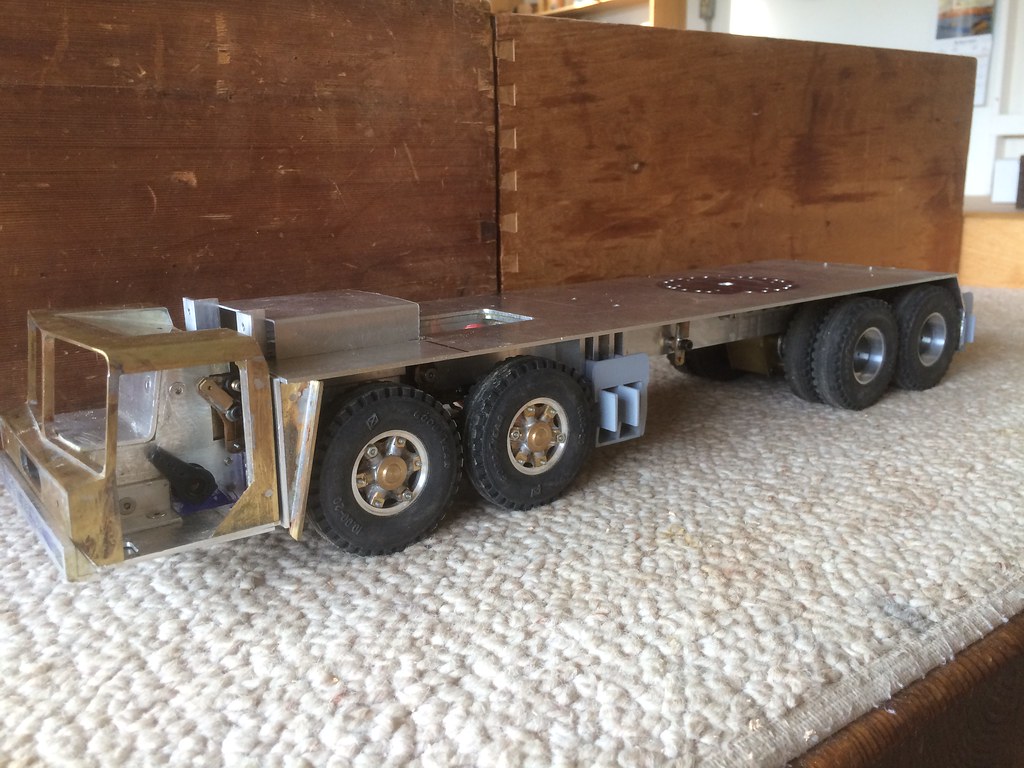 Note: The third axle is missing. Kerst
http://forums.dhsdiecast.com/default.aspx?g=posts&m=1096251
|
|
Rank: Advanced Member
Groups: Member
Joined: 9/7/2005
Posts: 1,154
Location: Copake, NY
|
Transfer box In the last couple of weeks I have been experimenting with a planetary reduction, which I got from a small geared motor. A lot of trial and error! The outside diameter is 22 mm and all the gears are steel. The trick was to incorporate it in the transfer box. I tried a lot of different setups, but I think I found a setup that works. The transfer box will have two speeds (direct and very low) and front wheel drive can be engaged or disengaged. The real one has an inter-axle diff, between the rear axles and the front axle, but I couldn’t find the right planetaries to accomplish that. It would need a 1:2 ratio. It turned out nice and compact. But it hasn’t been tested yet. 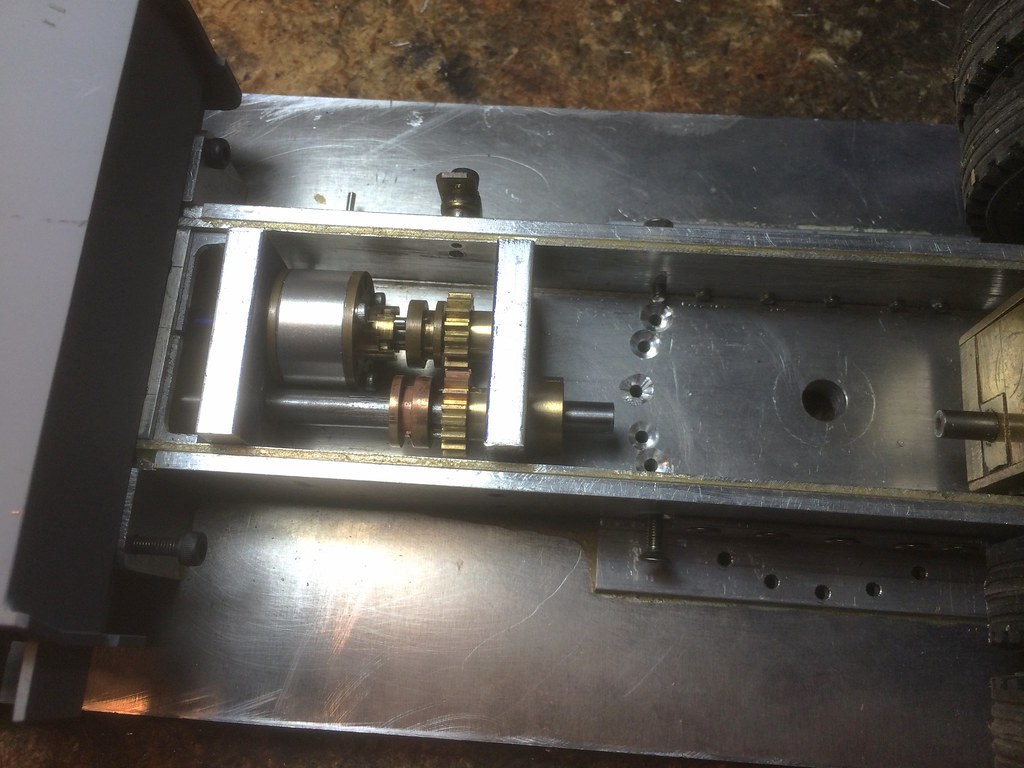 Kerst
http://forums.dhsdiecast.com/default.aspx?g=posts&m=1096251
|
|
Rank: Advanced Member
Groups: Member
Joined: 9/7/2005
Posts: 1,154
Location: Copake, NY
|
During the past couple of weeks I worked on the universal joints. I always make them myself, mainly because they need to be very specific in size, but also because good quality universal joints are very expensive. The final assembly of the joints is always tricky, because I solder the pins (1/16" diameter) in from the center and the solder easily flows in the wrong spaces. It needs to be heated just enough for the solder to flow, but not too long. I had a cup of water handy to cool it down quick once I thought it was done. In the pictures the motor is directly connected to the transfer box, but I might add a 2-speed gearbox. I want to first try out the speeds and see if this is the right motor, etc. 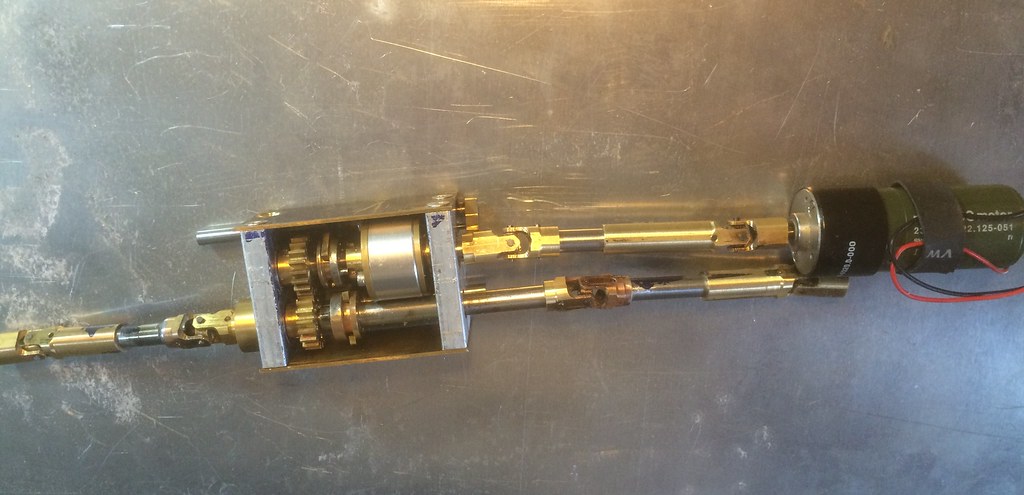 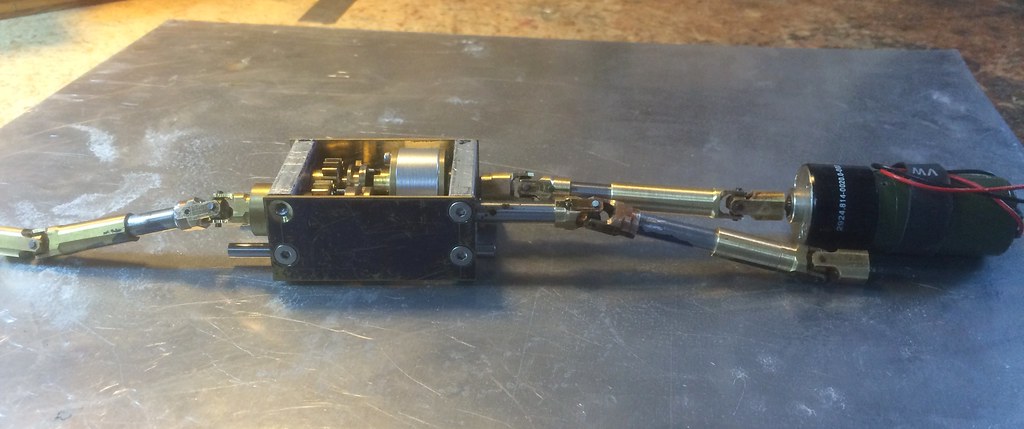 Kerst
http://forums.dhsdiecast.com/default.aspx?g=posts&m=1096251
|
|

Rank: Member
Groups: Member
Joined: 8/6/2015
Posts: 47
Location: Mobile Alabama
|
kerst wrote:During the past couple of weeks I worked on the universal joints. I always make them myself, mainly because they need to be very specific in size, but also because good quality universal joints are very expensive. The final assembly of the joints is always tricky, because I solder the pins (1/16" diameter) in from the center and the solder easily flows in the wrong spaces. It needs to be heated just enough for the solder to flow, but not too long. I had a cup of water handy to cool it down quick once I thought it was done. In the pictures the motor is directly connected to the transfer box, but I might add a 2-speed gearbox. I want to first try out the speeds and see if this is the right motor, etc. Kerst Looking good! Kerst, Can you tell me where you get your gears? Are you making all of your own gears? Job well done!
|
|
Rank: Advanced Member
Groups: Member
Joined: 9/7/2005
Posts: 1,154
Location: Copake, NY
|
|
|
Rank: Advanced Member
Groups: Member
Joined: 9/7/2005
Posts: 1,154
Location: Copake, NY
|
|
|

Rank: Advanced Member
Groups: Member
Joined: 8/8/2002
Posts: 789
Location: Clevedon UK
|
Nice looking work, what motor are you using?
Mark Bridle
|
|
Rank: Advanced Member
Groups: Member
Joined: 9/7/2005
Posts: 1,154
Location: Copake, NY
|
|
|

Rank: Advanced Member
Groups: Member
Joined: 1/7/2014
Posts: 213
Location: Arizona
|
Nice project. It should look good when you are finnished. I think that it is great that you have the tools and the knowledge to do this.
|
|
Rank: Advanced Member
Groups: Member
Joined: 9/7/2005
Posts: 1,154
Location: Copake, NY
|
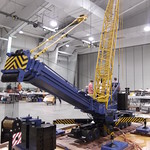
In the past couple of months I did all kinds of little things, including optimizing the steering, working on the space in front of the third axle, the levers of the gearbox and some other details. 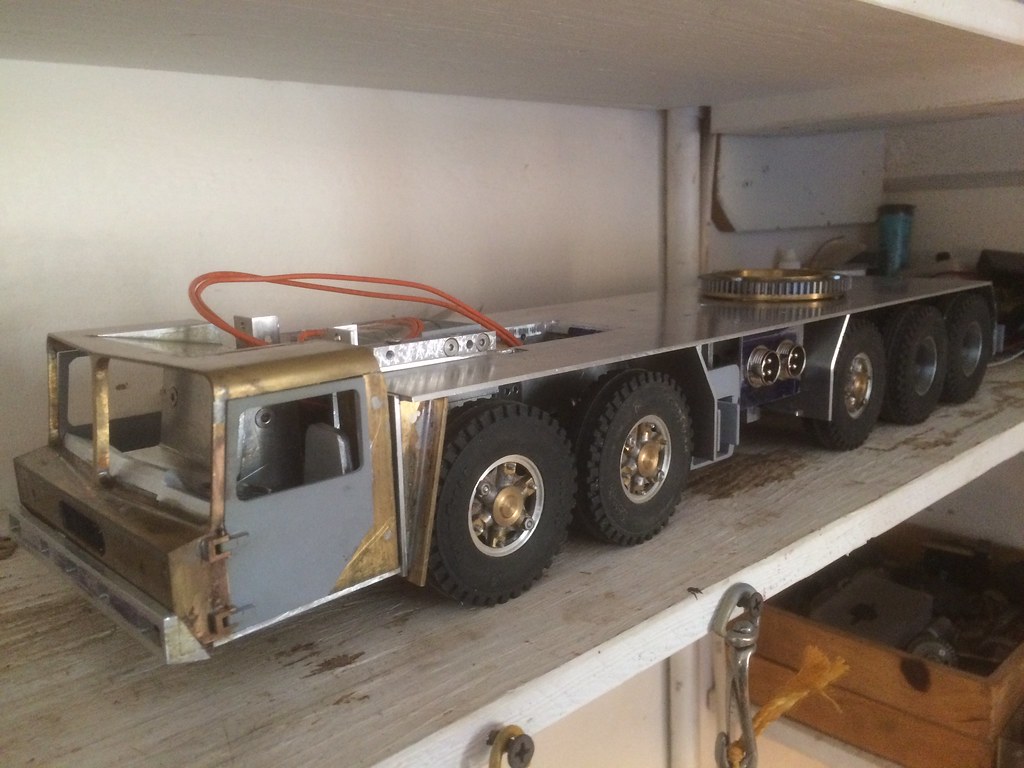 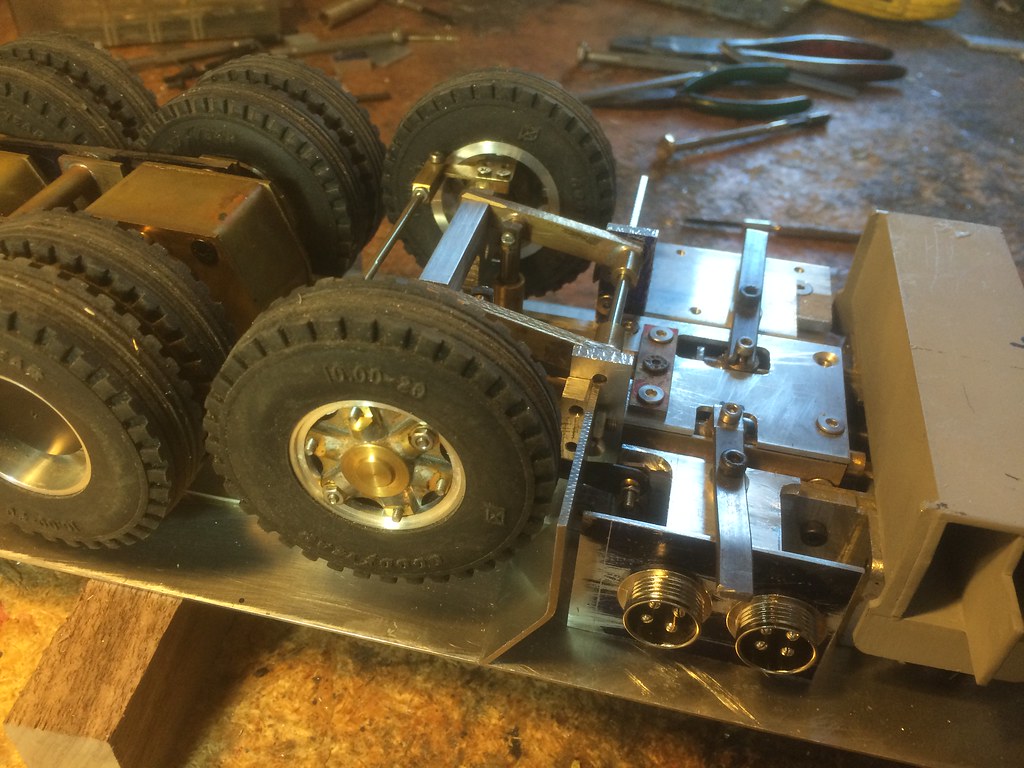 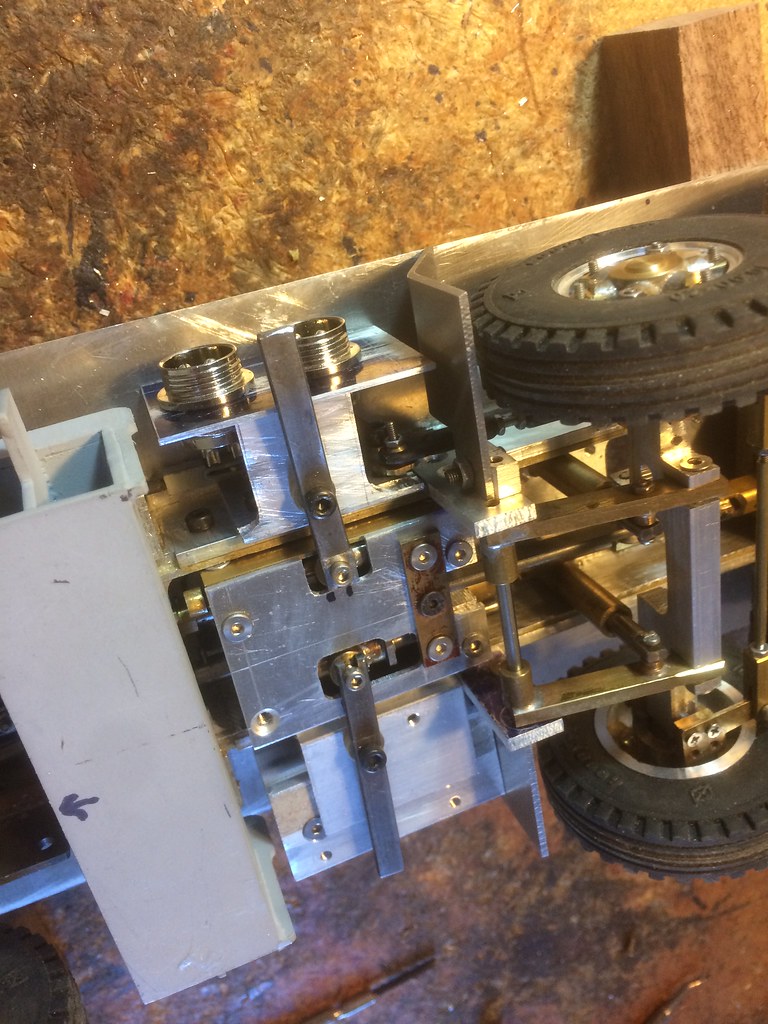 Here is a short video of the steering in action: https://youtu.be/ObYaSMiSlfUI also made a box for the crane with space for the crane itself and the boom sections.   I wish you all a Happy New year and see you at the Cabin Fever Expo! Kerst
http://forums.dhsdiecast.com/default.aspx?g=posts&m=1096251
|
|
Rank: Advanced Member
Groups: Member
Joined: 9/7/2005
Posts: 1,154
Location: Copake, NY
|
I started work on the outriggers. here you can see the structural parts of the outriggers, steel, brazed together. I will use hand operated screw jacks for the vertical movement. there is too little space for a motor. 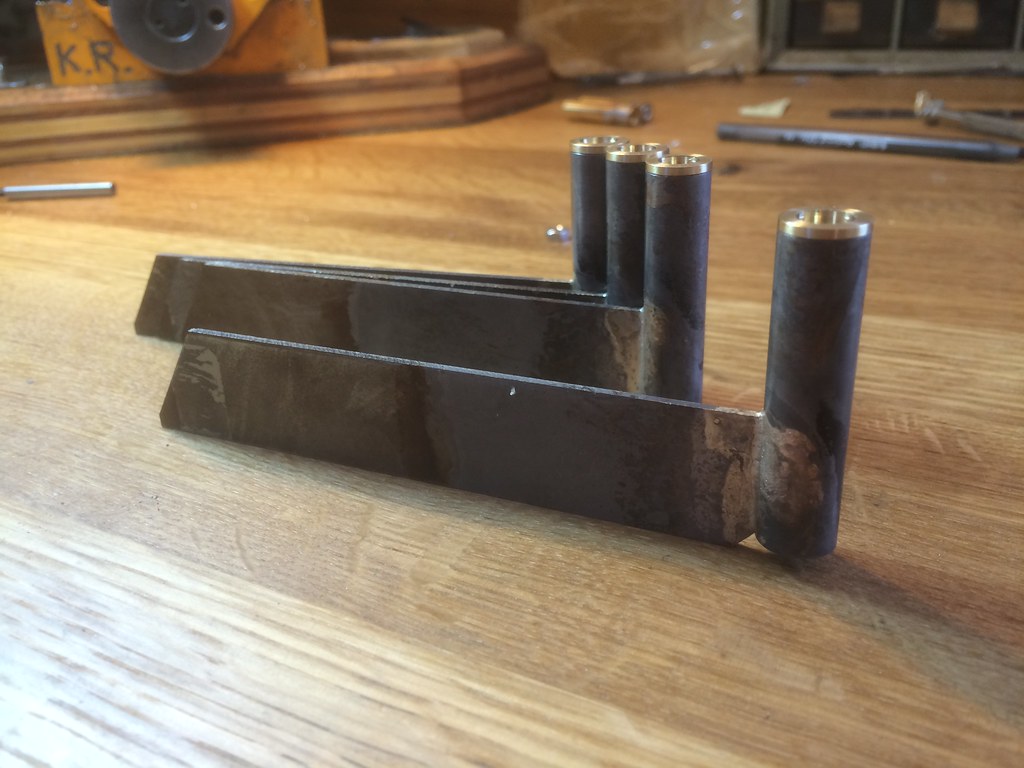 kerst
http://forums.dhsdiecast.com/default.aspx?g=posts&m=1096251
|
|

Rank: Advanced Member
Groups: Member
Joined: 3/17/2006
Posts: 1,169
Location: NJ
|
I missed this thread somehow before.
Awesome work.
What a great subject as well.
We rally round the family, with a pocket full of shells.....
|
|
Rank: Advanced Member
Groups: Member
Joined: 6/27/2013
Posts: 937
Location: Quebec, Canada,
|
Kerst, that's just fantastic work. About the door hinges: they don't look so clunky in my opinion.
Personally, I favor functionality to just detail. How about just grinding the front ends and a little polishing then it won't be noticeable. I think it's just about the sharpness of the edges.
Stephane
___________________________________________________
Playing with toys since 1970, now building them.
|
|
Rank: Advanced Member
Groups: Member
Joined: 9/7/2005
Posts: 1,154
Location: Copake, NY
|
Ironstef70 wrote:Kerst, that's just fantastic work. About the door hinges: they don't look so clunky in my opinion.
Personally, I favor functionality to just detail. How about just grinding the front ends and a little polishing then it won't be noticeable. I think it's just about the sharpness of the edges.
Stephane Thanks! Good idea! kerst
http://forums.dhsdiecast.com/default.aspx?g=posts&m=1096251
|
|
Rank: Advanced Member
Groups: Member
Joined: 9/7/2005
Posts: 1,154
Location: Copake, NY
|
I finished the outrigger boxes. The vertical movement is hand operated with a screw inside, very simple. 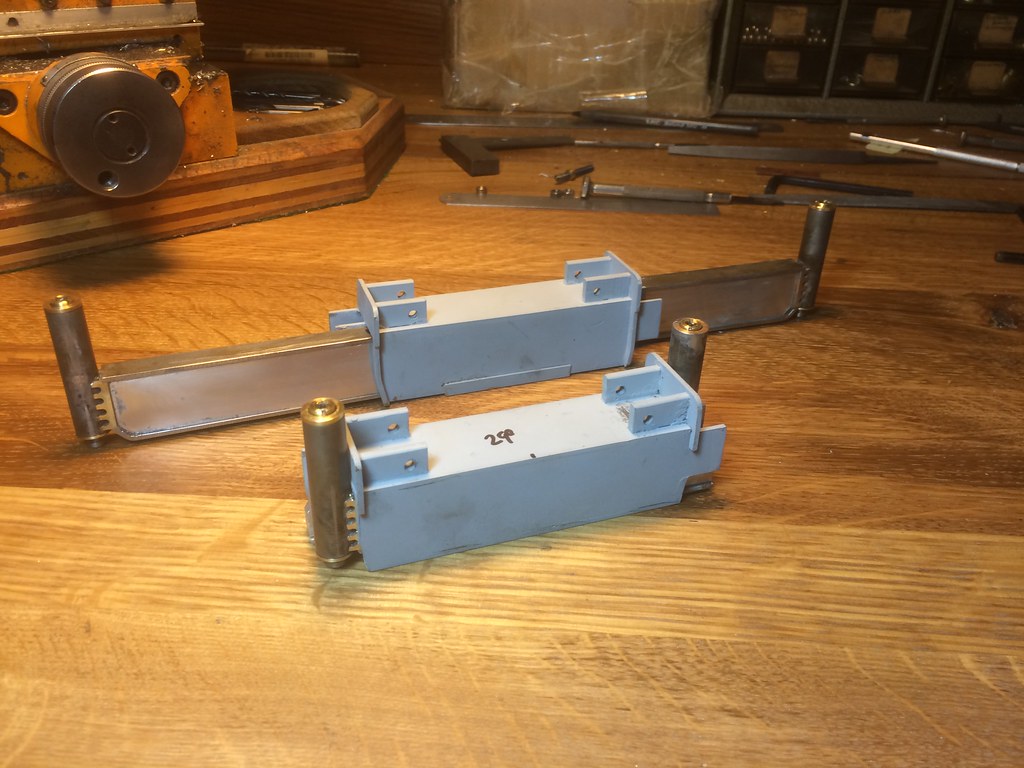 Kerst
http://forums.dhsdiecast.com/default.aspx?g=posts&m=1096251
|
|
|
Guest |
