|
|

Rank: Advanced Member
Groups: Member
Joined: 6/27/2013
Posts: 937
Location: Quebec, Canada,
|
A couple years ago I made a 6ft tall 1:50 wind turbine (would make a 4.5 MW unit, I guess, although I am not a specialist, but longest blades made in Canada are currently 185ft long, so mine is a realistic size). I decided to add a few accessories so I can include these components on my dio. I first started with blade supports. Of course, I need six three of them: three for the base, and three for the tips. I have found these 1:1 designs on the web and will build my own designs (so they fit my custom blades) inspired by those:   I've got much of the build done and should be able to take them to the airbrush next weekend. I will post pictures of the on going project tomorrow. Stephane
___________________________________________________ Playing with toys since 1970, now building them.
|
|
Rank: Advanced Member
Groups: Member
Joined: 6/27/2013
Posts: 937
Location: Quebec, Canada,
|
Here are some of the works. Most of the challenge is about keeping the right angles, then getting things properly aligned, since they will be stacked up on each other.  That's about the idea:   S.
___________________________________________________ Playing with toys since 1970, now building them.
|
|
Rank: Advanced Member
Groups: Member
Joined: 6/27/2013
Posts: 937
Location: Quebec, Canada,
|
The worst is behind now...   S
___________________________________________________ Playing with toys since 1970, now building them.
|
|

Rank: Advanced Member
Groups: Member
Joined: 2/14/2003
Posts: 2,353
Location: Granby,QC,Canada
|
superbe projet beau travail . lache pas j'ai hate de voir le final tu ets tres habile .
|
|
Rank: Advanced Member
Groups: Member
Joined: 6/27/2013
Posts: 937
Location: Quebec, Canada,
|
towoc999 wrote:superbe projet beau travail . lache pas j'ai hate de voir le final tu ets tres habile . Merci André. Il faudra que tu passe à Québec y jeter un coup d'oeil un jour.  Stephane
___________________________________________________ Playing with toys since 1970, now building them.
|
|

Rank: Advanced Member
Groups: Member
Joined: 10/9/2012
Posts: 551
Location: Ontario, Canada
|
Awesome progress! It's great to see you got this project going. Take care and Happy New Year!
|
|

Rank: Advanced Member
Groups: Member
Joined: 1/11/2007
Posts: 9,004
Location: Lincolnshire
|
They look very impressive. Well done!
Paul R
|
|
Rank: Advanced Member
Groups: Member
Joined: 6/27/2013
Posts: 937
Location: Quebec, Canada,
|
Thanks. More to come this weekend.... That's all about alignments. I am picking up with new skills in the process.  Stephane
___________________________________________________ Playing with toys since 1970, now building them.
|
|
Rank: Advanced Member
Groups: Member
Joined: 6/27/2013
Posts: 937
Location: Quebec, Canada,
|
THis weekend's works. I added the details: fork lift boxes, ladders, handrails and walkways, and brushed the job. Also shaped the blades supports. The benefit of that design is that whenever I eventually decide to change the blade for stock WSI ones or else, I will just have to pop these out and shape new ones . I still have plenty of these plastic 1/8" sheets left. I also had decals printed. In the process, I decided to detail the reference tank tainer with brand new brass walkways. I still need to glue and paint, but they already are nothing to compare with the stock plastic ones.    Now it's all ready for the paint booth, hopefully next weekend. S.
___________________________________________________ Playing with toys since 1970, now building them.
|
|

Rank: Advanced Member
Groups: Member
Joined: 12/30/2008
Posts: 3,439
Location: Good ol' Indiana
|
That is quite he project you have there. Best of luck with all the brass work.
-Ethan Collection 8/2/2016For more of the Diorama and my collection: On Facebook or On YouTube
|
|
Rank: Advanced Member
Groups: Member
Joined: 6/27/2013
Posts: 937
Location: Quebec, Canada,
|
Just freshly painted (oil paint). I am happy with the color mix; it came close to the color I was looking for. later this week I will coat it with matte clear. Of course, it is not yet possible to put the white blades through them, as I cannot slide the pads in already. But I will do a couple diorama pictures next week. I like that tank tainer better with these walkways. Now they look more like the real thing. I might even weather it one day.    S.
___________________________________________________ Playing with toys since 1970, now building them.
|
|
Rank: Advanced Member
Groups: Member
Joined: 6/27/2013
Posts: 937
Location: Quebec, Canada,
|
Now the yoke.... Here is the model from which I inspired my project: http://promet.szczecin.pl/new/?page_id=231http://www.liftra.com/product/blade-yoke-lt870-1/And here is the rough job, before adding details. It will feature the whole hydraulic layout, operating blade retaining cylinders, and camber positioning. Then will come the aibrush job and decals later. Yeah, that ain't only about brass now. This one is 90% steel. Oh well...   Not showing is the tile grout that I filled the bottom "C" frames with. It adds weight, rigidity, and stability so that makes a decent load for the LR1300. For those who wonder how I do the connections between frames: metal screws and epoxy inside+on surfaces. It will probably be capable of supporting my own weight, although I will not attempt to. Once all complete, I will do dio pictures. Blade racks are finished, but it will look more relevant once the yoke is completed. S.
___________________________________________________ Playing with toys since 1970, now building them.
|
|
Rank: Advanced Member
Groups: Member
Joined: 6/27/2013
Posts: 937
Location: Quebec, Canada,
|
Here's the final project, with a few action pictures...  As you can see, all cylinders are functioning: blade retention pads and camber adjustment. Keeping the Weldex team busy with an off shore wind turbine installation contract. Hope you enjoy. S.  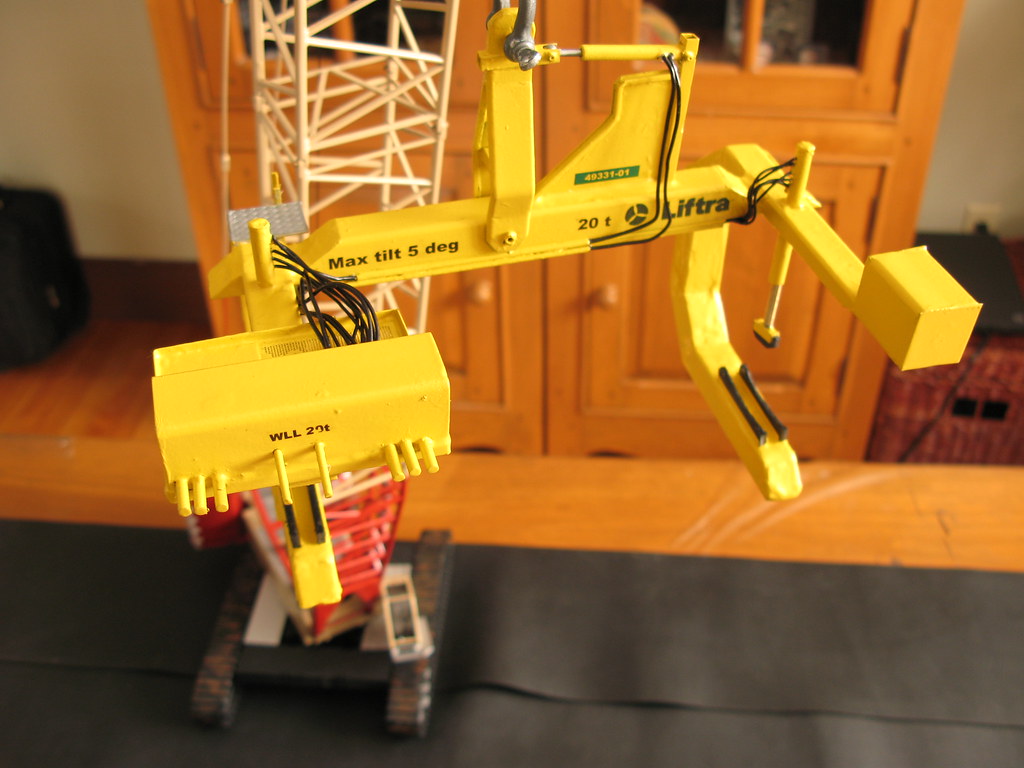 IMG_7886 IMG_7886 by Ironstef, sur Flickr "/> 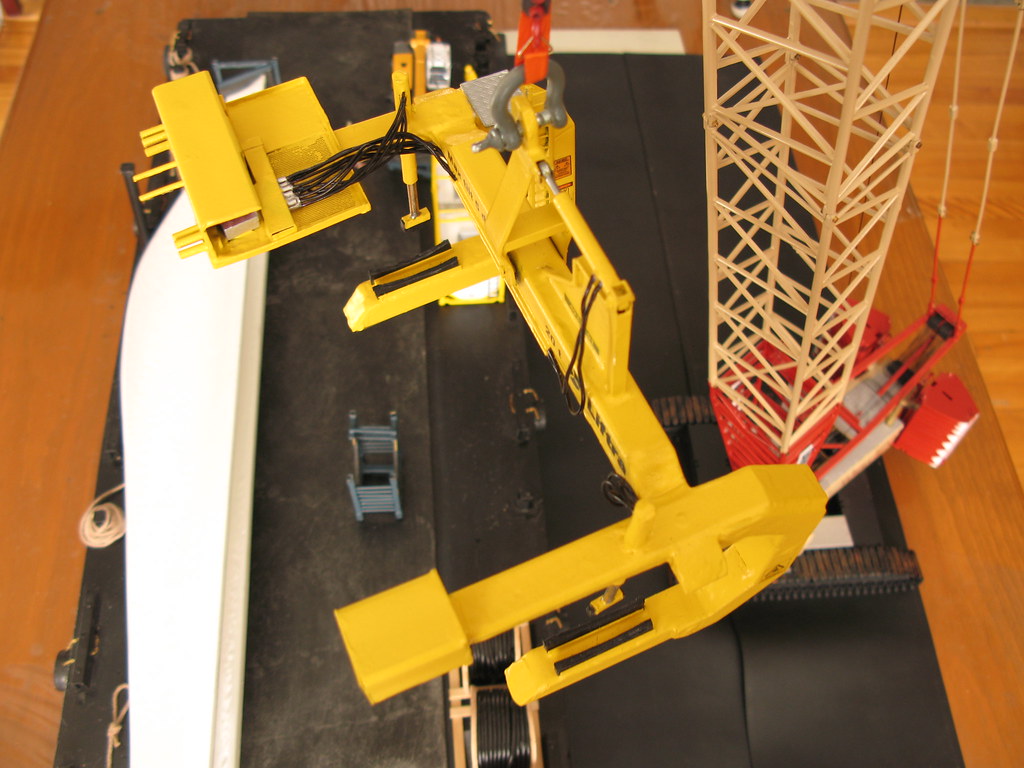 IMG_7883 IMG_7883 by Ironstef, sur Flickr "/> 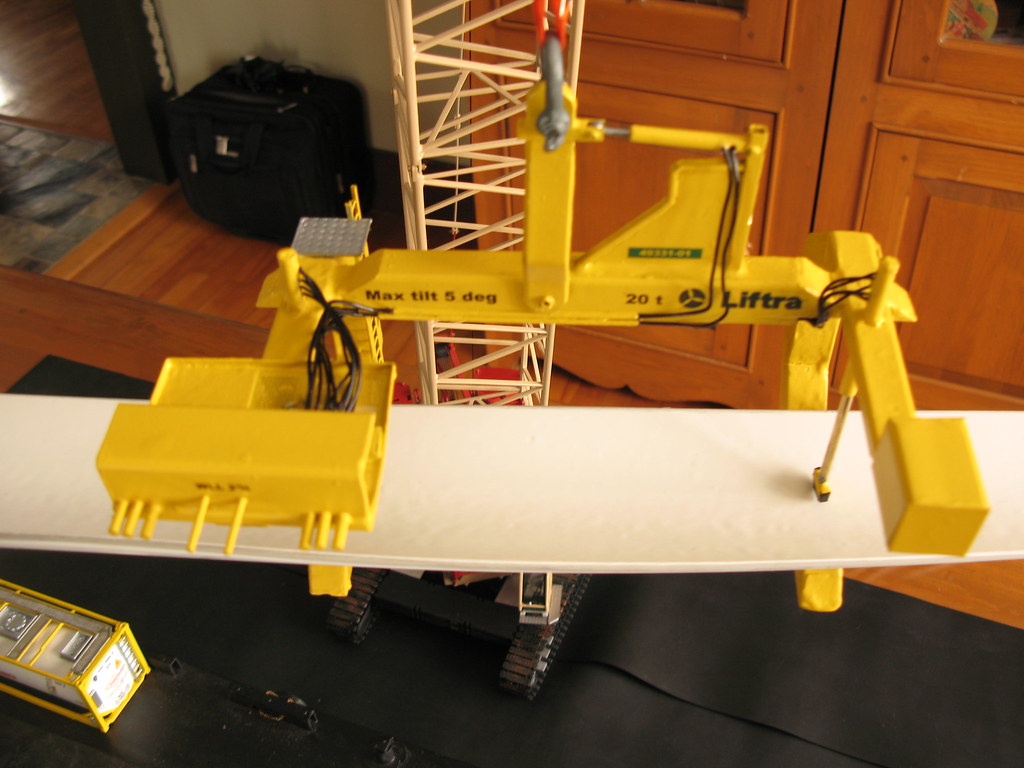 IMG_7893 IMG_7893 by Ironstef, sur Flickr "/> 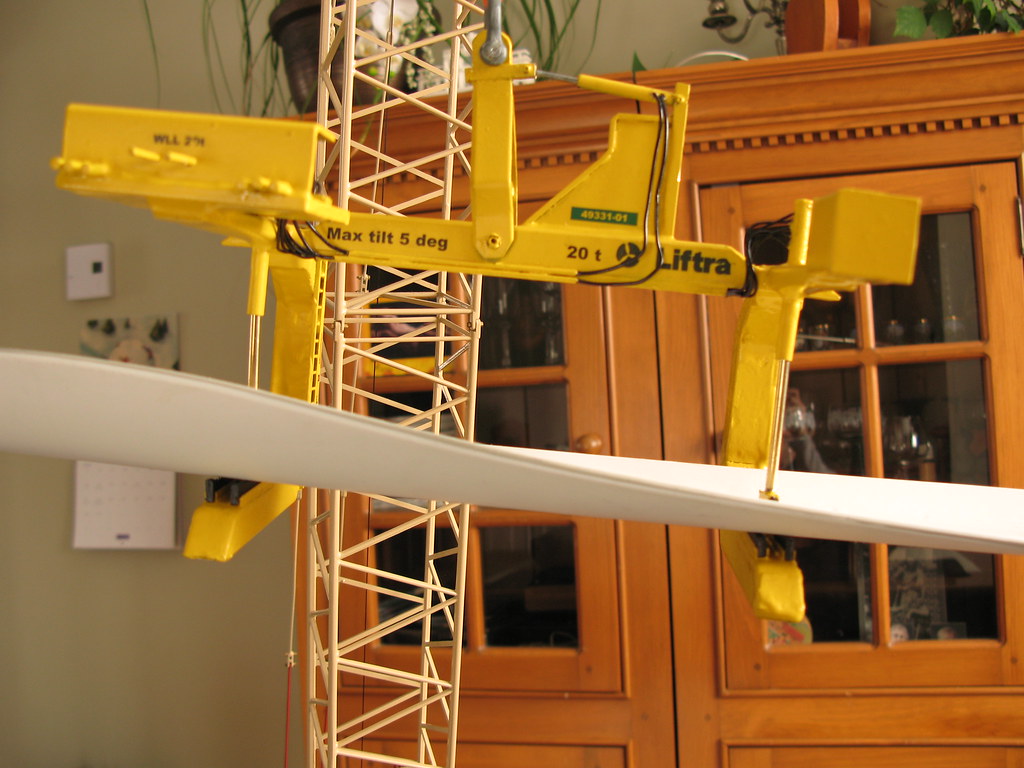 IMG_7892 IMG_7892 by Ironstef, sur Flickr "/> 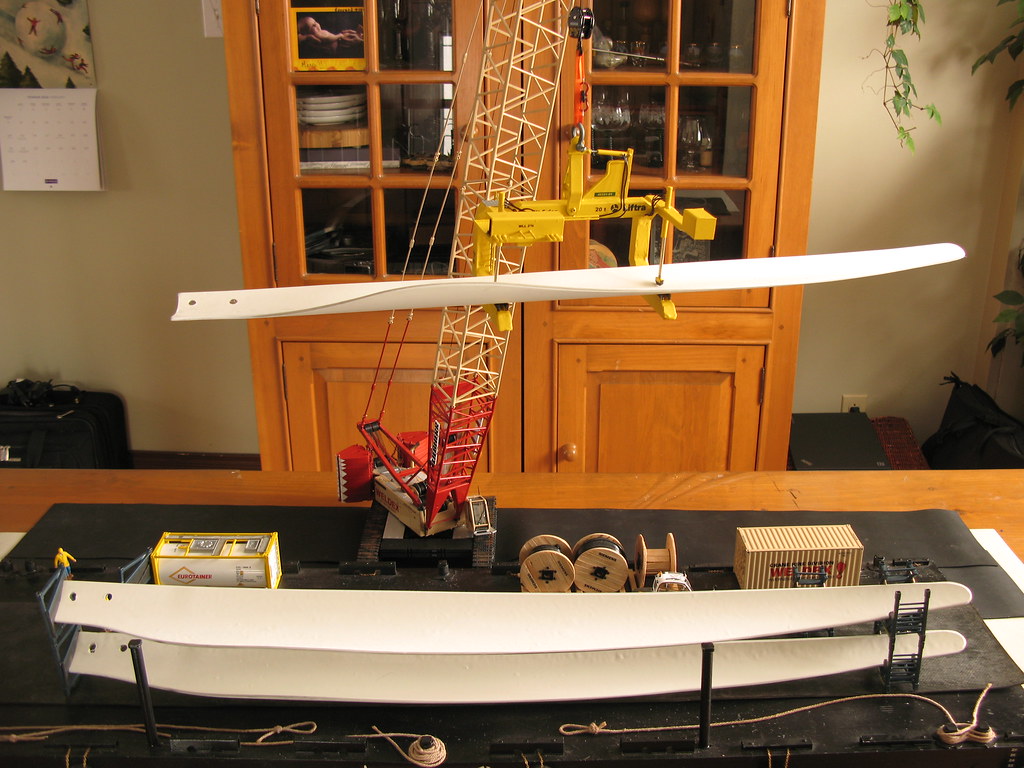 IMG_7894 IMG_7894 by Ironstef, sur Flickr "/> 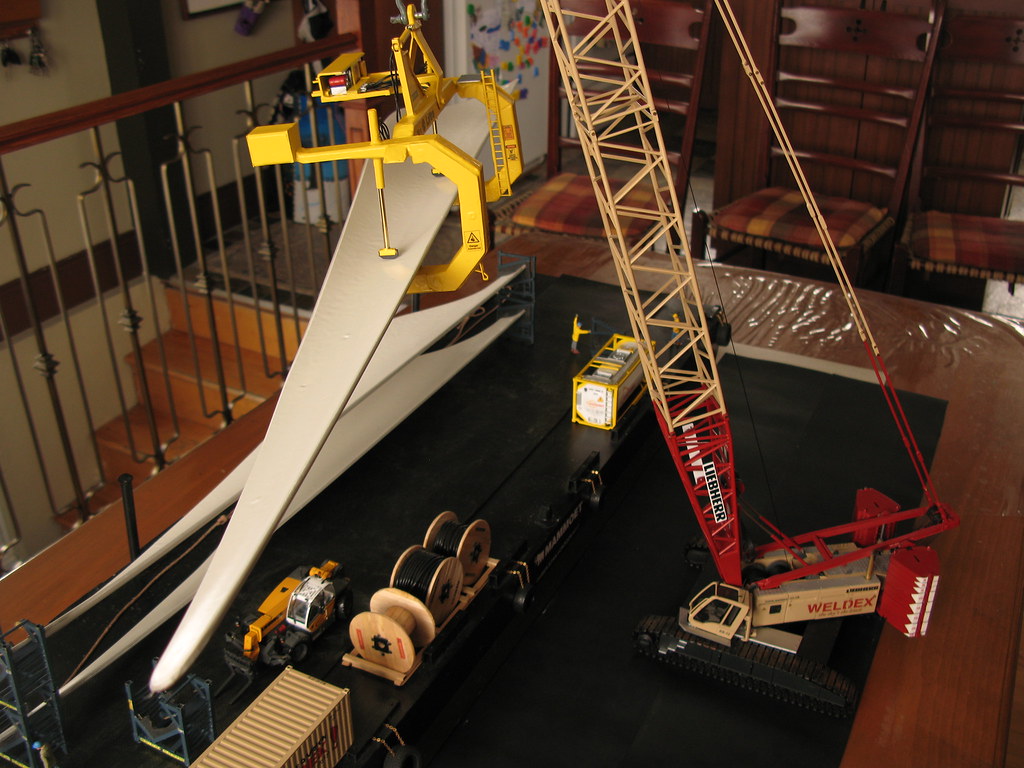 IMG_7895 IMG_7895 by Ironstef, sur Flickr "/> 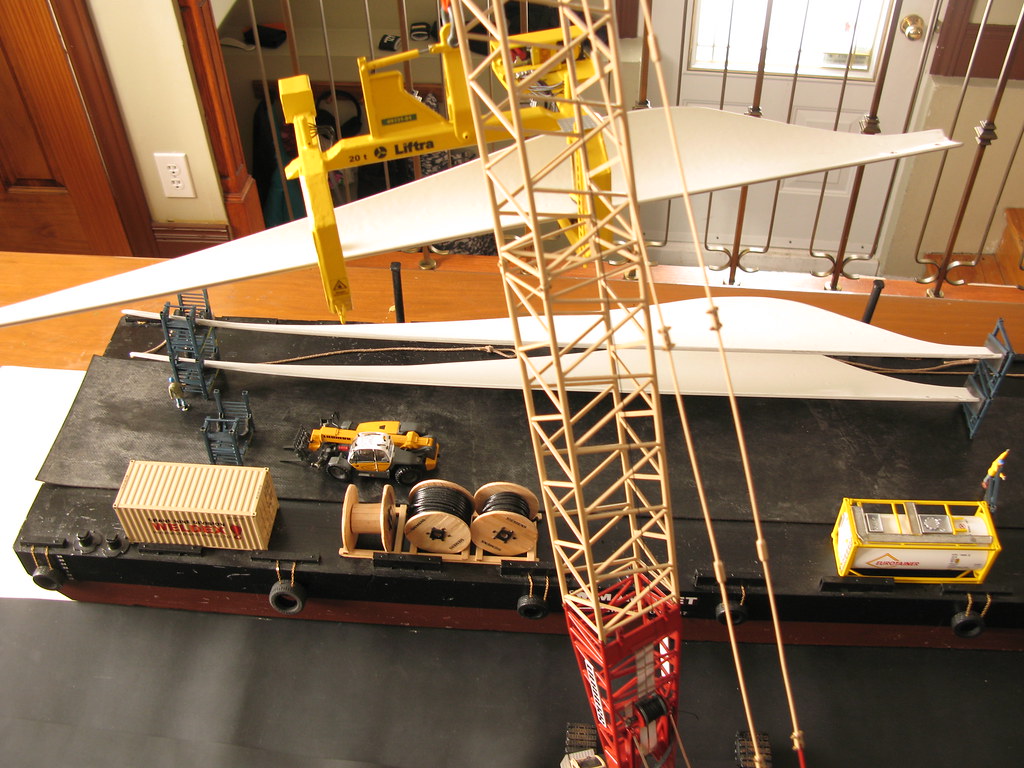 IMG_7901 IMG_7901 by Ironstef, sur Flickr "/> 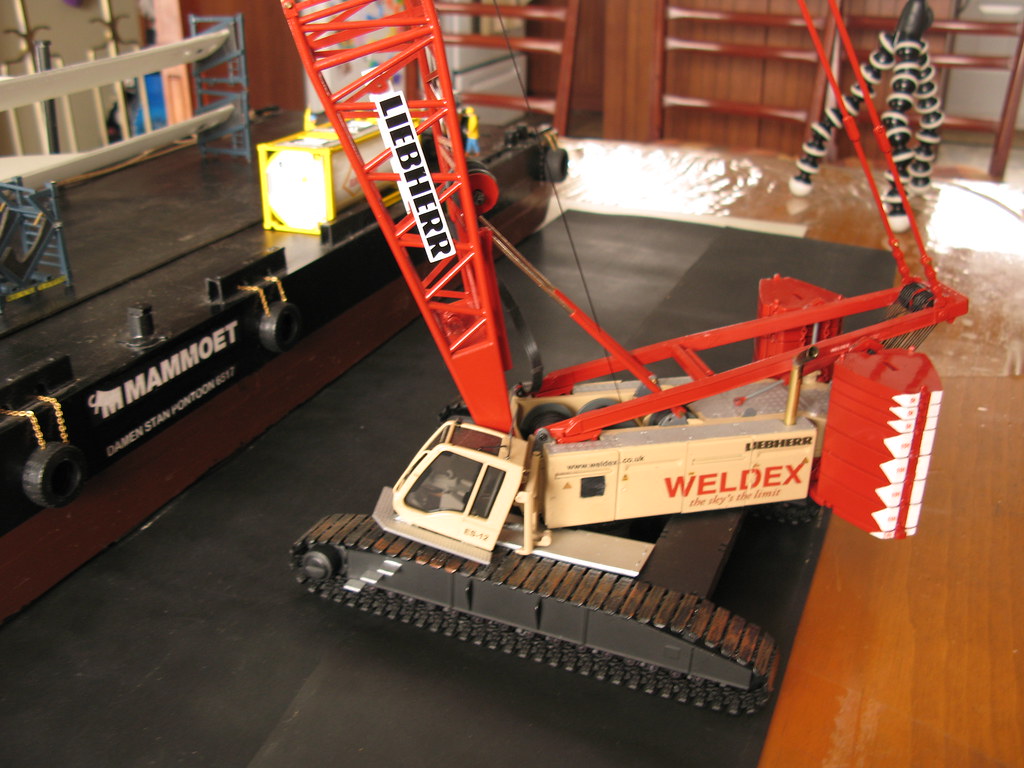 IMG_7881 IMG_7881 by Ironstef, sur Flickr "/> 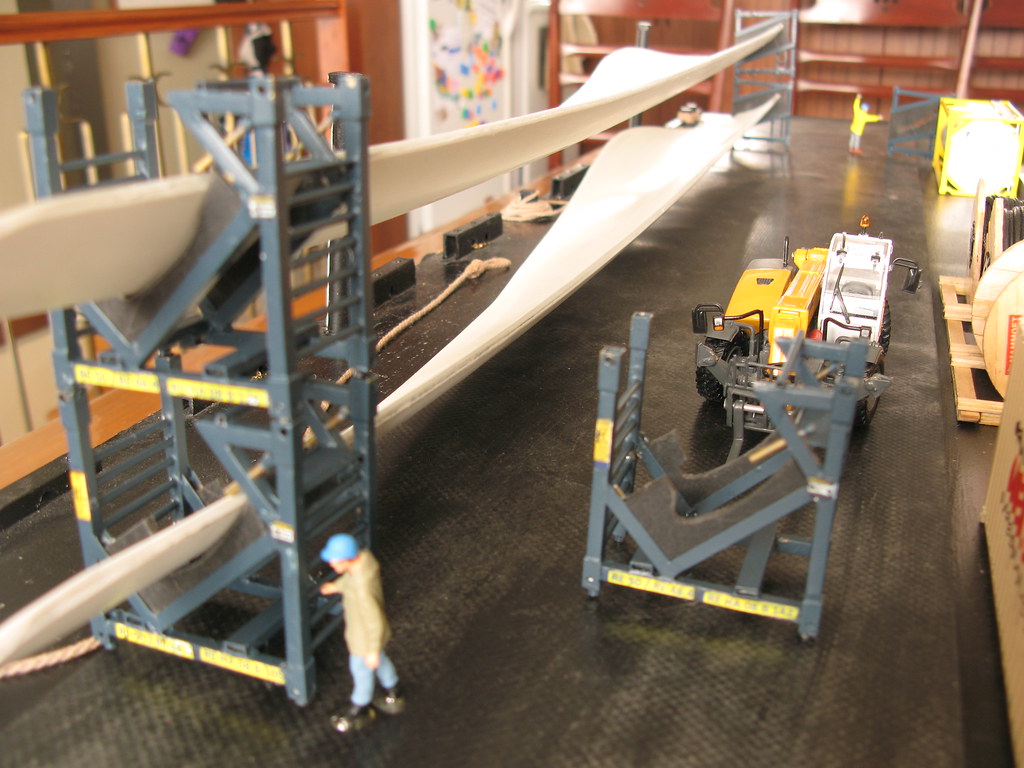 IMG_7889 IMG_7889 by Ironstef, sur Flickr "/> 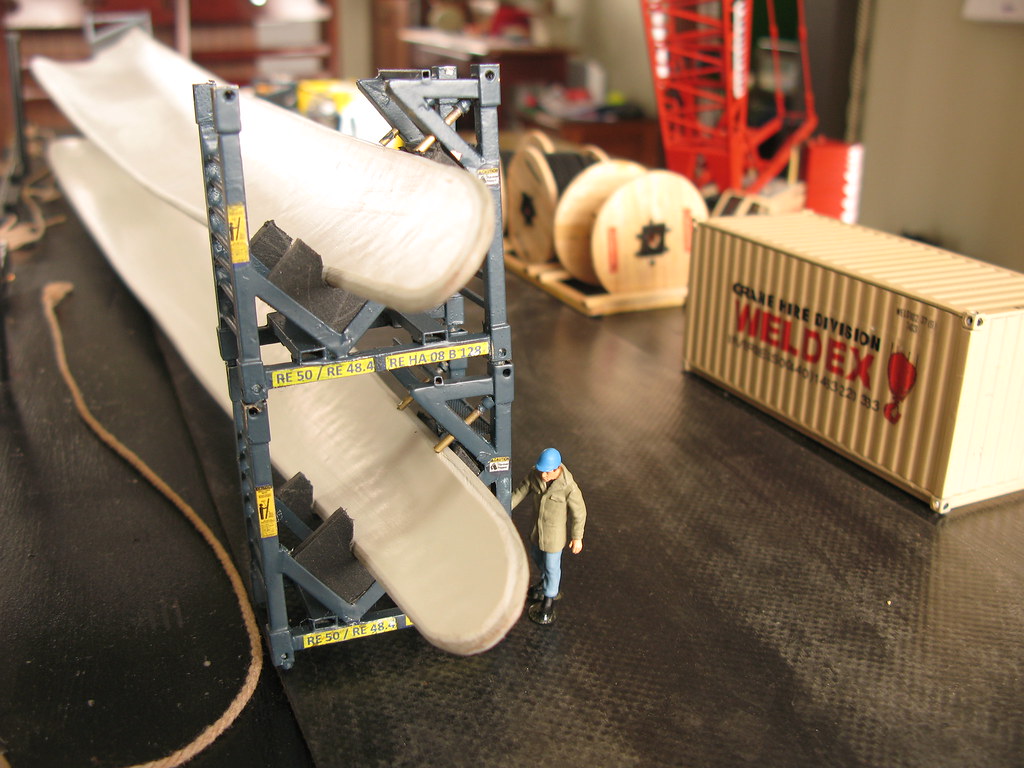 IMG_7888 IMG_7888 by Ironstef, sur Flickr "/> 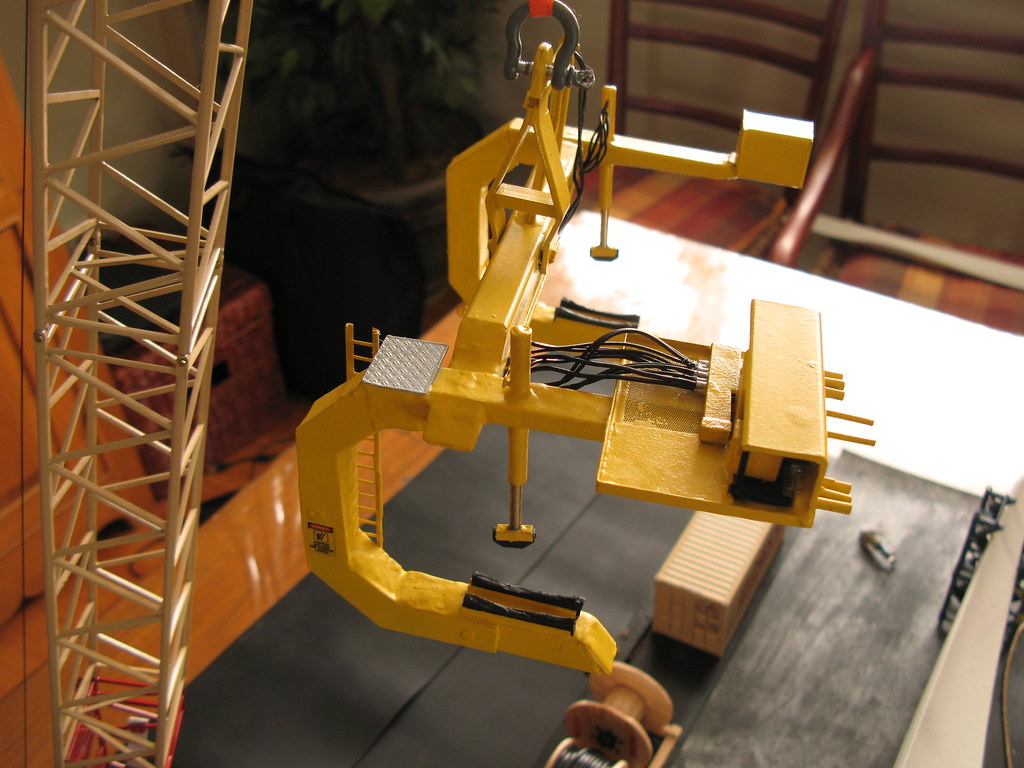 IMG_7887 IMG_7887 by Ironstef, sur Flickr "/>
___________________________________________________ Playing with toys since 1970, now building them.
|
|

Rank: Advanced Member
Groups: Member
Joined: 2/3/2015
Posts: 643
Location: New Hampshire
|
Looks amazing, excellent work!
- Kyle
|
|
Rank: Advanced Member
Groups: Member
Joined: 5/27/2010
Posts: 1,905
|
Love it ! An outside the box build.
“A tiger doesn't lose sleep over the opinion of sheep.” ― Shahir Zag
" An educated mind learns from his mistakes and corrects them. A dolt, on the other hand, lashes out and continues showing his ignorance."
-Unknown
“Two possibilities exist: either we are alone in the Universe or we are not. Both are equally terrifying.”― Arthur C. Clarke
"Anti-social behavior is a trait of intelligence in a world full of conformists" - Nikola Tesla
" If you think it's expensive to hire a professional to do the job, wait until you hire an amateur ". Paul Neal "Red" Adair {Wild Well Firefighter for those who live under rocks}
|
|
Rank: Advanced Member
Groups: Member
Joined: 9/28/2006
Posts: 615
Location: Allentown,Pa.
|
Very nice!
|
|

Rank: Advanced Member
Groups: Member
Joined: 3/10/2010
Posts: 1,100
Location: PA
|
Speeeeeeechless. Beautiful work! Can you post the link to your weldex crane repaint?
|
|

Rank: Advanced Member
Groups: Member
Joined: 9/22/2007
Posts: 5,860
Location: Louisville
|
|
|
Rank: Advanced Member
Groups: Member
Joined: 10/9/2012
Posts: 551
Location: Ontario, Canada
|
Hi IronStef, that turned out amazing. All of the fine details and the graphics really brought it to life. That is an amazing diorama! Congrats!
|
|
Rank: Advanced Member
Groups: Member
Joined: 1/11/2007
Posts: 9,004
Location: Lincolnshire
|
That is outrageously cool! Very nicely done indeed.
Paul R
|
|
|
Guest |
