|
|

Rank: Advanced Member
Groups: Member
Joined: 9/7/2005
Posts: 1,155
Location: Copake, NY
|
I put the FAUN carrier together again. Apart from a few details (never ending!) the carrier is done. I have started with the drawings of the upper works. 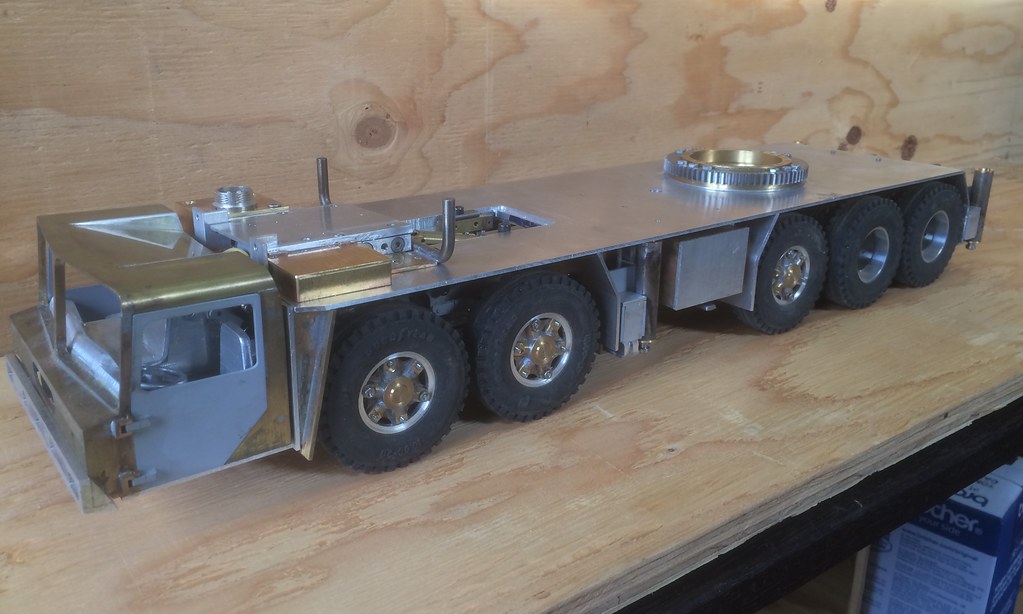 Kerst
 http://forums.dhsdiecast.com/default.aspx?g=posts&m=1096251 http://forums.dhsdiecast.com/default.aspx?g=posts&m=1096251
|
|

Rank: Advanced Member
Groups: Member
Joined: 9/7/2005
Posts: 1,155
Location: Copake, NY
|
|
|

Rank: Advanced Member
Groups: Member
Joined: 1/11/2007
Posts: 9,080
Location: Lincolnshire
|
Coming along very nicely!
Paul R
|
|

Rank: Advanced Member
Groups: Member
Joined: 9/7/2005
Posts: 1,155
Location: Copake, NY
|
The past week i worked on the swing gear. There is plenty of space for the whole assembly, so that was no problem. I added a springloaded clutch. I tried it and it seems a bit fast, so I might add a reduction later. 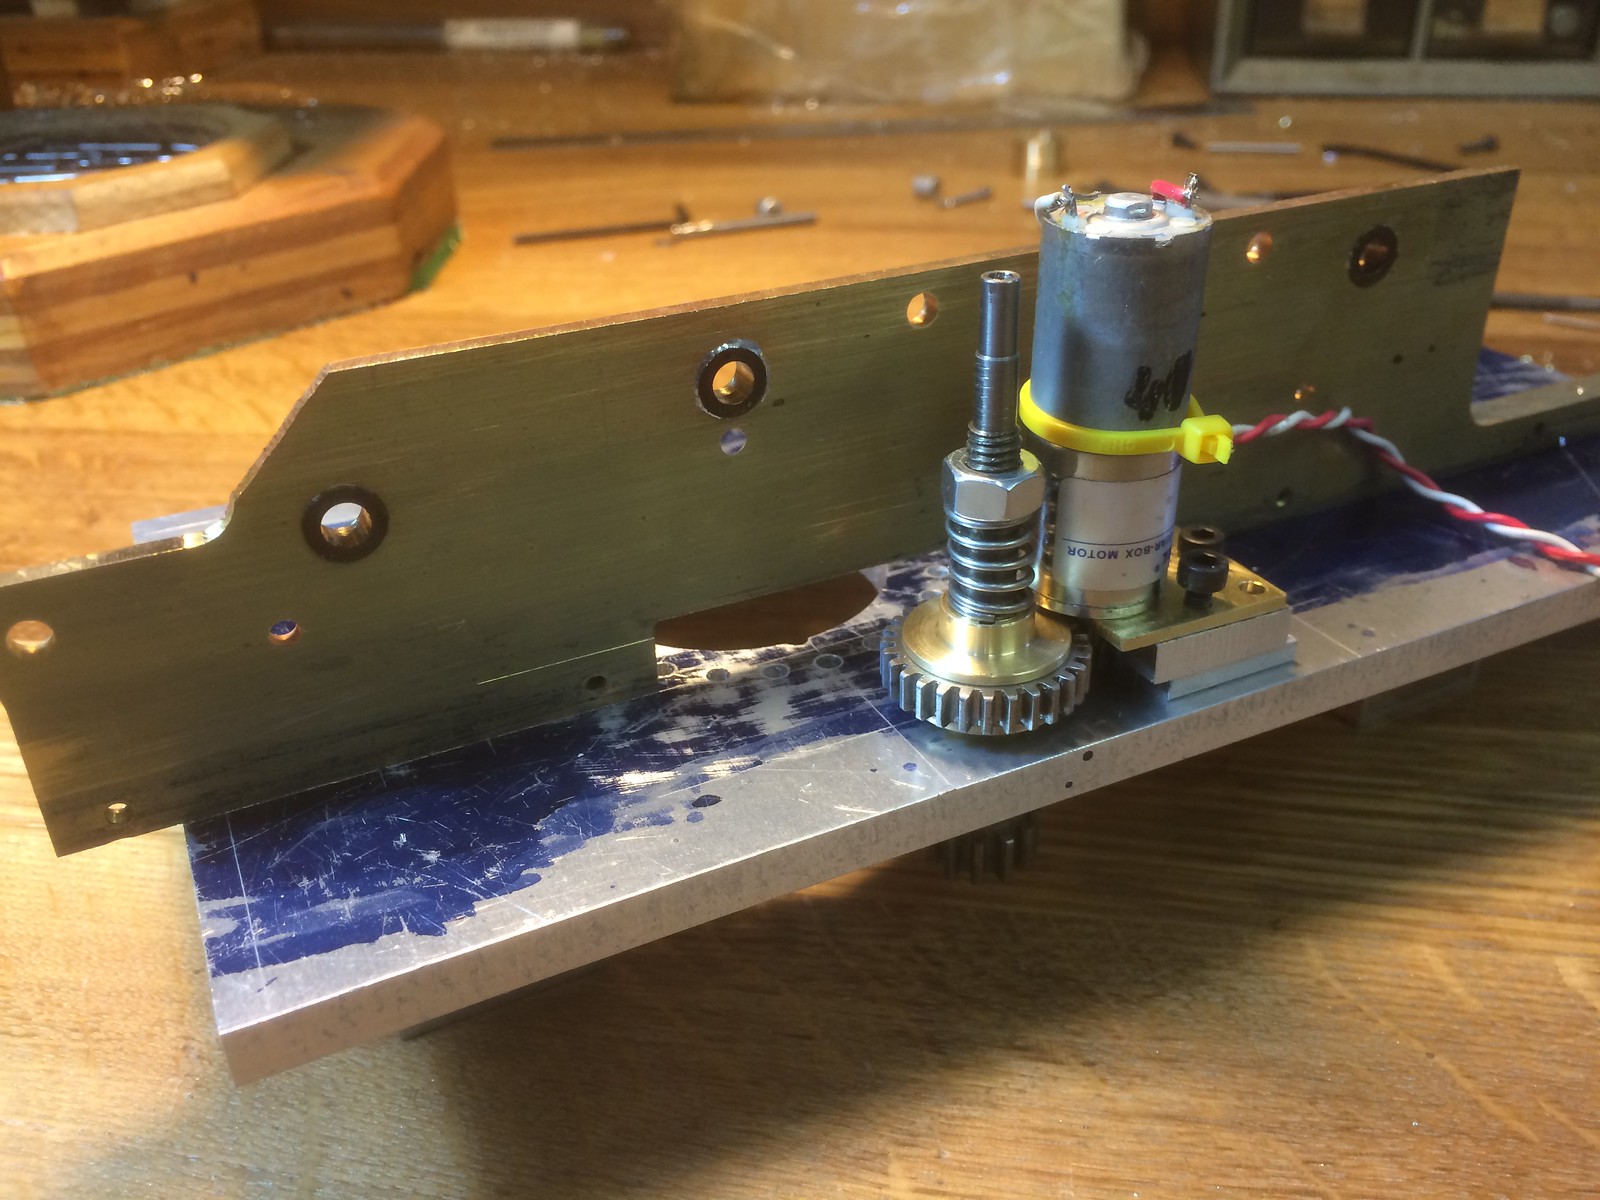 Kerst
 http://forums.dhsdiecast.com/default.aspx?g=posts&m=1096251 http://forums.dhsdiecast.com/default.aspx?g=posts&m=1096251
|
|

Rank: Advanced Member
Groups: Member
Joined: 9/12/2012
Posts: 485
Location: San Diego, California
|
I don't know how I missed this the first time. Pretty incredible build, you're very talented.
|
|

Rank: Advanced Member
Groups: Member
Joined: 5/18/2008
Posts: 515
Location: Richfield, Oh (Cleveland)
|
Really like the adjustable "slip" you have designed into the swing Kerst.
|
|

Rank: Advanced Member
Groups: Member
Joined: 9/7/2005
Posts: 1,155
Location: Copake, NY
|
Thanks for the nice comments! This setup is better. I added a reduction , so now the swing speed is perfect. 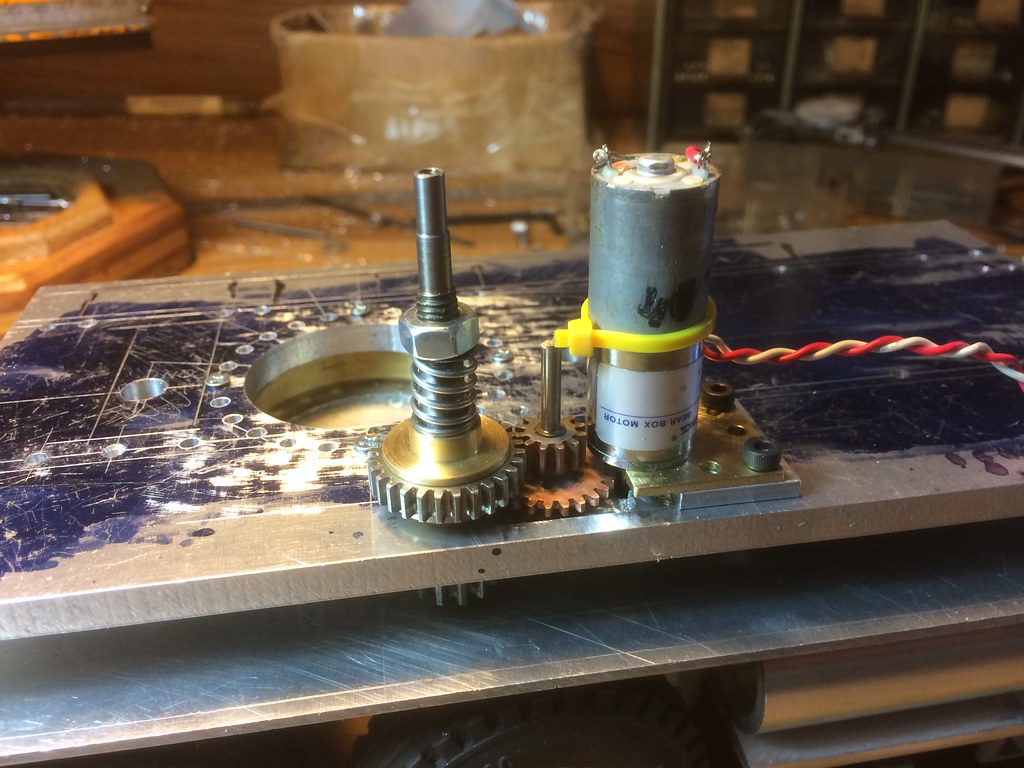 Kerst
 http://forums.dhsdiecast.com/default.aspx?g=posts&m=1096251 http://forums.dhsdiecast.com/default.aspx?g=posts&m=1096251
|
|

Rank: Advanced Member
Groups: Member
Joined: 9/7/2005
Posts: 1,155
Location: Copake, NY
|
|
|

Rank: Advanced Member
Groups: Member
Joined: 9/7/2005
Posts: 1,155
Location: Copake, NY
|
It is summer and I haven’t had too much time for the hobby. I worked a bit on the enclosure of the upper. It proved to be more complicated than I expected, mainly because I couldn’t agree with myself which method to use. It turned out to be a combination of brass and AL. There are quite a few angles that make it complicated. But it is getting somewhere. So far: 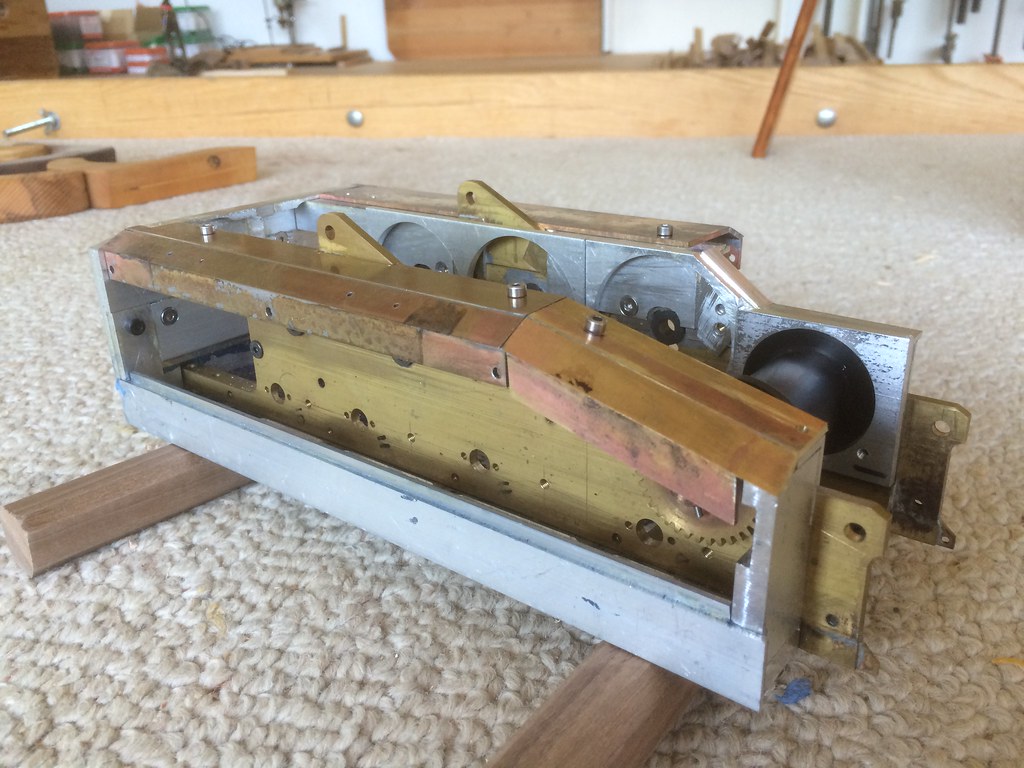 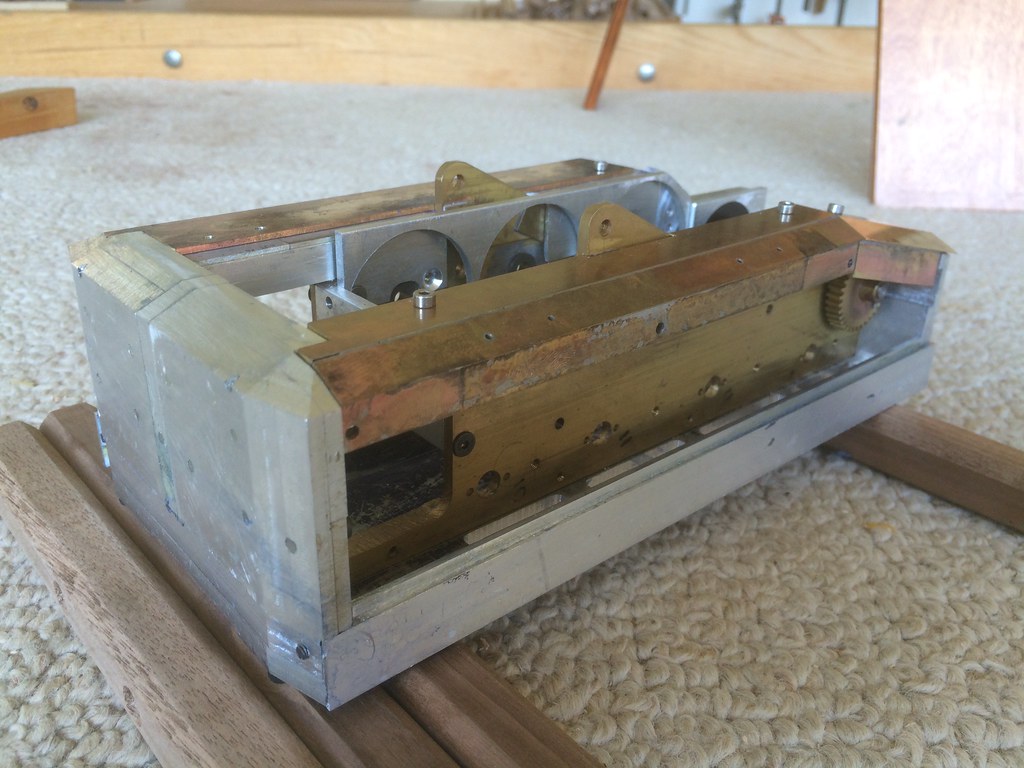 Kerst
 http://forums.dhsdiecast.com/default.aspx?g=posts&m=1096251 http://forums.dhsdiecast.com/default.aspx?g=posts&m=1096251
|
|

Rank: Advanced Member
Groups: Member
Joined: 9/7/2005
Posts: 1,155
Location: Copake, NY
|
The summer has been slow. Too many other distractions. And often it was simply too hot in the workshop. I continued working on the enclosure of the upper and built the cab. I am quite happy with the cab. It came together nicely. I am still not really happy with the enclosure. The idea is to be able to remove the side panels easily. The interior still needs to be done. The door is ready, but the front window not yet. There are still lots of details to be done. The next step is connection the electric wiring. 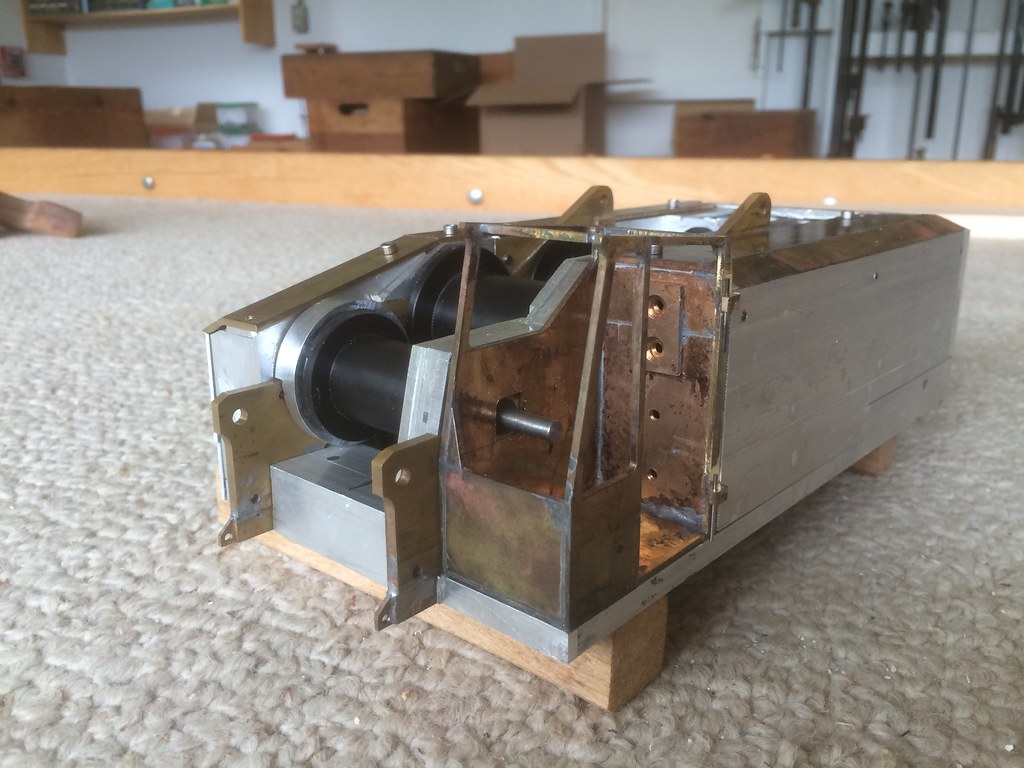 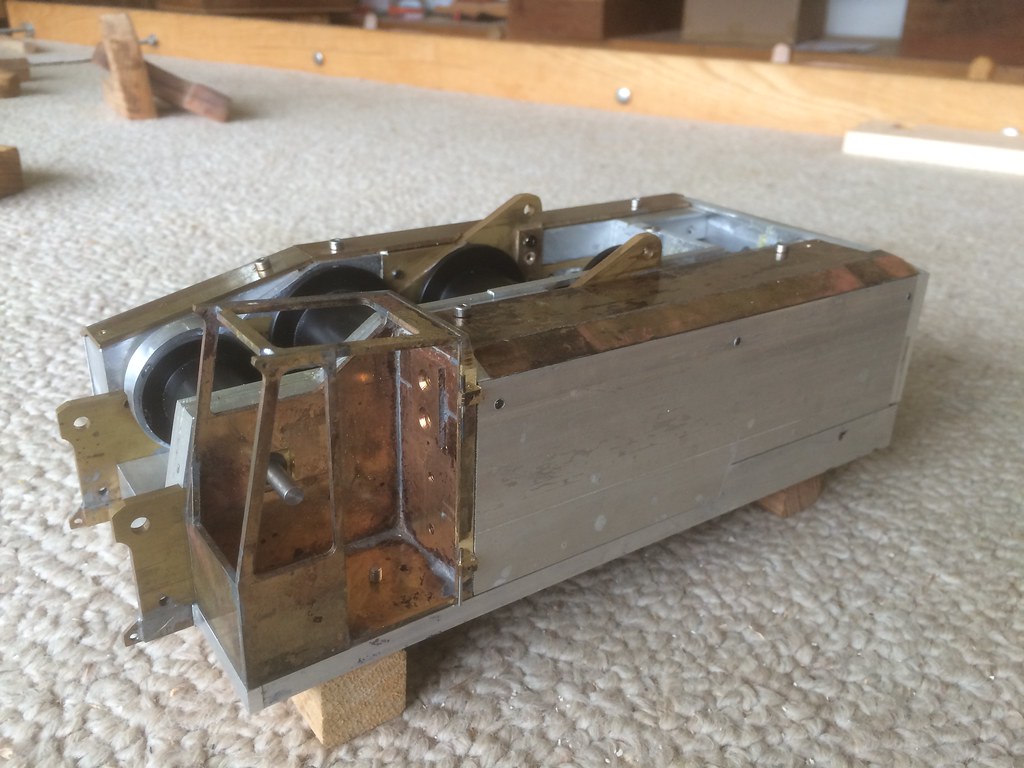 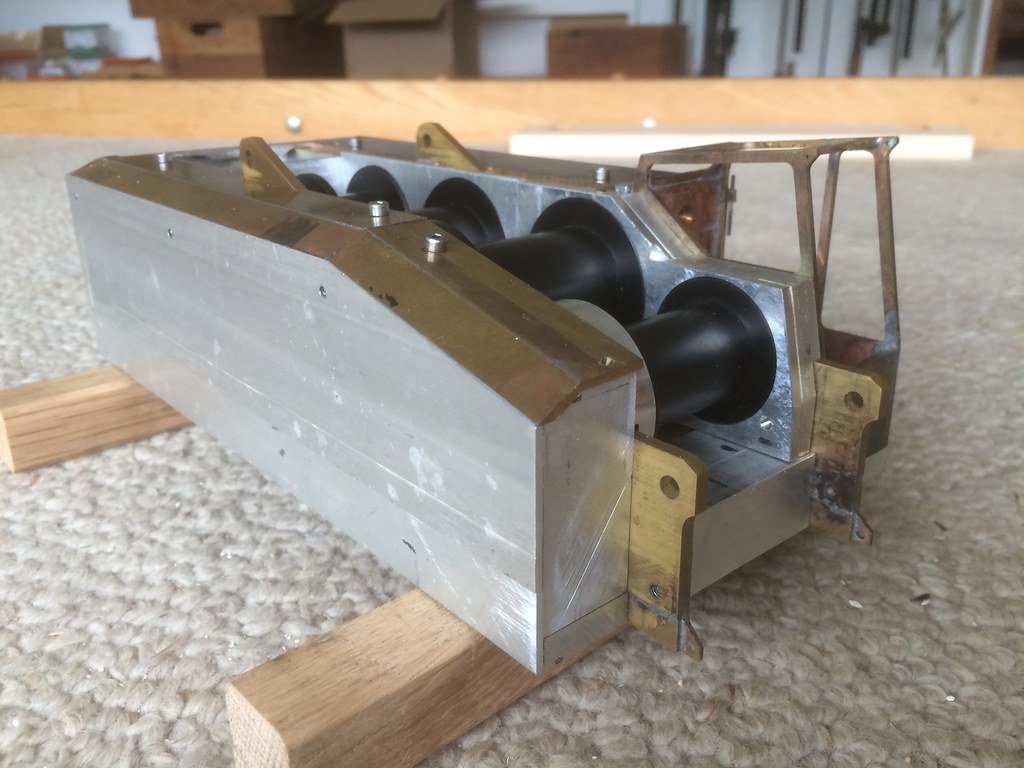 Kerst
 http://forums.dhsdiecast.com/default.aspx?g=posts&m=1096251 http://forums.dhsdiecast.com/default.aspx?g=posts&m=1096251
|
|

Rank: Advanced Member
Groups: Member
Joined: 1/11/2007
Posts: 9,080
Location: Lincolnshire
|
Great update Kerst!
Paul R
|
|

Rank: Advanced Member
Groups: Member
Joined: 9/7/2005
Posts: 1,155
Location: Copake, NY
|
|
|
Rank: Advanced Member
Groups: Member
Joined: 8/9/2002
Posts: 996
Location: worthington, ohio
|
FANTASTIC WORKMANSHIP I ENJOY WATCHING THIS TYPE OF CRAFTING. THANKS FOR SHARING
|
|

Rank: Advanced Member
Groups: Member
Joined: 9/7/2005
Posts: 1,155
Location: Copake, NY
|
Some progress on the boom. These are the ends for the boom sections. It took some work to get them straight, square, parallel and true, etc. , but the preparatory work paid off. 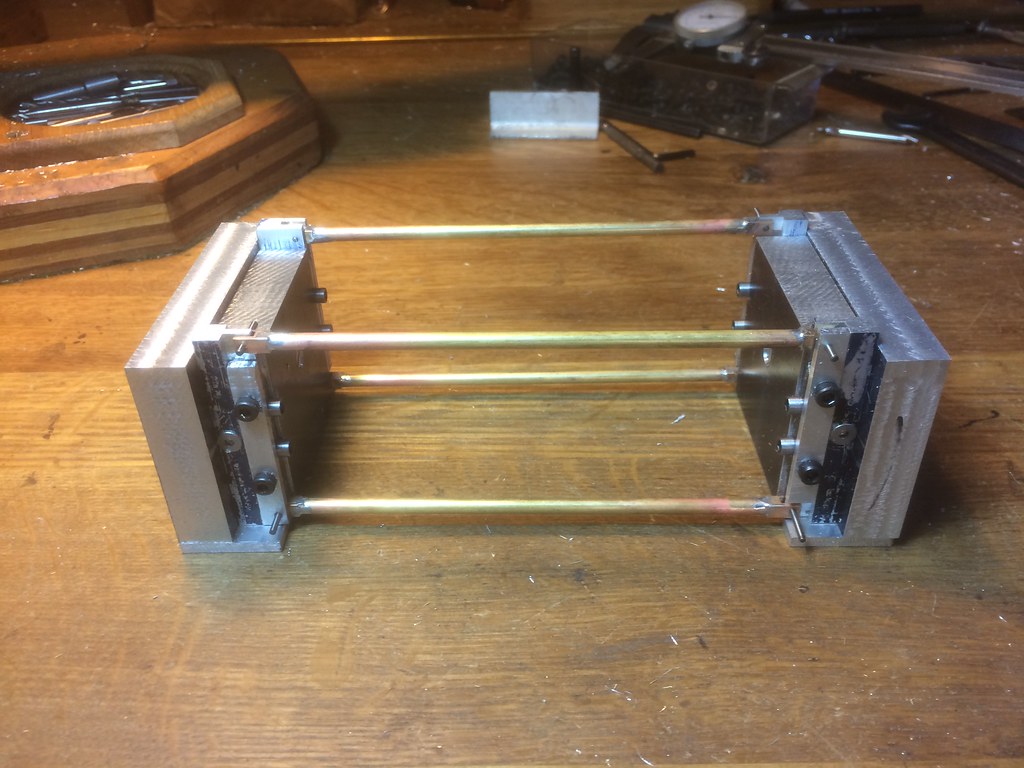 These two pictures show the setup for the assembly of the boom sections. Once set up it was a matter of fitting the laces in and soldering them. I made five 12 meter (40’) sections. With the butt and the top I will reach 72 original meters, which translates in roughly a scale length of 10 feet. My little cutoff saw was great for cutting the 3/32” laces. 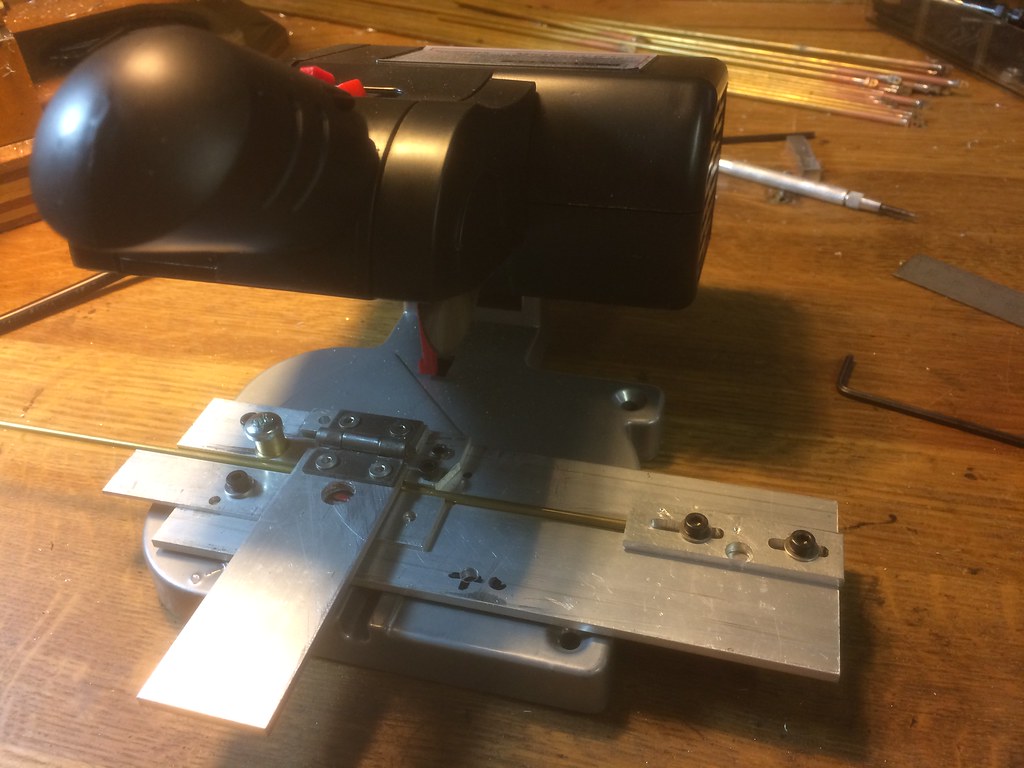 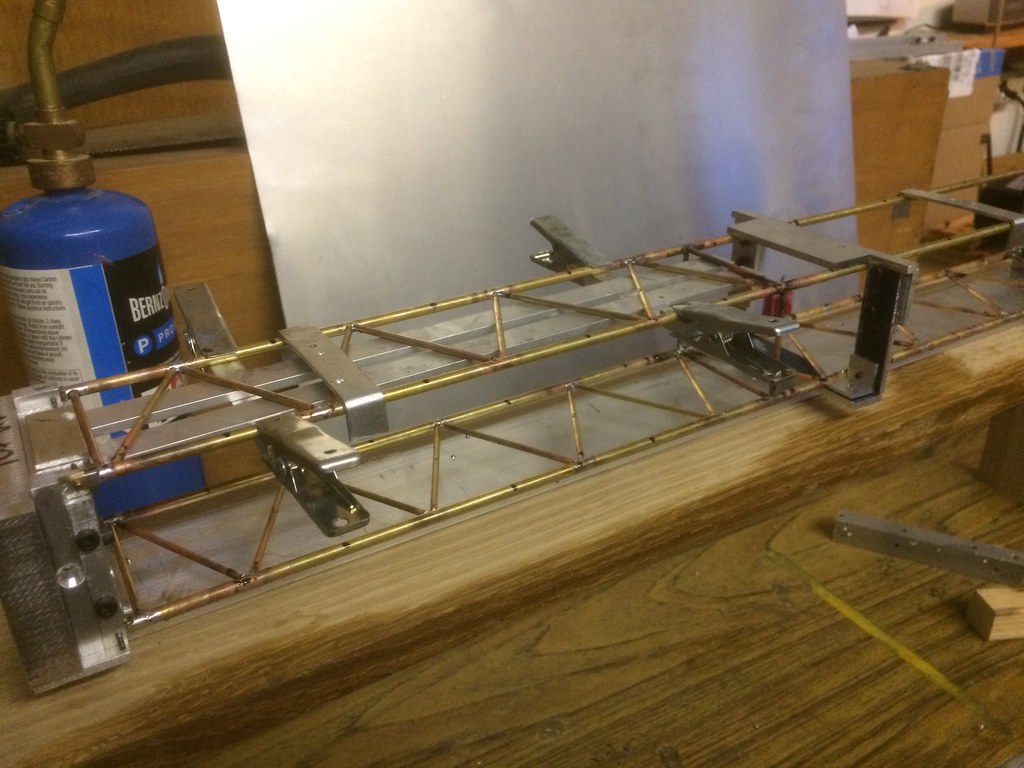 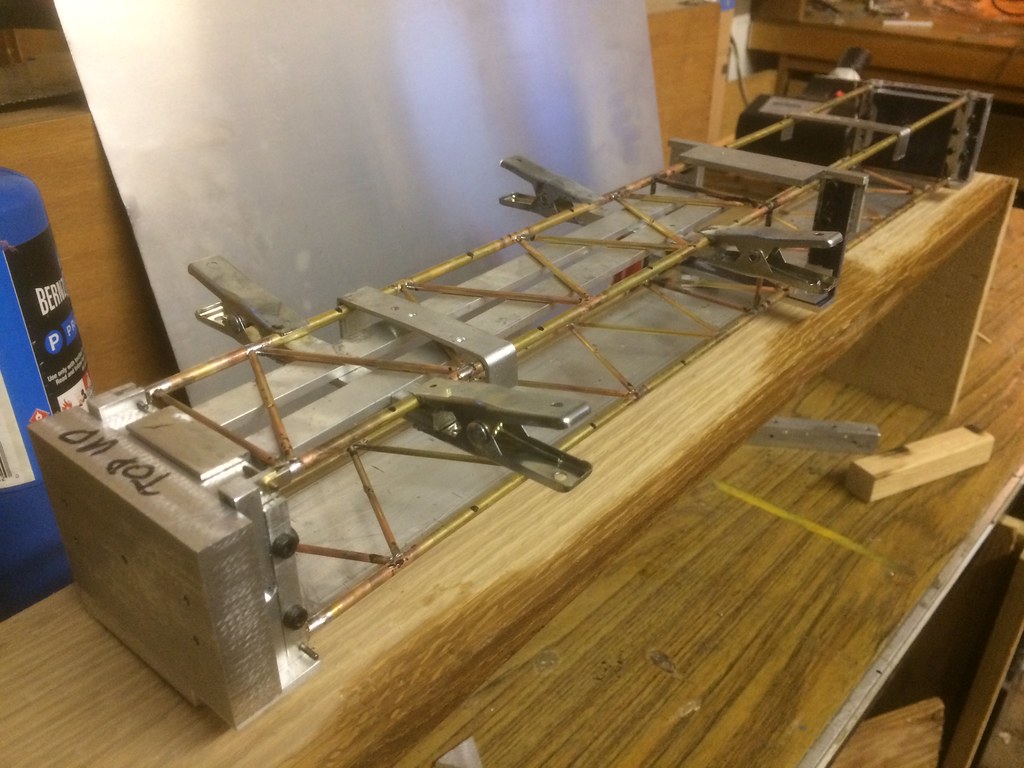 Each section took about 3 hours to solder together. This is the result. They are not perfect, but good enough and the boom is pretty straight. 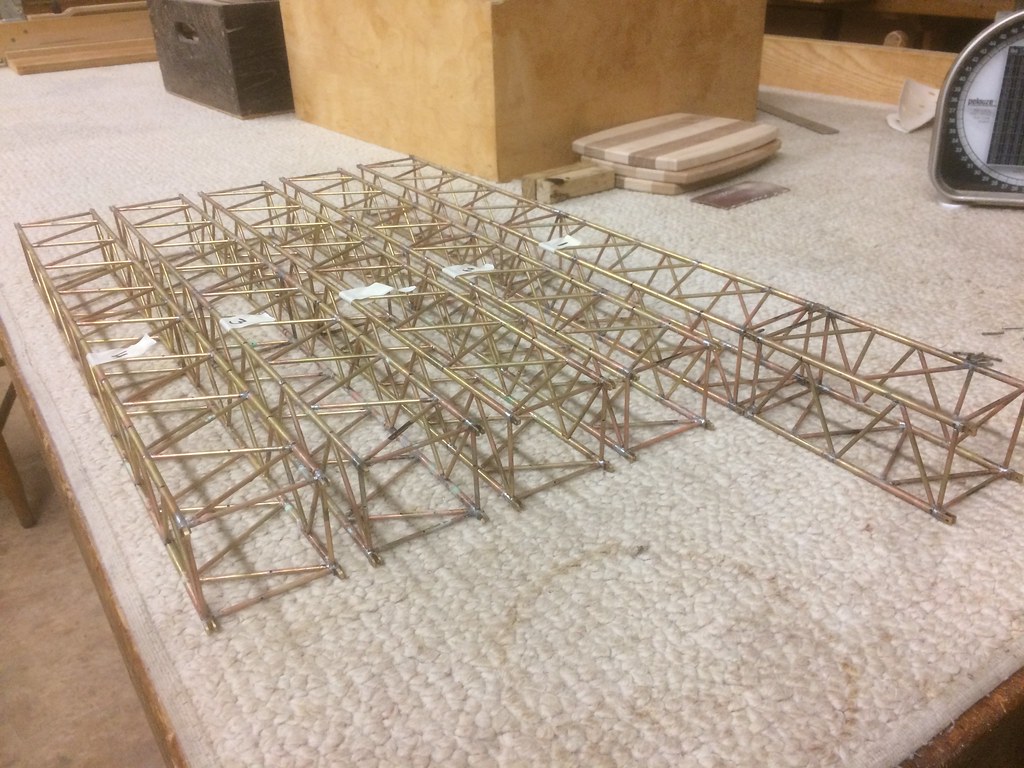 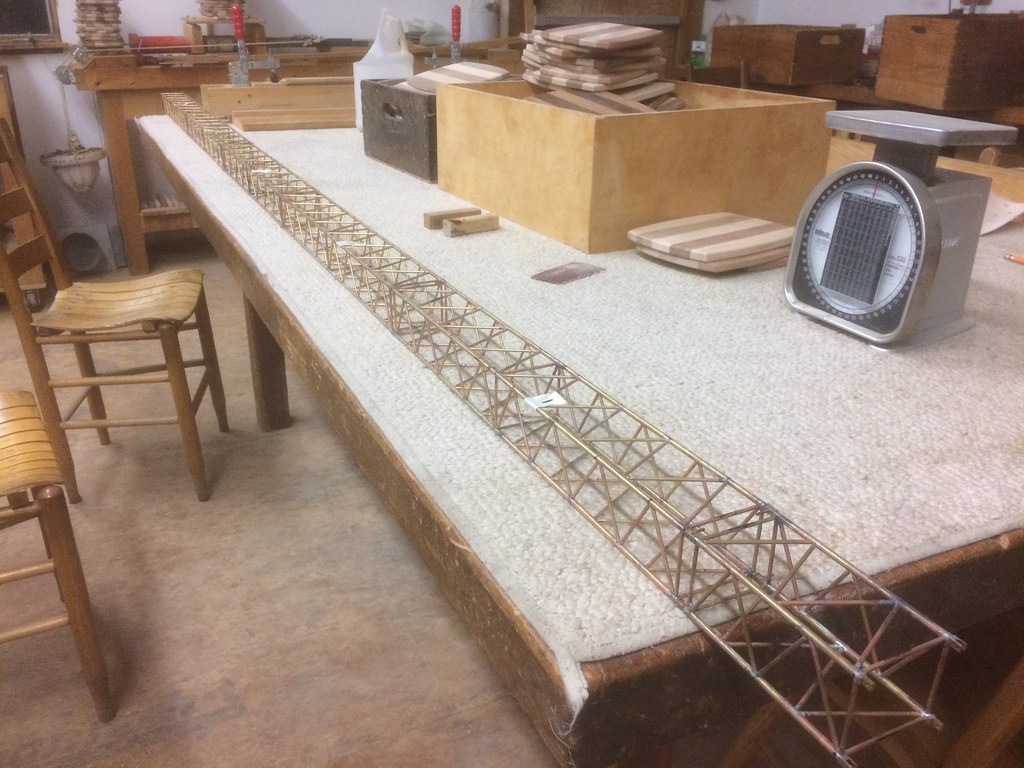 Next the butt and top section. Kerst
 http://forums.dhsdiecast.com/default.aspx?g=posts&m=1096251 http://forums.dhsdiecast.com/default.aspx?g=posts&m=1096251
|
|

Rank: Advanced Member
Groups: Member
Joined: 1/11/2007
Posts: 9,080
Location: Lincolnshire
|
Hi Kerst,
What a great update and it really is coming together nicely. I would really love to see the finished article one day in person but not sure that will ever happen!
Paul R
|
|

Rank: Advanced Member
Groups: Member
Joined: 3/17/2006
Posts: 1,169
Location: NJ
|
Looks great man! I love watching progress on this build. Keep going! Myself, i have stalled on a couple projects due to work. 
We rally round the family, with a pocket full of shells.....
|
|

Rank: Advanced Member
Groups: Member
Joined: 10/7/2005
Posts: 2,495
Location: Shetland
|
That's a great milestone to make and there must be quite a bit of weight in all that boom when it's all connected together!. 
Scania V8. The best sounding truck in the world.
|
|
Rank: Advanced Member
Groups: Member
Joined: 5/11/2009
Posts: 570
|
Kerst wrote:not perfect, but good enough I'm slowly learning that this is the key to model building. Fantastic work as always - keep it up!
|
|
Rank: Advanced Member
Groups: Member
Joined: 4/3/2009
Posts: 108
Location: South Yorkshire, England
|
Glad to see you back on the project. Fantastic detail, love the pulleys.
|
|

Rank: Advanced Member
Groups: Member
Joined: 9/7/2005
Posts: 1,155
Location: Copake, NY
|
Paul wrote:That's a great milestone to make and there must be quite a bit of weight in all that boom when it's all connected together!.  Thanks for the kind words! The weight is just over 3 pounds. With the butt and boom top and the rigging added I guess it will be around 5 pounds. Kerst
 http://forums.dhsdiecast.com/default.aspx?g=posts&m=1096251 http://forums.dhsdiecast.com/default.aspx?g=posts&m=1096251
|
|
|
Guest |
