|
|

Rank: Advanced Member
Groups: Member
Joined: 6/30/2003
Posts: 4,920
Location: Melbourne, Australia
|
Well its pretty slow going at the moment so I don't have a great deal to show but I took a few pictures this afternoon and decided to share them. Excuse the quality, the pictures were taken with my phone. A long time ago I decided that I would love to attempt to build a 'large scale' model out of styrene, my first thoughts turned to my favorite machine, the CAT 375 excavator. After some help from some members here on the forums, I got my hands on some of the older brochures in PDF format, I re-scaled, formatted and then printed off the blueprints at roughly double the size of my 1:50th scale model. I purchased some basic sheets of Evergreen styrene from my local hobby store and began scratch building some prototype parts and learning what was possible. I also purchased a some brass and aluminum rod and line to build cylinders, lay hydraulic lines, exhaust, create grab rails and other little aspects of the model. Like I said at the start of the post, I still have a long... LONG way to go with this project and it is going to take a lot of my time but I will try to keep you guys up to date with what I'm doing with it. Anyway, on with the pictures... 1 - The blueprints with some of the early over-layed parts. 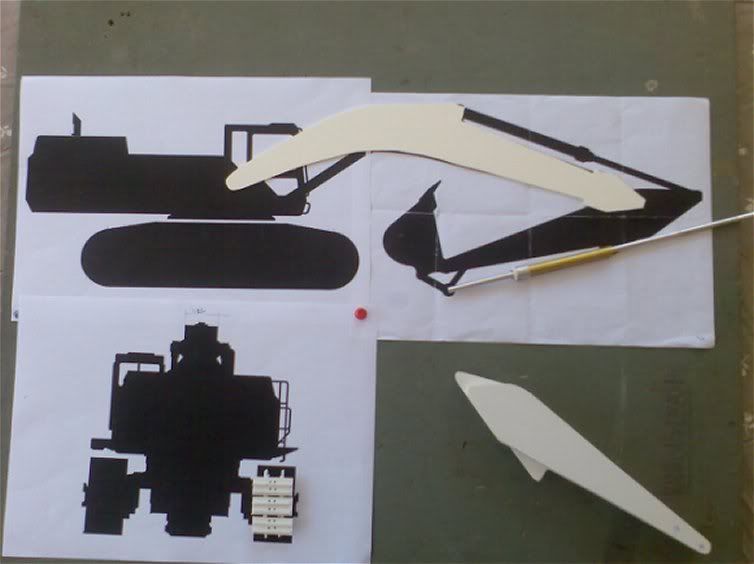 2 - Prototype track pads just to figure out how I would link them. The final versions will be a lot better. 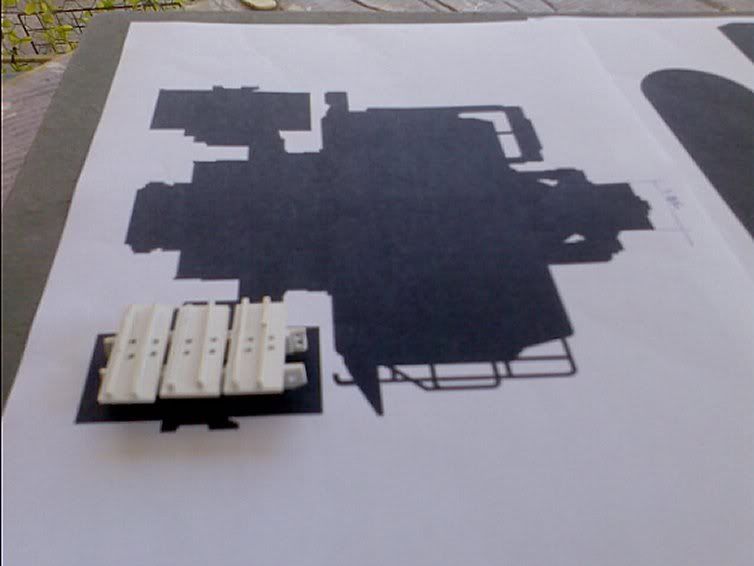 3 - The stick. I still need to add modeling putty, do a lot of sanding and then add all the minor details such as the edge lining and hydraulic plumbing.  4 - The stick cylinder. First attempt, again, more cutting and drilling for attachment areas required. 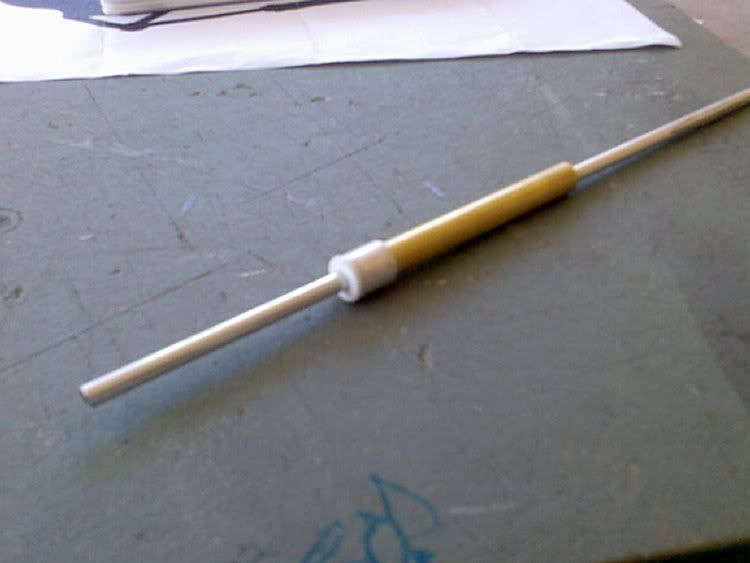 5 - The first part of the boom cut out. Very rough, lots of sanding required. I also included my Joal CAT 375 for size reference. 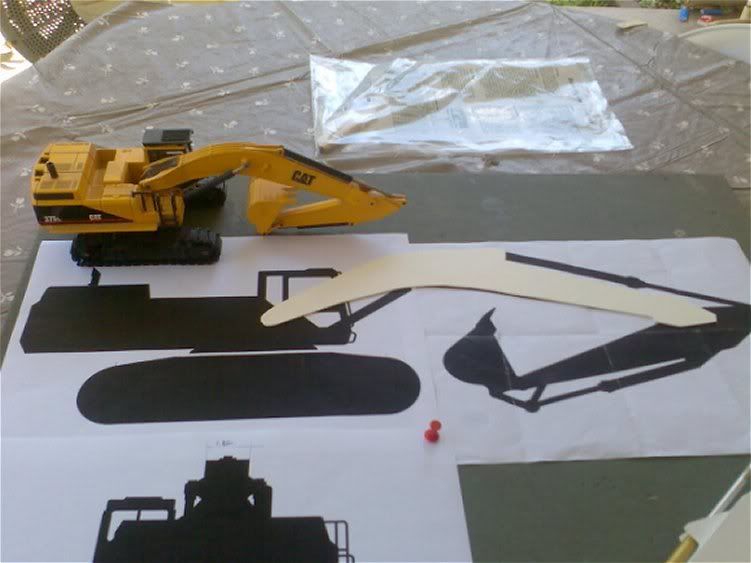 Rowan.
1:25th scale CAT 375L excavator
|
|

Rank: Advanced Member
Groups: Member
Joined: 1/11/2007
Posts: 9,080
Location: Lincolnshire
|
Well if that is your first attempt, I'd say it looks pretty dam good!! Keep it up.
Paul R
|
|

Rank: Advanced Member
Groups: Member
Joined: 8/9/2006
Posts: 795
Location: New South Wales, Australia
|
That is going to be huge!!! It is looking sensational so far! Be sure to keep us updated!!!! Cheers, Craig
 The Caucasianaasian The Caucasianaasian
|
|
Rank: Advanced Member
Groups: Member
Joined: 6/30/2003
Posts: 4,920
Location: Melbourne, Australia
|
Thanks guys! I'm already learning a lot and having a lot of fun along the way. Craig, it was your last few customs that finally convinced me to start my own project. Rowan.
1:25th scale CAT 375L excavator
|
|
Rank: Advanced Member
Groups: Member
Joined: 2/14/2006
Posts: 269
Location: South carolina
|
Hi Rowan,
Pretty impressive. Can't wait to see more progress pics.
Chris
|
|

Rank: Advanced Member
Groups: Member
Joined: 5/27/2007
Posts: 2,757
Location: Mansfield/Ft. Worth, Texas
|
Great job! How wide are thoes tracks? Could you drop me a PM? Thanks Jake
 "Building the future!" "Building the future!"
|
|
Rank: Advanced Member
Groups: Member
Joined: 6/30/2003
Posts: 4,920
Location: Melbourne, Australia
|
Thanks again guys, Jake, you have mail. Rowan.
1:25th scale CAT 375L excavator
|
|
Rank: Advanced Member
Groups: Member
Joined: 2/14/2006
Posts: 269
Location: South carolina
|
Hi Rowan,
If you don't mind me asking, how did you cut the dipper pieces?
Chris
|
|
Rank: Advanced Member
Groups: Member
Joined: 6/30/2003
Posts: 4,920
Location: Melbourne, Australia
|
Hi Chris, I assume you mean the large boom? If so I was lucky enough to purchase 3 sheets of styrene that were 76.5 cm L X 16.5 cm W X 1.5 mm from a trader on E-bay. Perfect for the larger parts however I will be using several cut-up pieces for the central sections. I also have a heap of smaller 200 x 220mm sheets for the rest. I found the 'rounder' parts are a lot harder to snap off the sheet once scored so I have been using pliers to gradually separate the pieces. Rowan.
1:25th scale CAT 375L excavator
|
|
Rank: Advanced Member
Groups: Member
Joined: 2/14/2006
Posts: 269
Location: South carolina
|
Rowan,
Thanks for the information. The reason I asked was because the pieces are nearly perfect and I know it is hard to make that many identical pieces. Can't wait to see more pictures.
Chris
|
|

Rank: Advanced Member
Groups: Member
Joined: 12/25/2006
Posts: 4,275
Location: Woodland, WA
|
Wow, roughly a 1:25 Cat 375, downright impressive. you say this is your first custom?! looking amazing
Eric
Eric W. Pioszak, Operating Engineers Local 701, Portland, Oregon
METAL TRACKS AVAILABLE AGAIN!
Cab guards Available again!
Grapples Available again!
Industrialscalemodels[at symbol]Gmail.com
|
|
Rank: Advanced Member
Groups: Member
Joined: 7/9/2007
Posts: 314
Location: Yorkshire, UK
|
Looks excellent Rowan  , be sure to keep us posted with more progress pictures.
|
|
Rank: Advanced Member
Groups: Member
Joined: 6/30/2003
Posts: 4,920
Location: Melbourne, Australia
|
Thanks again guys, I'm going to try get more boom pieces cut out this week and maybe start on the bucket. I'll post shots as I get stuff done. Rowan.
1:25th scale CAT 375L excavator
|
|
Rank: Advanced Member
Groups: Member
Joined: 6/30/2003
Posts: 4,920
Location: Melbourne, Australia
|
Alright, time for a small update. I've played around with melting and bending styrene, used a fair bit of modeling putty, spend a hell of a lot of time sanding, planned out parts of the (lower) upper structure and almost completed the bucket..... pictures.... 1 - The early stages of the bucket, as you can see the inner section is scorched from applying the flame, allowing the main rear section to bend. 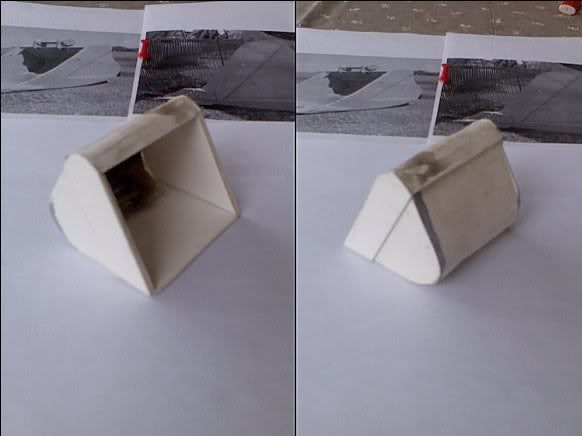 2 - The buckets linkage wings have been cut out and the first coat of putty was applied and sanded on the stick. 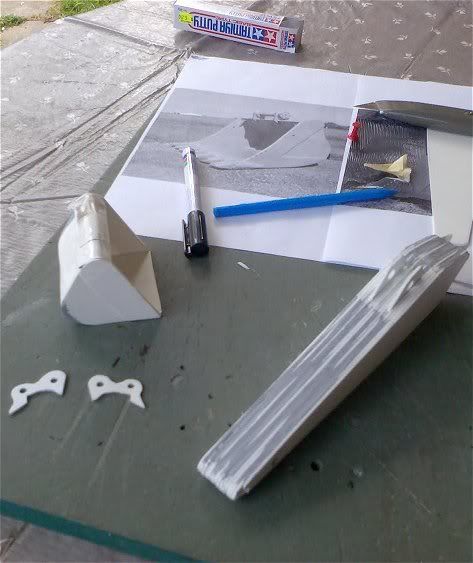 3 - A second coat of putty was applied to the stick and bucket but not yet sanded. More bucket linkage parts were cut out but I think I'm going to re-do the limbs, as they were rushed and a little out of shape. 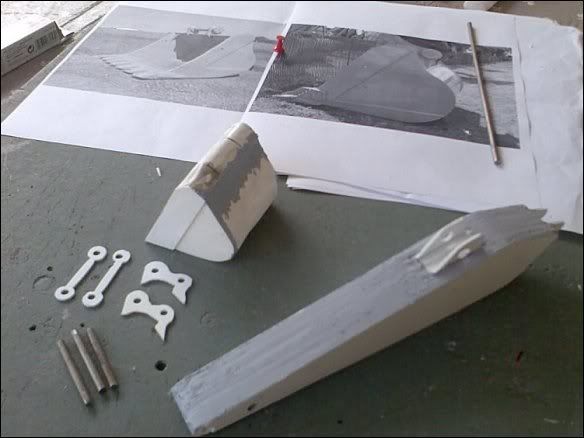 4 - Early stages of the bucket teeth, linkage winglets have been glued into position and the linkage rods were used to keep them straight while the glue set. 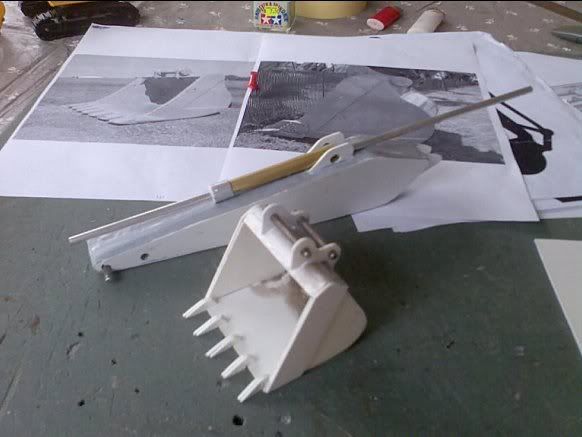 5 - Stick has been sanded and is almost ready for primer, another shot of the bucket. I also included some pictures of the lower upper-structure and the under carriage for planning. 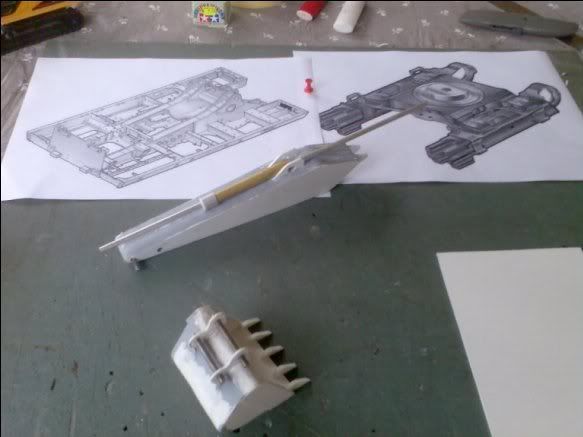 6 - Final close up of the bucket and stick. 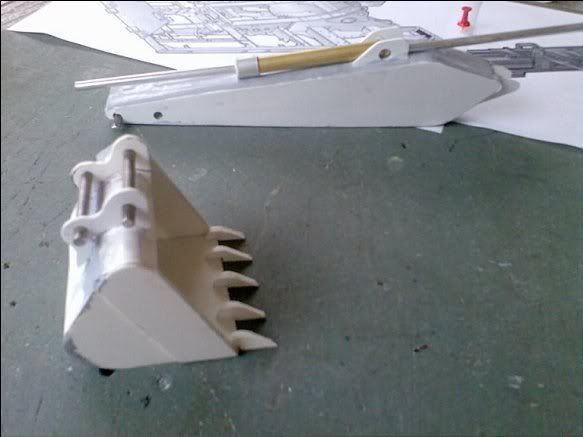 I think once I have finished building this thing, I will vow to never sand or file anything ever again. Rowan.
1:25th scale CAT 375L excavator
|
|
Rank: Advanced Member
Groups: Member
Joined: 8/18/2007
Posts: 255
Location: Isle Of Lewis
|
hi my I ask if you guys a queston if you were a customer and you were going to buy a bucket for your excavator would you buy some thing like that bucket? I hope you would becouse there is no point in me biulding attachments if thay are going to sit in the house doing nothing 
|
|

Rank: Advanced Member
Groups: Member
Joined: 6/4/2006
Posts: 7,752
Location: arlington, Tx
|
Looking good nice work Jason
NIkl Scale Models
|
|
Rank: Advanced Member
Groups: Member
Joined: 4/21/2003
Posts: 756
Location: Athens, Alabama
|
Nice work. Please do keep us informed on your progress.
Regards, Colin
|
|

Rank: Advanced Member
Groups: Member
Joined: 4/30/2003
Posts: 909
Location: Pennsylvania
|
Looking good, cant wait to see what it will look like when you get it done.
|
|
Rank: Advanced Member
Groups: Member
Joined: 8/3/2007
Posts: 1,463
Location: washington
|
That is going to be one good looking model when it is done.....
William.....
|
|
Rank: Advanced Member
Groups: Member
Joined: 8/9/2006
Posts: 795
Location: New South Wales, Australia
|
Rowan, That is looking sensational!!! You should be really pleased with your work. On the note of never wanting to sand or file anything again....perhaps you should consider making a moulding of each part for later casting in resin (just in case you want to build another version of the 375 or other). That would save you heaps of time and energy in the next build but you would have to make the casting before you put too many small delicate details onto the machine. Can't wait to see it finished! Craig
The Caucasianaasian
|
|
|
Guest |
