|
|

Rank: Advanced Member
Groups: Member
Joined: 6/8/2007
Posts: 3,587
Location: Ns, Canada
|
By the way, what glue do you use? I can see Tamiya in the background, is that what you use? If so, how strong is it? Thanks, Red
 redscustomscalemodels.com redscustomscalemodels.com
|
|

Rank: Advanced Member
Groups: Member
Joined: 6/30/2003
Posts: 4,920
Location: Melbourne, Australia
|
Red, I have been using the Tamiya extra thin cement for most of what I have built so far. It is a thin liquid and holds strong. I apply the cement to both contact surfaces and then hold it together for about 10 seconds before applying additional coats of the cement along both sides of the join. It works really well and almost melts the styrene sheet together. The other glue that I use for the large parts and the weight baring parts is this Loctite 454 that I had in the fridge. This stuff is the superglue of superglue and the best part of it is that it doesn't corrode any of the plastic because its a gel. If you get this on you, don't expect it to come off without losing a few layers of skin. Gloves are a safe option, I learnt the hard way. My father told me the other day they he used to use the exact same glue when he built trains (the real things). I've used this when compiling all the boom and stick pieces to give it a super strong hold and I also used it when attaching the boom fork arms at the base of the boom. It's well known for bonding difficult to bond materials eg: metal linch pins to styrene booms  The only downside to it is that it is an instant adhesive! Meaning you only have about 10-15 seconds before whatever you have glued in place is there for good. 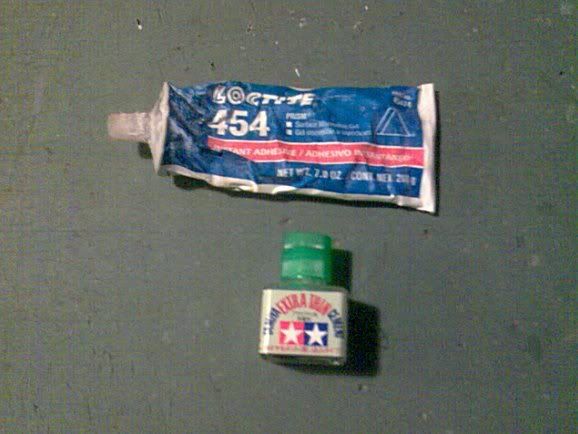 Rowan.
1:25th scale CAT 375L excavator
|
|

Rank: Advanced Member
Groups: Member
Joined: 1/23/2007
Posts: 3,636
Location: Staten Island NY
|
|
|
Rank: Advanced Member
Groups: Member
Joined: 6/30/2003
Posts: 4,920
Location: Melbourne, Australia
|
|
|

Rank: Advanced Member
Groups: Member
Joined: 9/16/2007
Posts: 2,707
Location: Staten Island, New York
|
|
|

Rank: Advanced Member
Groups: Member
Joined: 6/12/2006
Posts: 1,924
Location: Massachusetts
|
I was actually just going to PM you Rowan to ask how it was coming along. Still looks great, hopefully you get more time to do it. Look forward to seeing its progress. Jim

|
|

Rank: Advanced Member
Groups: Member
Joined: 2/28/2006
Posts: 3,464
Location: rhode island
|
very nice, i used that loctite glue on my customs and its great stuff. i used styrene cement for thr plastic parts. brian
|
|
Rank: Advanced Member
Groups: Member
Joined: 1/23/2007
Posts: 3,636
Location: Staten Island NY
|
very nice Rowan! 
|
|

Rank: Advanced Member
Groups: Member
Joined: 8/9/2006
Posts: 795
Location: New South Wales, Australia
|
Mate that is sensational! It is going to look tip top finished off! I am in awe of what you can do with plastic. Cheers, Craig
 The Caucasianaasian The Caucasianaasian
|
|
Rank: Member
Groups: Member
Joined: 2/13/2005
Posts: 78
Location: Kent,UK
|
Nice work..i too am working on a 375 but converted fron a 5080. i am looking for plans to construct an ME boom and dipper anybody got a spec sheet with a boom profile? be much appreciated
hurry up n finish it look forward to seeing the final product
|
|
Rank: Advanced Member
Groups: Member
Joined: 6/30/2003
Posts: 4,920
Location: Melbourne, Australia
|
Thanks guys, I'm really pleased with the way it's turning out. If all goes well, I hope to get some primer on it over the weekend. davetse, most people use the boom and stick from the Joal Volvo EC650 for an ME configuration but if you are looking to build one yourself, these ME spec images might be of some use.... 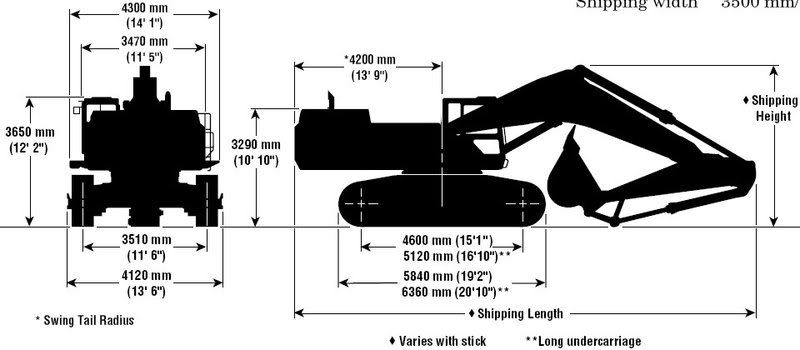 Rowan.
1:25th scale CAT 375L excavator
|
|
Rank: Advanced Member
Groups: Member
Joined: 6/30/2003
Posts: 4,920
Location: Melbourne, Australia
|
Well its been just over a month since my last update but I have still been making some progress. Work for me has finished for the term so I have 2 weeks holidays at the moment, plenty of opportunity to work on the 375, I hope to have completed it within the next month or so :D I have the majority of the undercarriage built up now, just some smaller details to add such as the steps, top rollers and obviously the tracks (which I am cutting out at the moment).  I decided to leave the final drive gear round to help the tracks move over them. Under the black paint and the track links, it should be pretty hard to notice anyhow. These, like the rest of the model are far from perfect but I am really happy with the way they came out. 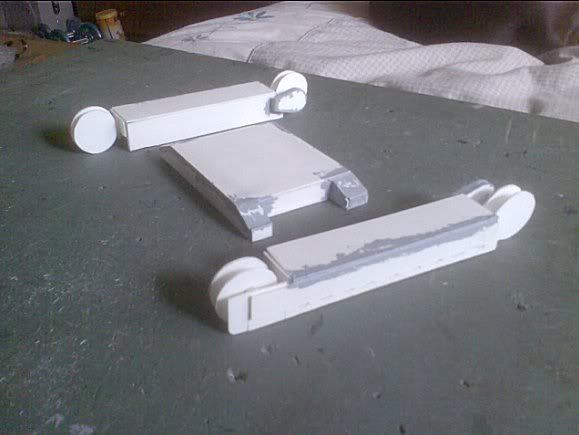 I have cut out the swing ring from the tin that I had shown earlier and I'm really happy with the result. I can't wait to get the black paint on the entire assembly. 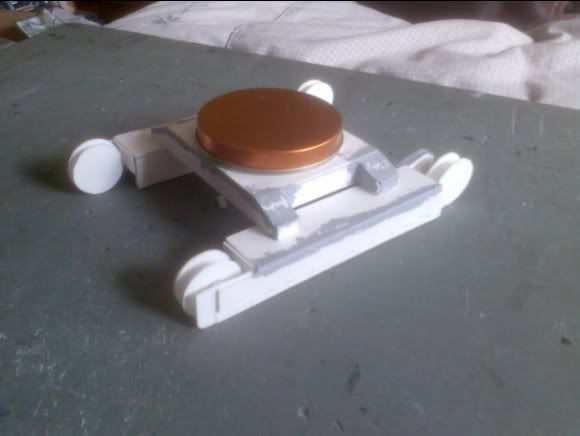 I have also added some more details to the body. Anti-slip grills, exhaust, and obviously, a lot of filler (that was just applied and needs to be sanded down). Most of the box and wall sections are still sitting loosely in place so I can get a good coverage of paint on them before I glue them down permanently. 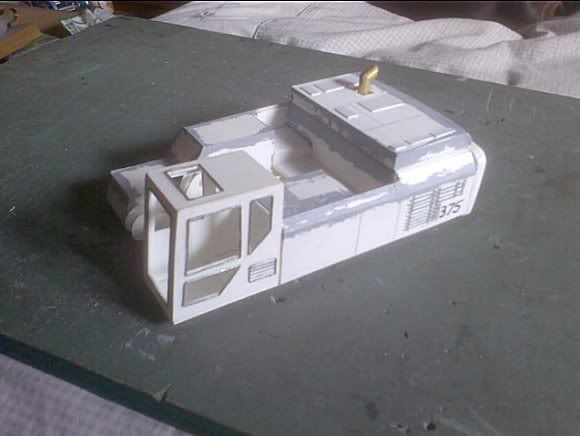 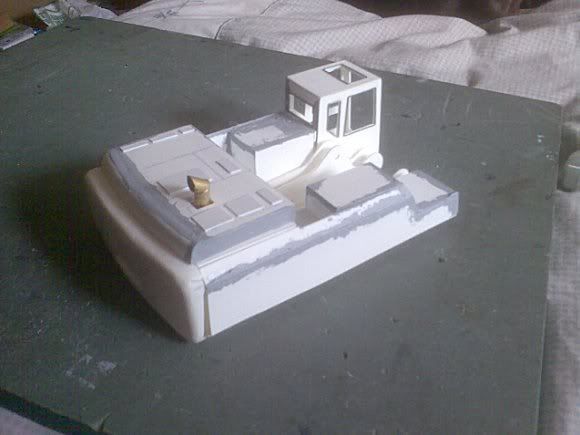 I already have the CAT black paint left over from a previous project but I will most likely head down to my local CAT dealer tomorrow to pick up a bunch of primer and CAT yellow cans just to get ready. Still lots of work to be done, decals, hand rails, walkways, hydraulic plumbing etc but I can say that the majority of the bodywork is now built. Soon I will be applying the first coat of primer and from there I will be able to get a good idea of how much extra filler and sanding I will need before paint so pictures in primer are most likely to be in the next update. Thanks again for looking, Rowan.
1:25th scale CAT 375L excavator
|
|

Rank: Advanced Member
Groups: Member
Joined: 1/11/2007
Posts: 9,079
Location: Lincolnshire
|
That is coming along nicely! Good job.
Paul R
|
|

Rank: Advanced Member
Groups: Member
Joined: 3/10/2008
Posts: 497
Location: lansing mi
|
wow i just spent the past 10 min or so learning alot, nice job! looks fun to do that, i been thinking of custom mods. for my self this post is truely educational ill keep watching this one for more pics like it was said earlyer "drooling to see it painted" thanks
www.langtool.comwww.langlandclearing.comwww.prolec.co.uk/index.php“Disclaimer: the views expressed here are my own and in no way represent the views or policies of any official agency.or said above The bearer of bad news on a new site, the HYDRO-AX guy  
|
|
Rank: Advanced Member
Groups: Member
Joined: 4/21/2003
Posts: 756
Location: Athens, Alabama
|
The model is coming along very nicely. I am looking forward to additional updates.
Regards, Colin
|
|
Rank: Advanced Member
Groups: Member
Joined: 6/12/2006
Posts: 1,924
Location: Massachusetts
|
I am patiently waiting to see the final result   Jim
|
|
Rank: Advanced Member
Groups: Member
Joined: 6/30/2003
Posts: 4,920
Location: Melbourne, Australia
|
Thanks again guys, I'm about to head off to CAT in a minute to pick up the paint. I also think I know what my next project is going to be. This morning I made a new purchase, this 1:26th scale remote control Kenworth W900L. With the removal of the decals, some new paint, new exhaust and other small details the tractor should look pretty good and I plan on turning the trailer into a Rogers SP80DS to haul the 375. Probably not a very realistic combination but it should look pretty good. 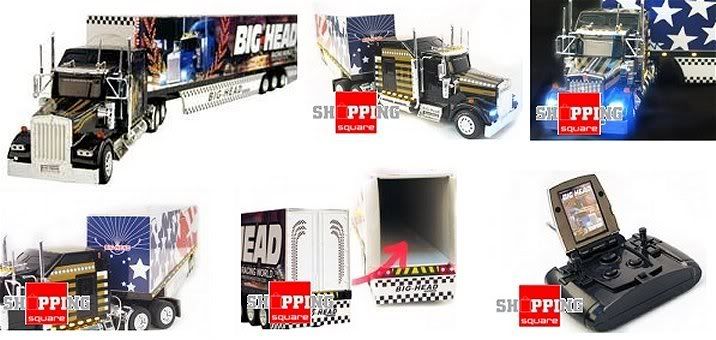  Rowan.
1:25th scale CAT 375L excavator
|
|
Rank: Advanced Member
Groups: Member
Joined: 1/23/2007
Posts: 3,636
Location: Staten Island NY
|
Great job Rowan, cant wait to see it finished!
|
|
Rank: Advanced Member
Groups: Member
Joined: 6/30/2003
Posts: 4,920
Location: Melbourne, Australia
|
Don't think I'll get much done today but I got the paint, lots of it! I've completed one set of track pads (still need to build the links) and I got the decals roughed in. I took a few mock up snaps as well, first time I've had the whole machine set up with the undercarriage. So far I think I'm about AUD$400 deep in the project, and I'm glad I spent every cent! If the boom cylinder seems a bit short, thats because it is, it's actually the stick cylinder. I'll probably work on cutting out more of the hydraulics today, I also need to get started on the hydraulic plumbing. My local print store does a good job with decals, they won't be water slide, rather normal high gloss stickers that I add extra adhesive to the back of. They have come out really well in the past so I'm looking forward to getting these on. I'll get them printed off on Monday. 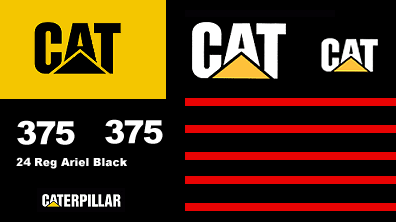 The model appears to sit a bit too high at the moment but once the tracks and walkways are added I'm sure it will stand just fine. According to the dimensional drawings, it's still spot on, only a few mm' off here and there. 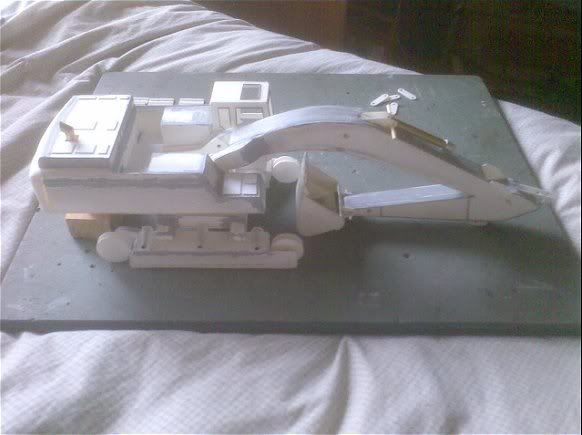 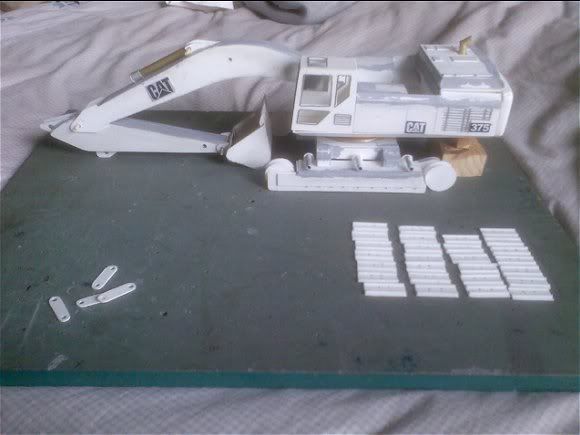 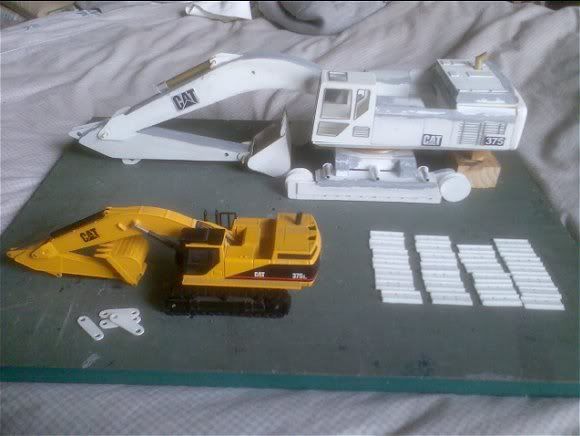 Gee these little things are time consuming but I think that they have turned out well. I also used a different grouser pattern to the original tracks I built. I believe that this is a more common style. 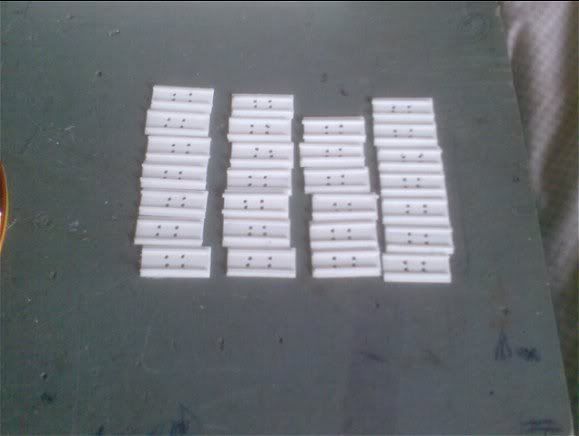 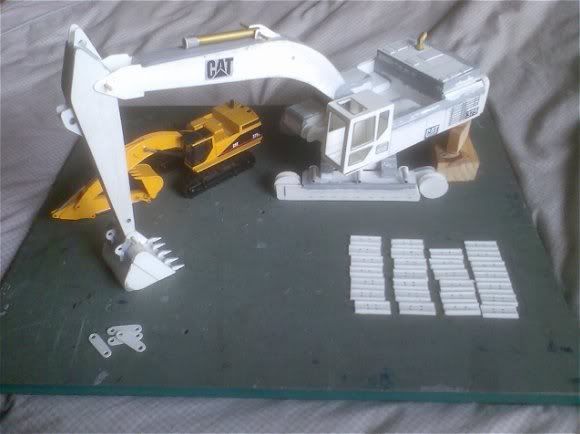 A different model for a change to use as size reference. 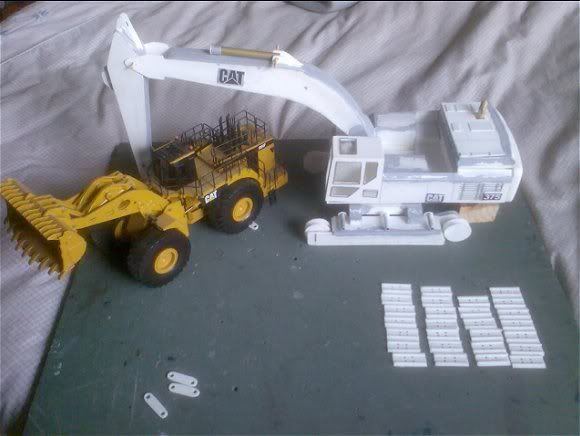 I decided to buy in bulk because I have a few other projects lying in wait which I will post about in the near future :D 4 of the new CAT yellow and 2 of the CAT primer. I also had a can of the black in my pile of goodies. 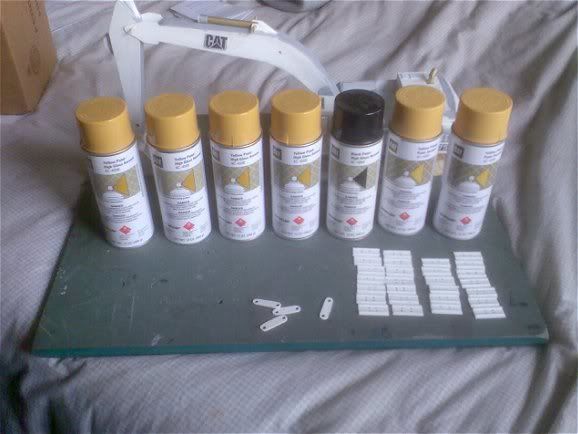 Thanks again for looking. Rowan.
1:25th scale CAT 375L excavator
|
|
Rank: Advanced Member
Groups: Member
Joined: 1/23/2007
Posts: 3,636
Location: Staten Island NY
|
that think is huge!! awesome!!!
|
|
|
Guest |
